Android Studio 類微信頁面
Android Studio 類微信頁面
本專案是利用Android Studio工具實現一個類微信介面。
要求完成以下需求:`
- 頁面具有標題微信
- 頁面具有中間顯示框
- 頁面具有底部選擇框,並且具有選擇事件
- 頁面底部選擇框在進行改變的時候,我們需要中間顯示框的頁面同步改變
- 頁面的佈局清晰
專案效果如下:
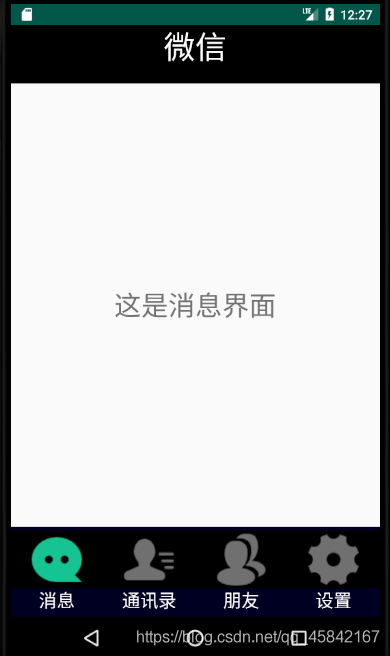
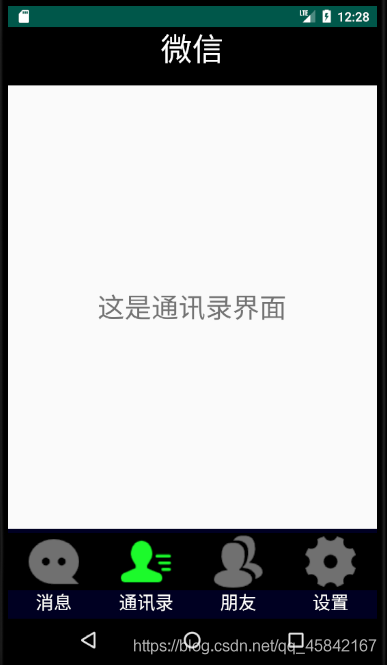
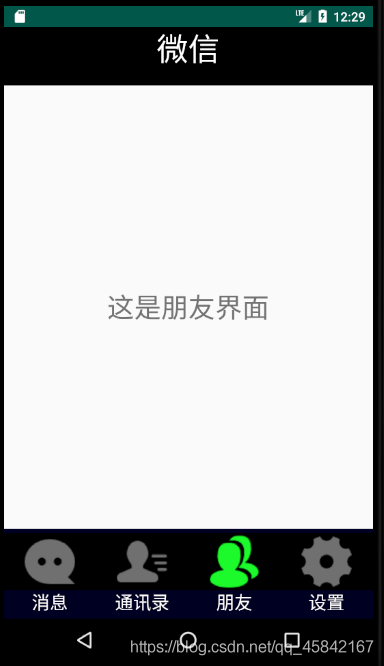
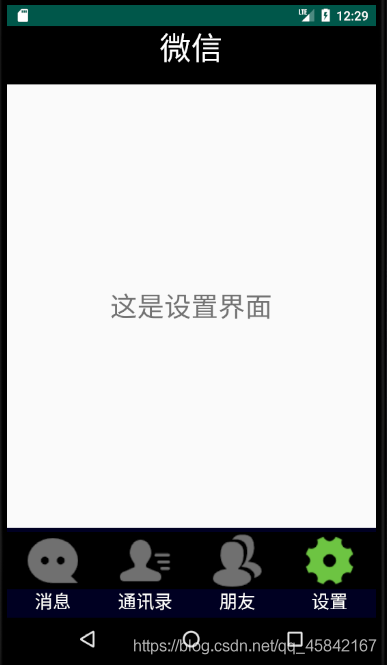
(圖示顏色沒有選好哈哈哈)
1.按鈕圖示檔案准備:
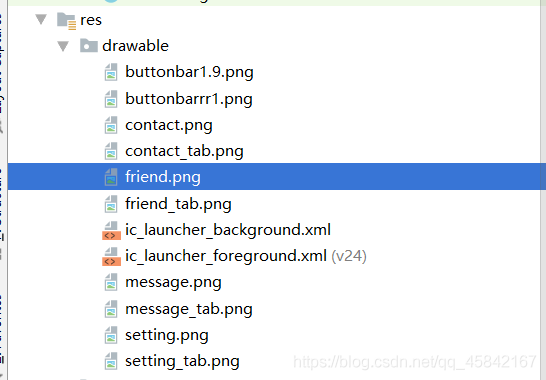
這裡是從阿里圖示庫獲得的圖示,可以自行選擇圖片格式和大小下載,由於需要做一個類微信介面,所以選擇了訊息,朋友,通訊錄和設定四個初始圖示還有對應的四個點選按鈕之後顏色變化的圖示。此外再選擇一個背景的點九圖片,這個點九圖片也可以利用Android Studio自帶工具對圖片生成點九格式,具體可以自行百度,這裡不展開介紹了。
圖示檔案可以通過ctrl+C/V貼上在res下的drawable資料夾下,注意圖片命名不要有空格漢字。
2.主介面佈局
首先可以觀察到微信介面分為三部分:頭部顯示App的名字:微信,底部四個按鈕,中間部分通過點選會顯示不同的介面。
所以我們需要通過res新建六個個layout xml檔案,包括一個頭部顯示的top.xml檔案,底部按鈕的bottom.xml檔案,還有點選四個按鈕顯示的不同介面的xml檔案。最後再在activity_main.xml檔案裡引入這些xml檔案,中間加入一個FrameLayout開闢出一塊空白區域可以自己加一些控制元件。
1.top.xml檔案
採用線性佈局,再引入一個TextView控制元件,顯示文字「微信」,設定如下:
<LinearLayout xmlns:android="http://schemas.android.com/apk/res/android"
    android:layout_width="match_parent"
    android:layout_height="65dp"
    android:background="#000000"
    android:gravity="center"
    android:orientation="vertical">

    <TextView
        android:id="@+id/textView"
        android:layout_width="wrap_content"
        android:layout_height="wrap_content"
        android:layout_gravity="center_horizontal"
        android:text="@string/app_name"
        android:textColor="#ffffff"
        android:textSize="35sp" />
</LinearLayout>
設定LinerLayout為垂直線性佈局,background設定為黑色,gravity為center,TextView字型顏色設定為白色,layout_gravity為center_horizontal,保持字型居中,text具體內容可以用res下的strings.xml檔案裡的app_name,這個可以自行設定。
<string name="app_name">"微信"</string>
字型顏色還有大小都可以自行設定。
2.bottom.xml
底部佈局就是要把按鈕和文字縱向排布,再把這四塊橫向排布出來,所以可以在最外層放置一個水平的LinearLayout,再在裡面放置四個垂直的LinearLayout,裡面的每個LinearLayout都放置一個ImageButton和一個TextView控制元件。
內層LinearLayout需要修改如下幾個設定:
 <LinearLayout
        android:id="@+id/id_tab_message"
        android:layout_width="0dp"
        android:layout_height="match_parent"
        android:layout_weight="1"
        android:gravity="center"
        android:orientation="vertical">
ImageButton和TextView控制元件設定如下:
<ImageButton
            android:id="@+id/imageButton_message"
            android:layout_width="match_parent"
            android:layout_height="wrap_content"
            android:background="#000000"
            android:contentDescription="@string/app_name"
            android:clickable="false"
            app:srcCompat="@drawable/message" />

        <TextView
            android:id="@+id/textView3"
            android:layout_width="match_parent"
            android:layout_height="wrap_content"
            android:layout_gravity="center_horizontal"
            android:text="@string/app_message"
            android:gravity="center"
            android:textColor="#ffffff"
            android:clickable="false"
            android:textSize="20sp" />
其他幾個內層LinearLayout類似設定,TextView和前面類似的設定顏色,字型大小即可,注意要居中,ImageButton選擇對應的圖片就行,再設定一下background.
3.點選四個按鈕顯示的介面檔案(tab01,tab02,tab03,tab04)
新建四個layout.xml檔案,這個內容比較簡單,可以自己任意設定,就新增了一個TextView控制元件,和前面top.xml檔案設定的最大區別就是把gravity設定為「center」,居中,這裡自由發揮算了。
4.activity_main.xml
LinearLayout設定為vertical,通過include引入底部和頭部檔案,中間再加一個FrameLayout設定layout_width,layout_height,layout_weight屬性。
設定如下:
<LinearLayout
        android:layout_width="match_parent"
        android:layout_height="match_parent"
        android:orientation="vertical"
        tools:layout_editor_absoluteX="1dp"
        tools:layout_editor_absoluteY="1dp">

        <include layout="@layout/top"/>

        <FrameLayout
            android:id="@+id/id_content"
            android:layout_width="match_parent"
            android:layout_height="0dp"
            android:layout_weight="1">

        </FrameLayout>
        <include layout="@layout/bottom"/>
    </LinearLayout>
這樣,主介面佈局基本完成了。
3.主程式編寫
首先一般在App前面會有一個文字為專案名稱的框,為了把這個框去掉可以增加這樣一條語句
requestWindowFeature(Window.FEATURE_NO_TITLE);
這樣就會把介面前面的框去掉了。
編寫的整體思路就是我們點選不同的按鈕,主佈局檔案裡的framelayout能夠轉換顯示不同的介面,所以這裡需要新建四個對應的fragment類為了新增顯示framelayout的不同佈局檔案。
例如messageFragment設定如下,繼承自Fragment,一個空構造含函數。
onCreateView() 提供了一個 LayoutInflater 物件,用於載入佈局檔案tab01.xml(前面已經寫好的tab01.xml).
public class messageFragment extends Fragment {


    public messageFragment() {
        // Required empty public constructor
    }


    @Override
    public View onCreateView(LayoutInflater inflater, ViewGroup container,
                             Bundle savedInstanceState) {
        return inflater.inflate(R.layout.tab01,container,false);
    }

}
其他的Fragment類類似返回不同按鈕的介面
準備好之後那麼我們就可以進行主函數的編寫了,採用java編寫就是利用物件導向程式設計的方法,建立對應的LinearLayout,ImageButton,Fragment範例化物件,注意範例化FragmentManager,目的就是為了通過
fm = getFragmentManager();
FragmentTransaction transaction = fm.beginTransaction();
來操作多個Fragment之間的切換(hide,add)
(如果對Fragment不太理解可以好好學習)
然後就要先實現兩個函數用於對fragment和view的初始化,這個就不展示出來了,再需要定義一個函數根據點選顯示使原來的圖示發生顏色變化,通過switch來切換,注意在這個函數裡呼叫一個自定義的hidefragment函數用於隱藏fragment介面,要不然後面再顯示介面就會發生重疊現象。部分程式碼結構如下,使用switch轉換,下面的類似
private void setSelect(int i){
 FragmentTransaction transaction=fm.beginTransaction();
        hideFragment(transaction);
        //把圖片設定為亮的
        switch (i){
            case 0:
                Log.d("setSelect","1");
                transaction.show(Tab01);
                ImgMessage.setImageResource(R.drawable.message_tab);
                break;
最後重點就是一個點選函數獲取對應的fragment介面和對底部按鈕點選函數的監聽,實現setOnClickListener傳入this就可以了,點選函數事件控制還是用的switch切換到不同的fragment,自定義的函數resetImags是為了初始顯示圖示均為灰色,這個用setImageResource自己選擇drawable對應需要的圖片就行了,下面的id_tab_message指的是bottom.xml裡面內層的LinearLayout,這樣無論點選按鈕還是文字都會被監聽到,都會產生點選效果。
public void onClick(View v)
    {
        Log.d("onClick","1");
        resetImgs();
        switch(v.getId()){
            case R.id.id_tab_message:
                Log.d("onClick","2");
                setSelect(0);
                break;
其餘部分就不細說了,整體思路清楚了,寫程式碼的時候一步一步調,缺啥補充就行了。
4.完整程式碼如下:
有需要的請移步完整程式碼