利用pyinstaller打包.py檔案遇到的小問題【新手】
今天分享一個我自己遇到的關於利用pyinstaller打包.py檔案遇到的一些小問題
1.無法利用pip下載
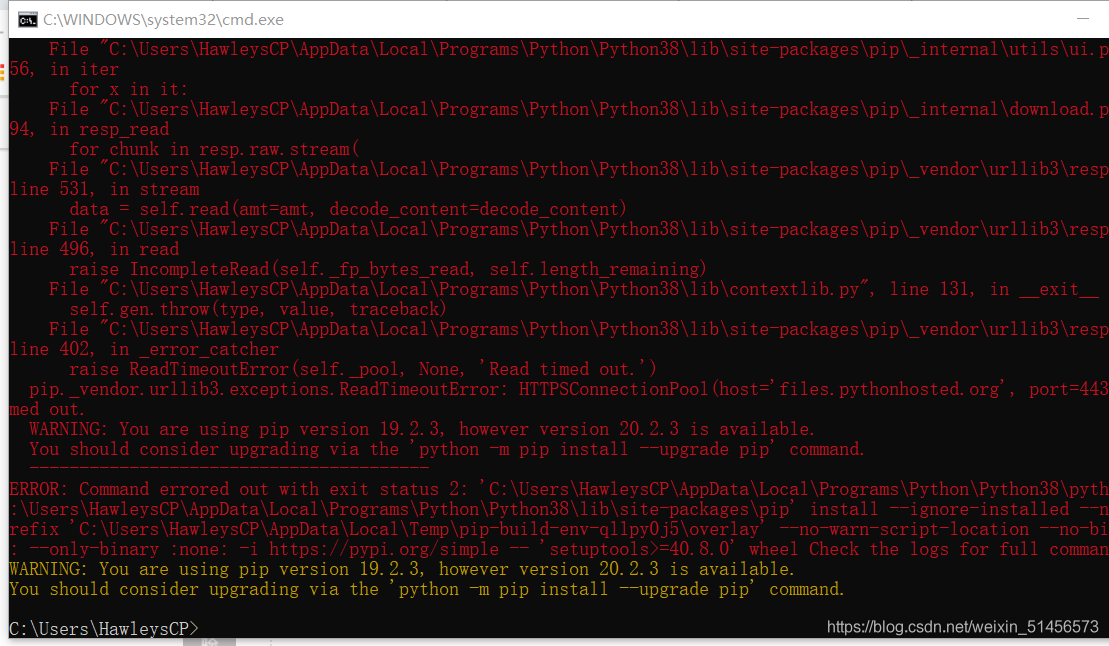
利用pyinstaller打包可執行的.py檔案時,會遇到幾個問題。
首先,這是源頭上會遇到的問題,遇到這個問題的時候,可能會遇到一大片紅色的報錯。

遇到這種情況,可以嘗試輸入提示我們的python -m pip install --upgrade pip來進行更新,但有可能還是會報錯。
2.兩種解決方法
①輸入程式碼解決
依次在cmd.exe中輸入以下程式碼:
easy_install pip
會得到以下結果
Searching for pip
Best match: pip 9.0.1
Removing pip 8.1.2 from easy-install.pth file
Adding pip 9.0.1 to easy-install.pth file
Installing pip script to /usr/local/bin
Installing pip3.5 script to /usr/local/bin
Installing pip3 script to /usr/local/bin

Using /usr/local/lib/python2.7/dist-packages
Processing dependencies for pip
Finished processing dependencies for pip
再輸入
pip install --upgrade pip
會得到
Requirement already up-to-date: pip in /usr/local/lib/python2.7/dist-packages
接著再輸入
pip install distribute
會得到
Requirement already satisfied: setuptools>=0.7 in /usr/lib/python2.7/dist-packages (from distribute)
Building wheels for collected packages: distribute
  Running setup.py bdist_wheel for distribute ... done
  Stored in directory: /root/.cache/pip/wheels/ef/17/3f/3f837ef0521dcfb5da75a00488fef1ac1747d74edbddeb27e6
Successfully built distribute
Installing collected packages: distribute
Successfully installed distribute-0.7.3
這樣一來,就可以解決一部分的人的問題了,可以用 pip install pyinstaller嘗試下載了。
②利用pip換源
在cmd.exe中輸入pip config set global.index-url https://mirrors.aliyun.com/pypi/simple/
按回車,就可以用最簡單的方法給pip換源,這樣也可以解決一些問題。
可以再嘗試pip install pyinstaller進行安裝。
3.打包後的問題
下載好pyinstaller之後,就可以在cmd.exe中執行程式碼,注意不是在python程式碼中!
下面是pyinstaller一些常用的語法:
| -h,–help | 檢視該模組的幫助資訊 |
|---|---|
| -F,-onefile | 產生單個的可執行檔案 |
| -D,–onedir | 產生一個目錄(包含多個檔案)作為可執行程式 |
| -a,–ascii | 不包含 Unicode 字元集支援 |
| -d,–debug | 產生 debug 版本的可執行檔案 |
| -w,–windowed,–noconsolc | 指定程式執行時不顯示命令列視窗(僅對 Windows 有效) |
| -c,–nowindowed,–console | 指定使用命令列視窗執行程式(僅對 Windows 有效) |
| -o DIR,–out=DIR | 指定 spec 檔案的生成目錄。如果沒有指定,則預設使用當前目錄來生成 spec 檔案 |
| -p DIR,–path=DIR | 設定 Python 匯入模組的路徑(和設定 PYTHONPATH 環境變數的作用相似)。也可使用路徑分隔符(Windows 使用分號,Linux 使用冒號)來分隔多個路徑 |
| -n NAME,–name=NAME | 指定專案(產生的 spec)名字。如果省略該選項,那麼第一個指令碼的主檔名將作為 spec 的名字 |
上面是一些語法,就像我這樣的小白而言,最常用pyinstaller -F onepath。
例如: pyinstaller -F D:\HwPy\ZH.py
自動生成到C槽dist資料夾中,如果想更改生成目標檔案地址,可以輸入以下程式碼:
Pyinstaller -F D:\HwPy\ZH.py --distpath=D:\dist
這樣,生成的可執行檔案就會儲存在D:\dist資料夾中。
後面更改的目標檔案是先前就要建立好的,而直接生成不修改目標地址的話,dist檔案是自動生成。
生成後是這樣:

①pywin32的安裝
生成檔案之後,也會遇到一點小問題:
第一次使用的時候會提示沒有安裝相關的依賴(這個視窗會一閃而過)

所以我們就要按照他的提示,在cmd介面輸入
Pip install pywin32-ctypes
但是他會提示你已經安裝並且給你一個檔案地址
所以我們要再次安裝,輸入:
Pip install pywin32
這才完成依賴的安裝。
②.exe檔案一閃而過
安裝完成之後,執行生成的.exe也會遇到點小問題:
這是原始碼

但是生成.exe之後再執行,發現hello一閃而過。
這是因為在生成的.exe檔案中,程式執行結束自動關閉,或者是回車自動結束。
所以我們要在程式碼結尾加上input(),來讓我們的視窗一直保持。

這樣,再打包之後,執行結果是這樣的:

這就成功啦!
4.尾言
第一次寫,python小白一個,只是想分享自己遇到的小問題和解決方法,還請大佬們指教。
參考:pip install xxxx報錯(一大堆紅色exception)【解決】
參考:切換pip源的簡便方法
(部分轉自參考,侵刪)