簡單導航的標題切換
2020-10-13 03:00:21
剛學習AndroidStudio,我們先寫一個xml介面,然後再實現它的功能
現在我們先實現一個點選切換標題的功能
在activity_main.xml裡面寫入以下程式碼,將按鈕以及排版設定好
<?xml version="1.0" encoding="utf-8"?>
<LinearLayout
    xmlns:android="http://schemas.android.com/apk/res/android"
    android:id="@+id/main_body_bar"
    android:orientation="vertical"
    android:layout_width="match_parent"
    android:layout_height="match_parent">

    <TextView
        android:id="@+id/tv_title"
        android:textSize="36sp"
        android:text="標題"
        android:gravity="center"
        android:textColor="@android:color/white"
        android:background="@color/colorPrimary"
        android:layout_width="match_parent"
        android:layout_height="56dp"/>

    <LinearLayout
        android:id="@+id/main_body"
        android:layout_weight="1"
        android:layout_width="match_parent"
        android:layout_height="0dp"
        android:orientation="vertical">

    </LinearLayout>


        <LinearLayout
            android:id="@+id/bottom_bar"
            android:layout_alignParentBottom="true"
            android:orientation="horizontal"
            android:background="#F2F2F8"
            android:layout_width="match_parent"
            android:layout_height="50dp">
            <RelativeLayout
                android:id="@+id/bottom_bar_1_btn"
                android:layout_weight="1"
                android:layout_width="0dp"
                android:onClick="onClick"
                android:layout_height="match_parent">
                <TextView
                    android:id="@+id/bottom_bar_text_1"
                    android:layout_width="match_parent"
                    android:layout_height="wrap_content"
                    android:layout_alignParentBottom="true"
                    android:layout_centerHorizontal="true"
                    android:layout_marginBottom="2dp"
                    android:gravity="center"
                    android:text="課程"
                    android:textColor="#000000"
                    android:textSize="14sp"/>

                <ImageView
                    android:id="@+id/bottom_bar_image_1"
                    android:layout_width="30dp"
                    android:layout_height="30dp"
                    android:layout_above="@+id/bottom_bar_text_1"
                    android:layout_alignParentTop="true"
                    android:layout_centerHorizontal="true"
                    android:layout_marginTop="0dp"
                    android:layout_marginBottom="2dp"
                    android:src="@mipmap/ic_course" />
            </RelativeLayout>
            <RelativeLayout
                android:id="@+id/bottom_bar_2_btn"
                android:layout_weight="1"
                android:layout_width="0dp"
                android:onClick="onClick"
                android:layout_height="match_parent">

                <TextView
                    android:id="@+id/bottom_bar_text_2"
                    android:layout_width="match_parent"
                    android:layout_height="wrap_content"
                    android:layout_alignParentBottom="true"
                    android:layout_centerHorizontal="true"
                    android:layout_marginBottom="2dp"
                    android:gravity="center"
                    android:text="習題"
                    android:textColor="#000000"
                    android:textSize="14sp" />

                <ImageView
                    android:id="@+id/bottom_bar_image_2"
                    android:layout_width="30dp"
                    android:layout_height="30dp"
                    android:layout_alignParentTop="true"
                    android:layout_centerHorizontal="true"
                    android:layout_marginTop="2dp"
                    android:src="@mipmap/ic_exercise" />
            </RelativeLayout>
            <RelativeLayout
                android:id="@+id/bottom_bar_3_btn"
                android:layout_weight="1"
                android:layout_width="0dp"
                android:onClick="onClick"
                android:layout_height="match_parent">
                <TextView
                    android:id="@+id/bottom_bar_text_3"
                    android:layout_width="match_parent"
                    android:layout_height="wrap_content"
                    android:layout_alignParentBottom="true"
                    android:layout_centerHorizontal="true"
                    android:layout_marginBottom="2dp"
                    android:gravity="center"
                    android:text="搜尋"
                    android:textColor="#000000"
                    android:textSize="14sp"/>
                <ImageView
                    android:id="@+id/bottom_bar_image_3"
                    android:layout_width="30dp"
                    android:layout_height="30dp"
                    android:layout_above="@+id/bottom_bar_text_3"
                    android:layout_alignParentTop="true"
                    android:layout_centerHorizontal="true"
                    android:layout_marginTop="2dp"
                    android:src="@mipmap/ic_message"/>
            </RelativeLayout>
            <RelativeLayout
                android:id="@+id/bottom_bar_4_btn"
                android:layout_weight="1"
                android:layout_width="0dp"
                android:onClick="onClick"
                android:layout_height="match_parent">
                <TextView
                    android:id="@+id/bottom_bar_text_4"
                    android:layout_width="match_parent"
                    android:layout_height="wrap_content"
                    android:layout_alignParentBottom="true"
                    android:layout_centerHorizontal="true"
                    android:layout_marginBottom="2dp"
                    android:gravity="center"
                    android:text="我"
                    android:textColor="#000000"
                    android:textSize="14sp"/>
                <ImageView
                    android:id="@+id/bottom_bar_image_4"
                    android:layout_width="30dp"
                    android:layout_height="30dp"
                    android:layout_above="@+id/bottom_bar_text_4"
                    android:layout_alignParentTop="true"
                    android:layout_centerHorizontal="true"
                    android:layout_marginTop="2dp"
                    android:src="@mipmap/ic_my"/>
            </RelativeLayout>
        </LinearLayout>


</LinearLayout>
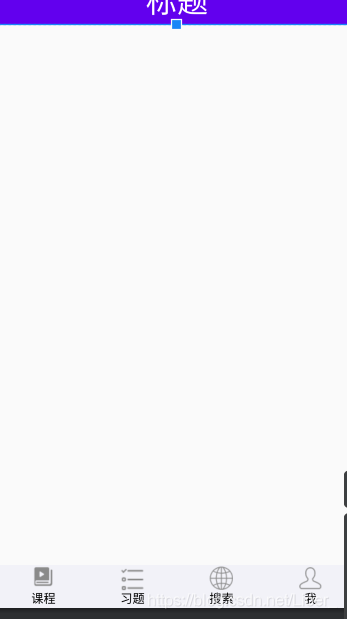
寫完以上的程式碼,我們會得到這樣一個介面

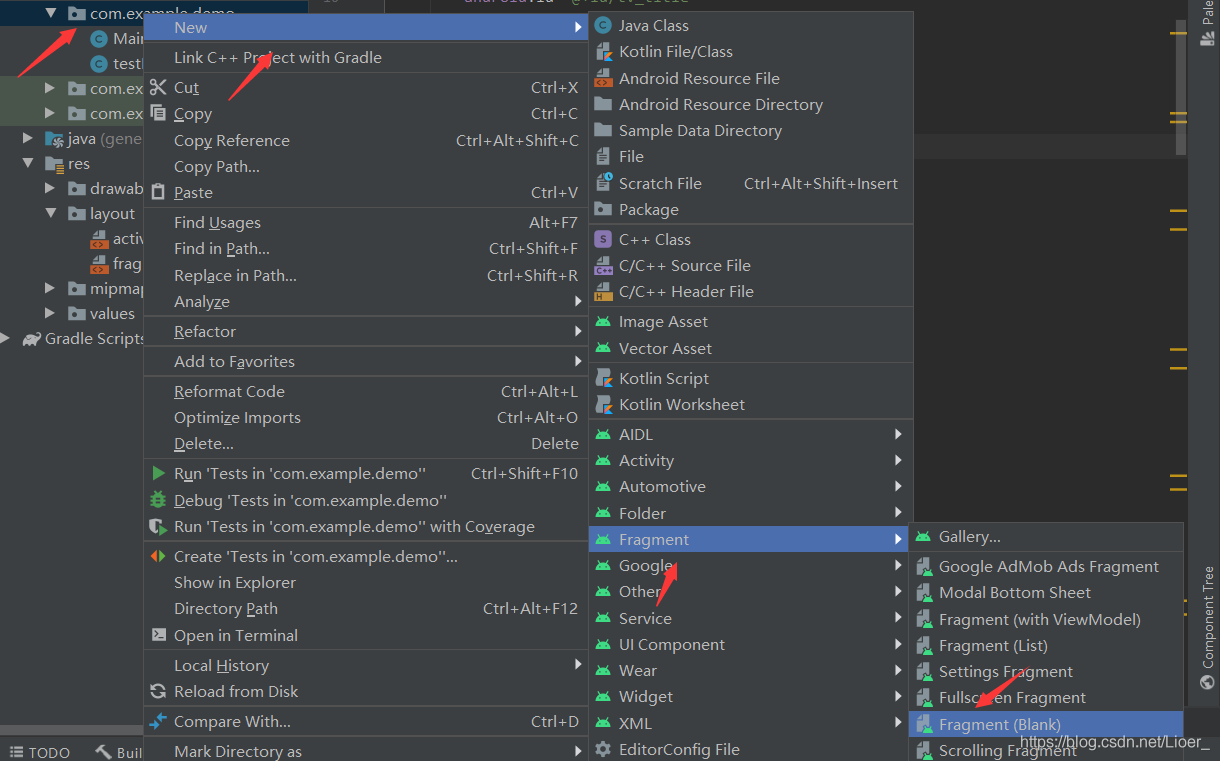
然後我們新建一個fragment

我們給它起個名字testFragment
然後我們就得到一個fragment_test.xml
我們在裡面新增一個id android:id="@+id/tv_content" 這樣方便我們後面功能的實現
  @Override
    protected void onCreate(Bundle savedInstanceState)  {
        super.onCreate(savedInstanceState);
        setContentView(R.layout.activity_main);


        initView();
        initFragment();

        replaceFragment(fragments.get(R.id.bottom_bar_2_btn));


    }
    //實現回撥介面
    @Override
    public void setTitle(String title) {
        tvTitle.setText(title);
    }
我們再onCreate方法裡面新增兩個建構函式,接下來我們實現這幾個函數
private void initFragment() {
        fragments = new SparseArray<>();
        fragments.put(R.id.bottom_bar_1_btn,testFragment.newInstance("課程"));
        fragments.put(R.id.bottom_bar_2_btn,testFragment.newInstance("習題"));
        fragments.put(R.id.bottom_bar_3_btn,testFragment.newInstance("搜尋"));
        fragments.put(R.id.bottom_bar_4_btn,testFragment.newInstance("我"));

    }
    private void replaceFragment(Fragment fragment){
        FragmentManager manager=getSupportFragmentManager();
        FragmentTransaction transaction=manager.beginTransaction();
        transaction.replace(R.id.main_body,fragment);
        transaction.commit();
    }

    private void initView(){
        tvTitle = findViewById(R.id.tv_title);

        bottom_bar_text_1=findViewById(R.id.bottom_bar_text_1);
        bottom_bar_text_2=findViewById(R.id.bottom_bar_text_2);
        bottom_bar_text_3=findViewById(R.id.bottom_bar_text_3);
        bottom_bar_text_4=findViewById(R.id.bottom_bar_text_4);
        bottom_bar_image_1=findViewById(R.id.bottom_bar_image_1);
        bottom_bar_image_2=findViewById(R.id.bottom_bar_image_2);
        bottom_bar_image_3=findViewById(R.id.bottom_bar_image_3);
        bottom_bar_image_4=findViewById(R.id.bottom_bar_image_4);

        mian_body_bar=findViewById(R.id.main_body_bar);
        bottom_bar_1_btn=findViewById(R.id.bottom_bar_1_btn);
        bottom_bar_2_btn=findViewById(R.id.bottom_bar_2_btn);
        bottom_bar_3_btn=findViewById(R.id.bottom_bar_3_btn);
        bottom_bar_4_btn=findViewById(R.id.bottom_bar_4_btn);

        bottom_bar_1_btn.setOnClickListener(this);
        bottom_bar_2_btn.setOnClickListener(this);
        bottom_bar_3_btn.setOnClickListener(this);
        bottom_bar_4_btn.setOnClickListener(this);

        setSelectStatus(1);//預設選擇
    }
在onclick函數中獲取事件
 @Override
    public void onClick(View view) {
        switch (view.getId()){
            case R.id.bottom_bar_1_btn:
                setSelectStatus(0);
                break;
            case R.id.bottom_bar_2_btn:
                setSelectStatus(1);
                break;
            case R.id.bottom_bar_3_btn:
                setSelectStatus(2);
                break;
            case R.id.bottom_bar_4_btn:
                setSelectStatus(3);
                break;
        }
        replaceFragment(fragments.get(view.getId()));
    }
點選後變色並跳轉
 private  void setSelectStatus(int index){
        switch(index){
            case 0:
                //圖片點選選擇變換圖片,顏色的改變,其他變為原來的顏色,並保持原來的圖片
                bottom_bar_image_1.setImageResource(R.mipmap.ic_course_selected);
                bottom_bar_text_1.setTextColor(Color.parseColor("#0097F7"));

                //其他文字和顏色不變
                bottom_bar_image_2.setImageResource(R.mipmap.ic_exercise);
                bottom_bar_text_2.setTextColor(Color.parseColor("#000000"));

                bottom_bar_image_3.setImageResource(R.mipmap.ic_message);
                bottom_bar_text_3.setTextColor(Color.parseColor("#000000"));

                bottom_bar_image_4.setImageResource(R.mipmap.ic_my);
                bottom_bar_text_4.setTextColor(Color.parseColor("#000000"));

                break;


            case 1:
                //圖片點選選擇變換圖片,顏色的改變,其他變為原來的顏色,並保持原來的圖片
                bottom_bar_image_2.setImageResource(R.mipmap.ic_exercise_selected);
                bottom_bar_text_2.setTextColor(Color.parseColor("#0097F7"));

                //其他文字和顏色不變
                bottom_bar_image_1.setImageResource(R.mipmap.ic_course);
                bottom_bar_text_1.setTextColor(Color.parseColor("#000000"));

                bottom_bar_image_3.setImageResource(R.mipmap.ic_message);
                bottom_bar_text_3.setTextColor(Color.parseColor("#000000"));

                bottom_bar_image_4.setImageResource(R.mipmap.ic_my);
                bottom_bar_text_4.setTextColor(Color.parseColor("#000000"));

                break;

            case 2:
                //圖片點選選擇變換圖片,顏色的改變,其他變為原來的顏色,並保持原來的圖片
                bottom_bar_image_3.setImageResource(R.mipmap.ic_message_selected);
                bottom_bar_text_3.setTextColor(Color.parseColor("#0097F7"));

                //其他文字和顏色不變
                bottom_bar_image_2.setImageResource(R.mipmap.ic_exercise);
                bottom_bar_text_2.setTextColor(Color.parseColor("#000000"));

                bottom_bar_image_1.setImageResource(R.mipmap.ic_course);
                bottom_bar_text_1.setTextColor(Color.parseColor("#000000"));

                bottom_bar_image_4.setImageResource(R.mipmap.ic_my);
                bottom_bar_text_4.setTextColor(Color.parseColor("#000000"));

                break;

            case 3:
                //圖片點選選擇變換圖片,顏色的改變,其他變為原來的顏色,並保持原來的圖片
                bottom_bar_image_4.setImageResource(R.mipmap.ic_my_selected);
                bottom_bar_text_4.setTextColor(Color.parseColor("#0097F7"));

                //其他文字和顏色不變
                bottom_bar_image_2.setImageResource(R.mipmap.ic_exercise);
                bottom_bar_text_2.setTextColor(Color.parseColor("#000000"));

                bottom_bar_image_3.setImageResource(R.mipmap.ic_message);
                bottom_bar_text_3.setTextColor(Color.parseColor("#000000"));

                bottom_bar_image_1.setImageResource(R.mipmap.ic_course);
                bottom_bar_text_1.setTextColor(Color.parseColor("#000000"));
                break;
        }
    }
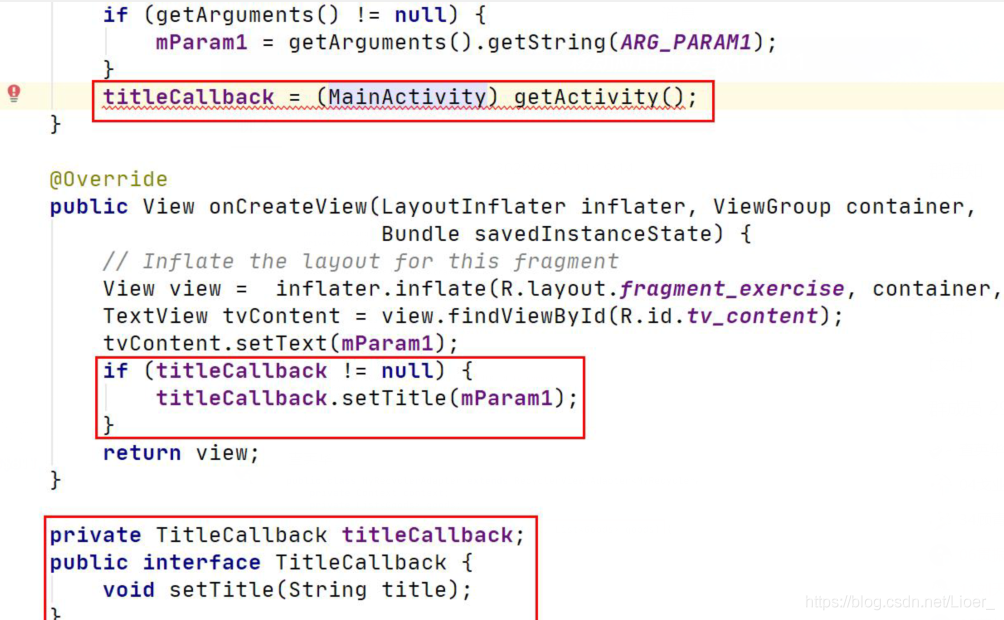
我們到testFragment裡onCreate方法中獲得Activity中實現好的範例化介面物件

@Override
    public void onCreate(Bundle savedInstanceState) {
        super.onCreate(savedInstanceState);
        if (getArguments() != null) {
            mParam1 = getArguments().getString(ARG_PARAM1);
        }
        titleCallback=(MainActivity)getActivity();
    }

    @Override
    public View onCreateView(LayoutInflater inflater, ViewGroup container,
                             Bundle savedInstanceState) {
        // Inflate the layout for this fragment
        View view= inflater.inflate(R.layout.fragment_test, container, false);
        TextView tvContent=view.findViewById(R.id.tv_content);
        tvContent.setText(mParam1);
        if (titleCallback!=null){
            titleCallback.setTitle(mParam1);
        }
        return  view;
    }
    //定義回撥介面
    private TitleCallback titleCallback;
    public  interface  TitleCallback{
        void setTitle(String title);
    }
到此我們就完成了一個簡單的小功能啦(~ ̄▽ ̄)~
步驟:
1.在Fragment類中定義一個回撥介面
2.在Activity中實現這個回撥介面
3.在Fragment的onCreate方法中獲得Activity中實現好的範例化介面物件
4.利用介面的物件進行傳值