一篇文章帶你實操程式碼理解盒子模型
目錄
一、盒子模型的幾個關鍵詞
內容(content)、填充(padding通俗講就是內邊距)、邊框(border)、邊界(margin通俗講就是外邊距)。
用圖片來演示一下
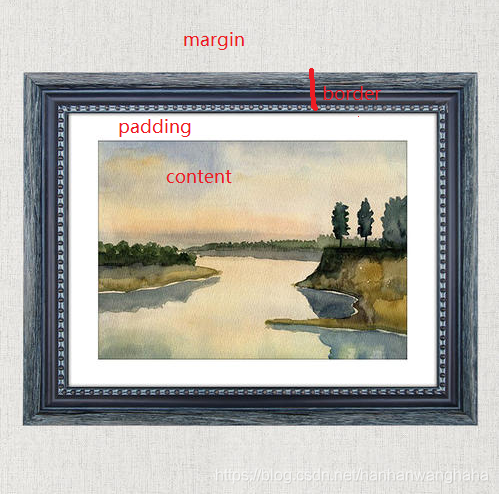
簡單用畫圖工具演示一下就是
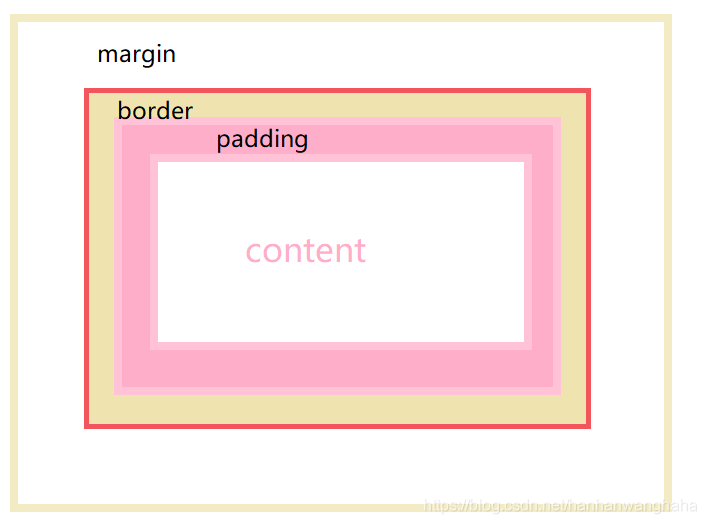
二、盒子有尺寸,用CSS寫法為寬度(width)和高度(height)
定義盒子的寬度和高度
<!DOCTYPE html>
<html>
	<head>
		<meta charset="utf-8">
		<title></title>
		<style type="text/css">
			#box1{
				width: 200px;
				height: 100px;
				background-color: blue;
			}
		</style>
	</head>
	<body>
		<div id="box1">
			Hello, I am box1
		</div>
	</body>
</html>
執行結果
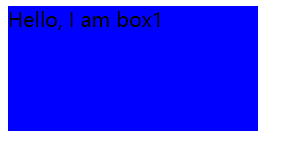
注意:只有塊元素才可以設定寬度和高度,行內元素無法設定寬度和高度。
三、盒子有邊框,用CSS寫法為上下左右邊框(border)
3.1邊框線型 border-style
引數:
none : 無邊框 dotted : 點線邊框 dashed : 虛線邊框 solid : 實線邊框 double : 雙線邊框
3.2邊框顏色
檢索或設定物件的邊框顏色。
語法:
border-color : color
3.3邊框的複合屬性
語法:
border : border-style||border-width|| border-color
例如我要設定 p標籤的邊框為: 線型實線 , 寬度20px , 顏色為紅色
p { border: solid 20px red; }
3.4單獨控制上下左右邊框
3.4.1上邊框 border-top
檢索或設定物件的上邊框。這是一個複合屬性。
語法:
border-top: border-style||border-width||border-color
例如我要設定 p標籤的上邊框為: 線型實線 ,寬度20px , 顏色為紅色。
<!DOCTYPE html>
<html>
	<head>
		<meta charset="utf-8">
		<title></title>
		<style type="text/css">
			#box1{
				width: 200px;
				height: 100px;
				border-top: solid 20px red;
				}
		</style>
	</head>
	<body>
		<div id="box1">
			Hello, I am box1
		</div>
	</body>
</html>
執行效果

3.4.2下邊框 border-bottom
檢索或設定物件的下邊框。這是一個複合屬性。
語法:
border-bottom :border-style||border-width||border-color
比如我要設定 p標籤的下邊框為: 寬度2px , 線型實線 , 顏色為紅色 。
<!DOCTYPE html>
<html>
	<head>
		<meta charset="utf-8">
		<title></title>
		<style type="text/css">
			#box1{
				width: 200px;
				height: 100px;
				border-bottom: 20px solid red;
				}
		</style>
	</head>
	<body>
		<div id="box1">
			Hello, I am box1
		</div>
	</body>
</html>
執行效果
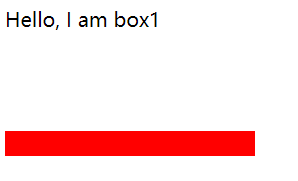
3.4.3左邊框border-left
3.4.4右邊框border-right
左邊框 border-left、右邊框 border-right同上
四、盒子有內邊距,用CSS寫法為上下左右內邊距(padding)
4.1padding的複合屬性
檢索或設定物件四邊的內邊距,換句話說,也就是邊框與內容之間的距離。
語法:
padding :length
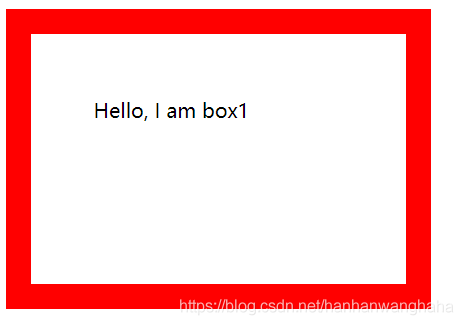
例如我要邊框與內容之間的距離為50px
<!DOCTYPE html>
<html>
	<head>
		<meta charset="utf-8">
		<title></title>
		<style type="text/css">
			#box1{
				width: 200px;
				height: 100px;
				border: 20px solid red;
				padding: 50px;
				}
		</style>
	</head>
	<body>
		<div id="box1">
			Hello, I am box1
		</div>
	</body>
</html>
執行效果
注意:
如果只提供一個,將用於全部的四條邊。
如果提供兩個,第一個用於上-下,第二個用於左-右。
如果提供三個,第一個用於上,第二個用於左-右,第三個用於下。
如果提供全部四個引數值,將按上-右-下-左的順序作用於四邊。
4.2單獨控制上下左右邊框
4.2.1上邊內邊距 padding-top
檢索或設定物件的上邊內邊距。
語法:
padding-top :length
<!DOCTYPE html>
<html>
	<head>
		<meta charset="utf-8">
		<title></title>
		<style type="text/css">
			#box1{
				width: 200px;
				height: 300px;
				border: solid 20px red;
				padding-top: 100px;
				}
		</style>
	</head>
	<body>
		<div id="box1">
			Hello, my padding-top is 50px
		</div>
	</body>
</html>
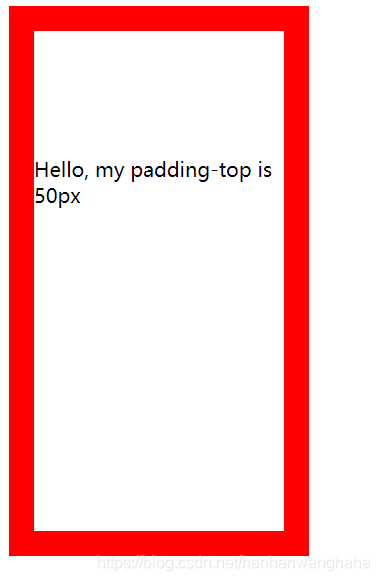
執行結果
4.2.2底邊內邊距 padding-bottom
檢索或設定物件的下邊內邊距。
語法:
padding-right:length
<!DOCTYPE html>
<html>
	<head>
		<meta charset="utf-8">
		<title></title>
		<style type="text/css">
			#box1{
				width: 200px;
				height: 200px;
				border: solid 20px red;
				padding-bottom: 100px;
				}
		</style>
	</head>
	<body>
		<div id="box1">
			Hello, my padding-bottom is 100px
			Hello, my padding-bottom is 100px
			Hello, my padding-bottom is 100px
			Hello, my padding-bottom is 100px
			Hello, my padding-bottom is 100px
			Hello, my padding-bottom is 100px

		</div>
	</body>
</html>
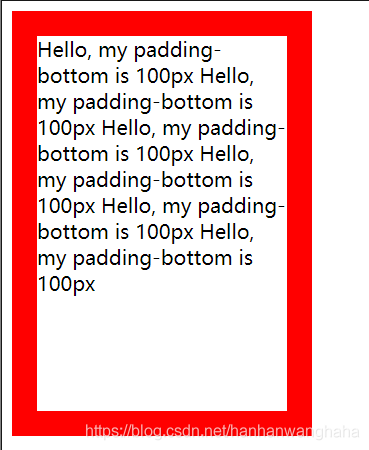
執行結果
4.2.3左邊內邊距 padding-left
4.2.4右邊內邊距 padding-right
左邊內邊距padding-left、右邊內邊距padding-right同上
五、盒子有外邊距,用CSS寫法為外邊距(margin)
5.1margin的複合屬性
檢索或設定物件四邊的外邊距。
語法:
margin:length
<!DOCTYPE html>
<html>
	<head>
		<meta charset="utf-8">
		<title></title>
		<style type="text/css">
			#box1{
				width: 350px;
				height: 200px;
				border: solid 20px red;
				padding: 2px;
				margin: 50px;
				}
		</style>
	</head>
	<body>
		<div id="box1">
			I didn't say anything. I just walked away.
			You're the light, you're the night
			You're the color of my blood
			You're the cure, you're the pain
			You're the only thing I wanna touch
			Never knew that it could mean so much, so much
			You're the fear, I don't care
			'Cause I've never been so high
			Follow me to the dark
			Let me take you past our satellites
		</div>
	</body>
</html>
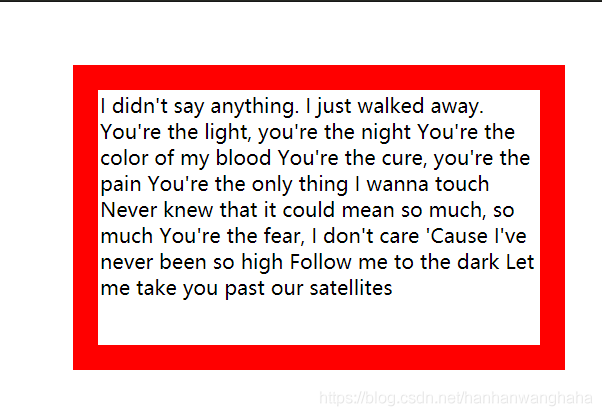
執行結果
注意:
如果只提供一個,將用於全部的四條邊。
如果提供兩個,第一個用於上-下,第二個用於左-右。
如果提供三個,第一個用於上,第二個用於左-右,第三個用於下。
如果提供全部四個引數值,將按上-右-下-左的順序作用於四邊。
外邊距在不同瀏覽器的效果會有很大不同,建議儘量少用。
5.2單獨控制上下左右邊框
5.2.1上邊外邊距 margin-top
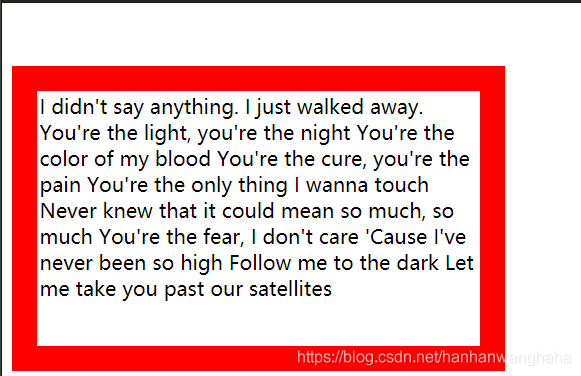
檢索或設定物件的上邊外邊距。
語法:
margin-top :length
<!DOCTYPE html>
<html>
	<head>
		<meta charset="utf-8">
		<title></title>
		<style type="text/css">
			#box1{
				width: 350px;
				height: 200px;
				border: solid 20px red;
				padding: 2px;
				margin-top: 50px;
				}
		</style>
	</head>
	<body>
		<div id="box1">
			I didn't say anything. I just walked away.
			You're the light, you're the night
			You're the color of my blood
			You're the cure, you're the pain
			You're the only thing I wanna touch
			Never knew that it could mean so much, so much
			You're the fear, I don't care
			'Cause I've never been so high
			Follow me to the dark
			Let me take you past our satellites
		</div>
	</body>
</html>
執行結果
5.2.2下邊外邊距 margin-bottom
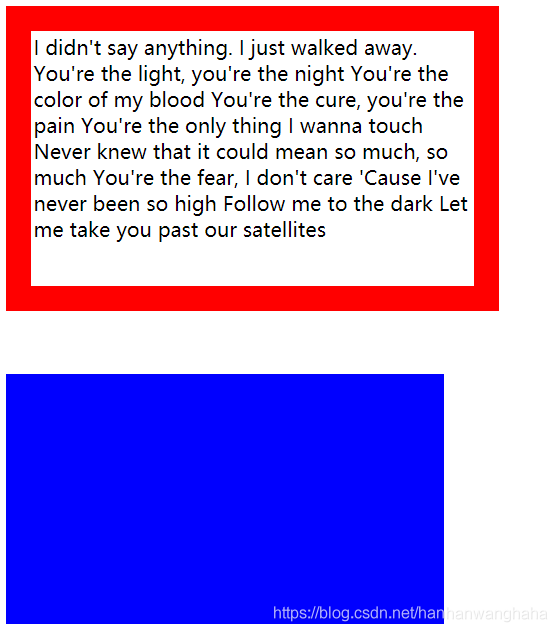
檢索或設定物件的下邊外邊距。
語法:
margin-bottom :length
<!DOCTYPE html>
<html>
	<head>
		<meta charset="utf-8">
		<title></title>
		<style type="text/css">
			#box1{
				width: 350px;
				height: 200px;
				border: solid 20px red;
				padding: 2px;
				margin-bottom: 50px;
				}

			#box2{
				width: 350px;
				height: 200px;
				background-color: blue;
			}
		</style>
	</head>
	<body>
		<div id="box1">
			I didn't say anything. I just walked away.
			You're the light, you're the night
			You're the color of my blood
			You're the cure, you're the pain
			You're the only thing I wanna touch
			Never knew that it could mean so much, so much
			You're the fear, I don't care
			'Cause I've never been so high
			Follow me to the dark
			Let me take you past our satellites
		</div>
		<div id="box2">

		</div>
	</body>
</html>
執行結果
5.2.3左邊外邊距 margin-left
5.2.4左邊外邊距 margin-left
左邊外邊距 margin-left、左邊外邊距 margin-left同上
六、盒子模型範例
要把頁面佈局好,需要注意:
- 頁面由很多個盒子,從上往下堆積。外層的這些盒子是獨立的。
- 我們佈局的時候,外層的盒子最好不要設定浮動,也不要設定為絕對定位。
- 盒子一般不設定高度,它的高度一般由內容來撐高。
- 每個外層的盒子需要設定寬度(這個寬度叫版心),並且要將這些盒子在水平方向居中。
- 把每個模組外層的容器設定為相對定位。可以作為裡面每個元素定位的參考。
- 把外層容器設定為相對定位之後,它也不會脫離標準流,不會影響佈局。
<!DOCTYPE html>
<html>
	<head>
		<meta charset="UTF-8">
		<title></title>

		<style type="text/css">
			*{
				margin: 0;
				padding: 0;
			}
			.wrapper{
				background-color: green;
				width: 1200px;
				margin: 0 auto;
				margin-bottom: 4px;
			}
			#box1{
				width: 200px;
				height: 300px;
				border:solid 20px red;
				padding-left: 100px;

			}

			#box2{
				width:100px;
				height: 100px;
				background-color: seagreen;
				cursor: move;
				/* display: none; *//*元素隱藏後,不佔位置*/
				/*visibility: hidden;*/  /*這種隱藏也會佔著位置*/
				/*opacity: 0;*/   /*通過設定不透明度去隱藏一個元素,元素隱藏後,位置還佔著*/
			}
			#box3{
				width:100px;
				height: 100px;
				background-color:darkgoldenrod;
				cursor: move;
			}
		</style>
	</head>
	<body>

		<div  class="wrapper">
			1

		</div>

		<div class="wrapper">
			2
		</div>

		<div class="wrapper">
			3
		</div>

		<div class="wrapper">
			4
		</div>

		<div class="wrapper">
			5
		</div>


		<div class="wrapper">
			6
		</div>


		<div id="box1">
			<div id="box2"></div>
			<div id="box3"></div>
		</div>


	</body>
</html>
附加:如何隱藏一個元素?
七、如何隱藏一個元素
看上面的程式碼和註釋就知道了!把註釋去掉,拿去執行執行!希望可以幫到你哈哈哈
