從0開始實現SpringBoot入門程式及踩坑指南
學習B站尚矽谷SpringBoot頂尖教學(springboot之idea版spring boot)有感
目錄
0 什麼是SpringBoot
SpringBoot通過整合Spring技術棧,簡化了Spring開發。
SpingBoot特點——微服務:
- 是一種架構風格
- 服務應該是一組小型服務的組合(功能元素動態組合,比如在一個伺服器多放點A,少放點B服務)
- 每個服務都可替換可升級
- 每個服務可以通過http方式溝通
微服務與單體應用 (all in one)相對。單體應用具有以下優點:
- 開發測試簡單
- 部署簡單(整個打包成war包即可)
- 拓展簡單(提高並行只要相同應用複製到多個伺服器即可)
但缺點在於每次修改都要重新部署。
接下來了解如何從0開始用SpringBoot框架搭建一個HelloWorld程式
目標功能:
瀏覽器傳送hello請求,伺服器接收請求並處理,給瀏覽器響應一個hello world字串
1 jdk 與jre安裝
JDK1.8下載、安裝和環境設定教學
該文章同時內含jre安裝
2 maven安裝
3 Idea安裝
4 SpringBoot安裝
SpringBoot不需要手動下載,只需要後續在檔案中設定即可自動下載
5 修改Maven的setting設定
開啟maven的安裝目錄下conf\setting.xml,如D:\Maven\apache-maven-3.3.9\conf\setting.xml檔案,在<profiles>標籤內增加下面這段並儲存。
<profile>
    <id>jdk-1.8</id>
    <activation>
        <activeByDefault>true</activeByDefault>
        <jdk>1.8</jdk>
    </activation>
    <properties>
      <maven.compiler.source>1.8</maven.compiler.source>
      <maven.compiler.target>1.8</maven.compiler.target>
      <maven.compiler.compilerVersion>1.8</maven.compiler.compilerVersion>
    </properties>
  </profile>
6 修改Idea中的Maven設定
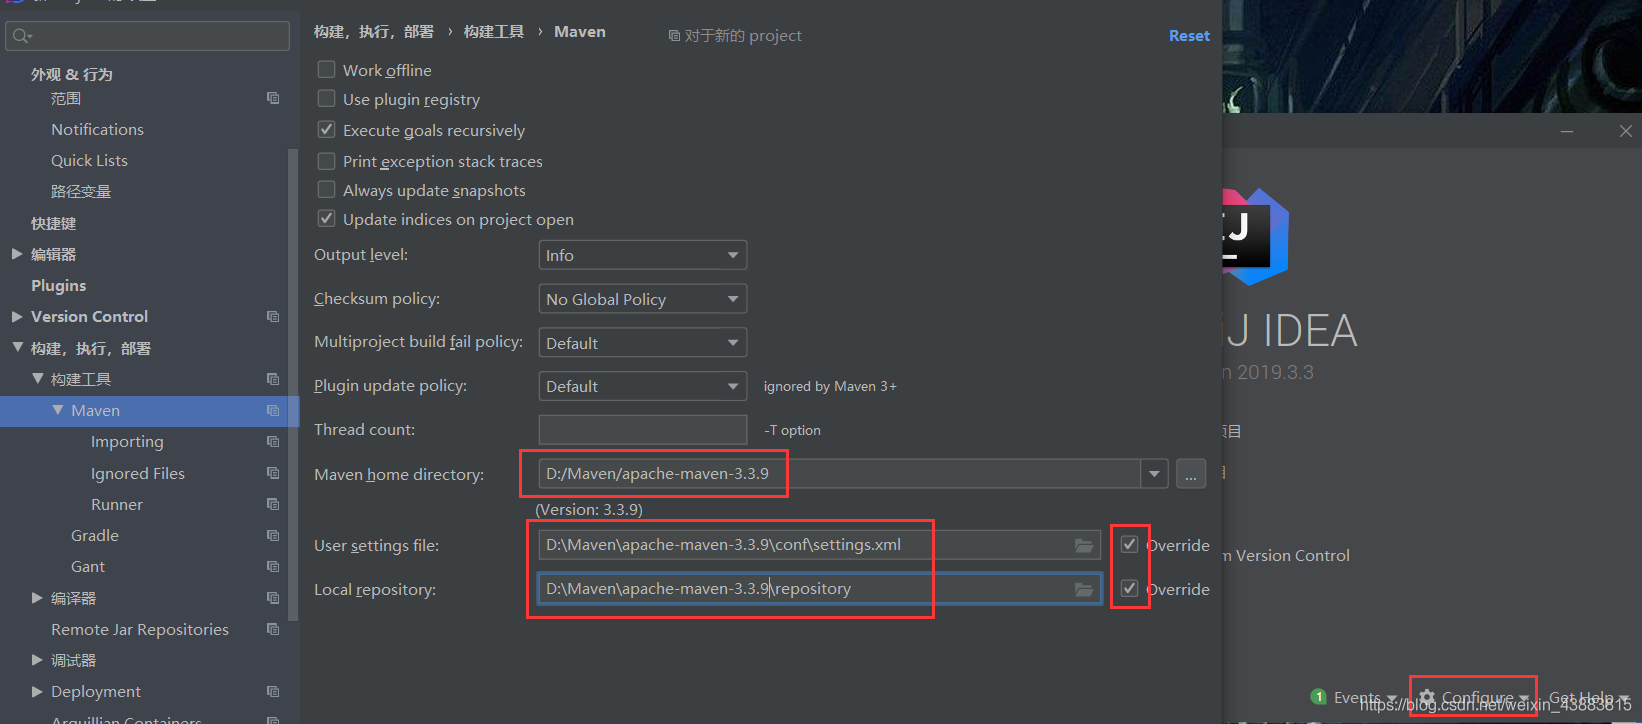
開啟Idea的首頁-右下角的Configure-左邊找到Maven項
- 將Maven home directionory設定為Maven安裝目錄
- 將User setting file設定為第5步修改過的
setting.xml檔案,勾選Override - 將Local repository設定為
maven安裝路徑\repository(本來maven安裝路徑裡是沒有repository資料夾的,是自己寫的路徑,表示到時候倉庫就放這)
7 開始SpringBoot操作
7.1 建立一個maven工程
-
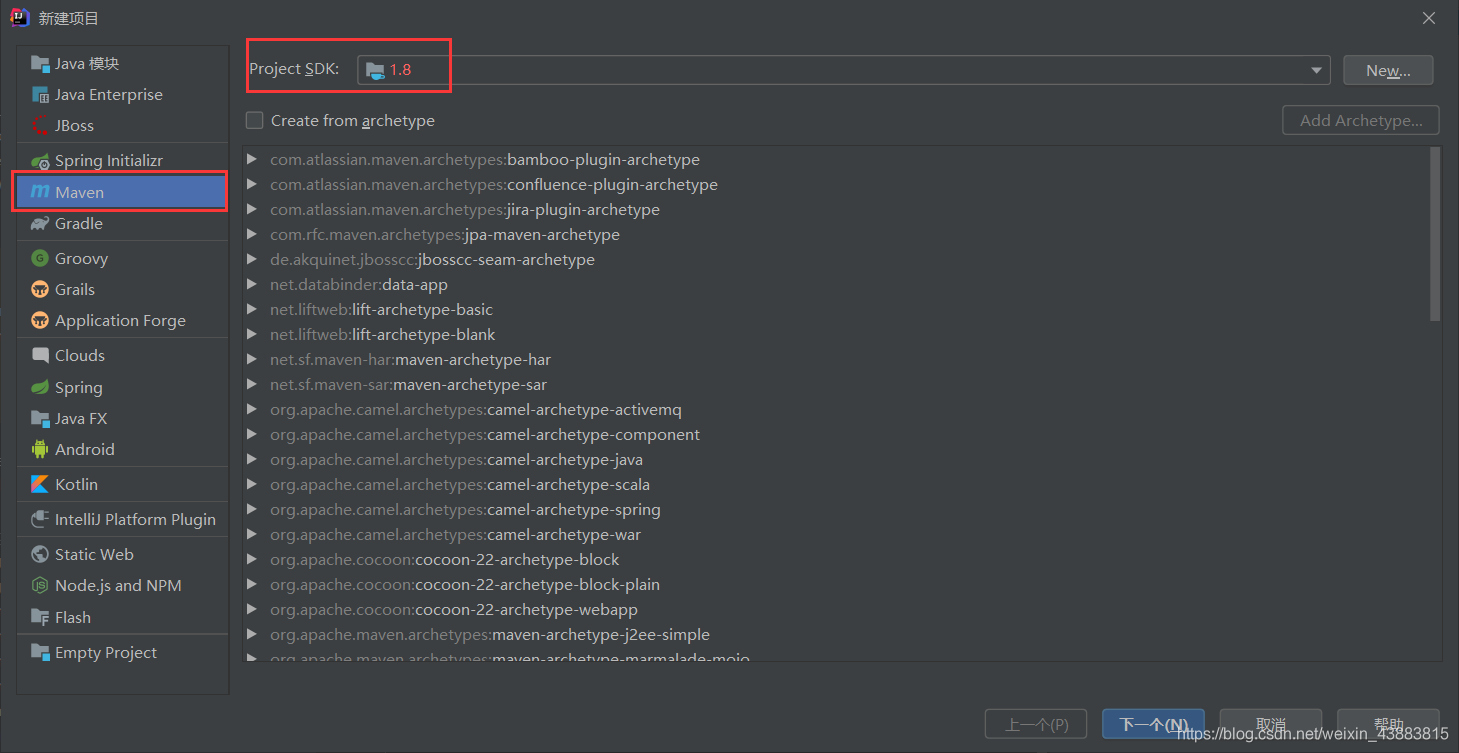
開啟idea,new project,選擇左側maven
-
修改上方的project sdk為自己安裝jdk的目錄,next
-
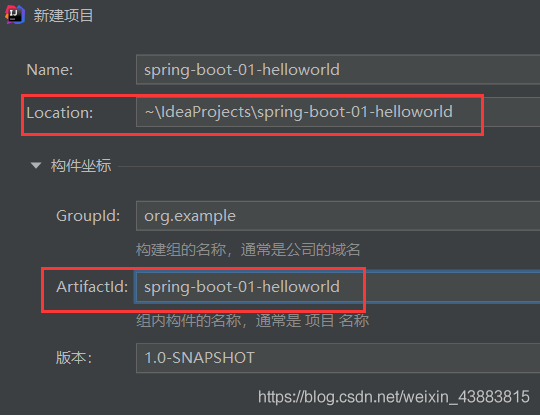
設定專案名稱和儲存地址,finish
-
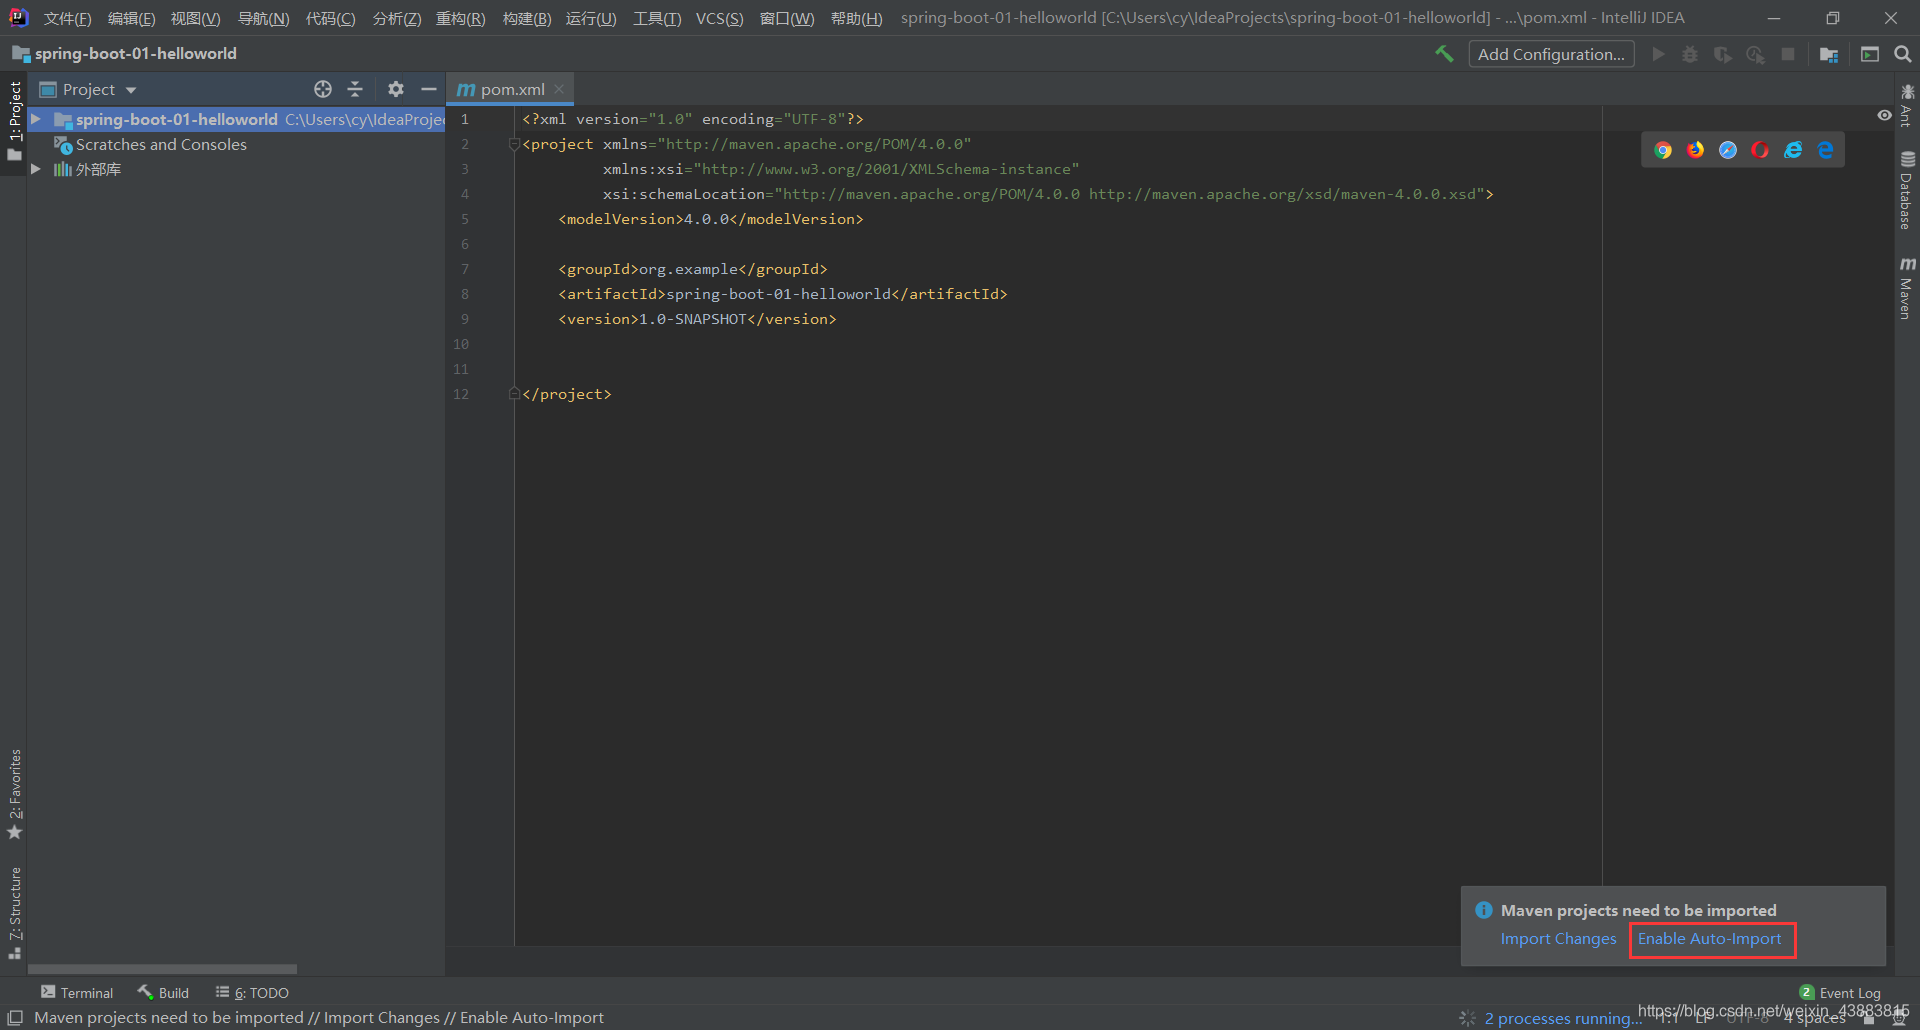
右下角 啟動自動匯入,這樣在pom檔案裡面每寫一個依賴就會自動加入相關依賴
7.2 匯入SpringBoot相關依賴
去Spring官網,SpringBoot的Quick Start,複製依賴(即下面這段),貼上到一開始就開啟的pom檔案裡面(<project>裡面,<version>下面即可),由於是自動匯入,所以會開始下載
<parent>
	<groupId>org.springframework.boot</groupId>
	<artifactId>spring-boot-starter-parent</artifactId>
	<version>1.5.9.RELEASE</version>
</parent>
<dependencies>
	<dependency>
		<groupId>org.springframework.boot</groupId>
		<artifactId>spring-boot-starter-web</artifactId>
	</dependency>
</dependencies>
當外部庫出現新的maven庫就成功了。
但是我用的時候這段沒有自動開始下載,改用下面的才成功了,其實理論上匯入spring-boot-starter-web應該就行了,不清楚原因。
<parent>
	<groupId>org.springframework.boot</groupId>
	<artifactId>spring-boot-starter-parent</artifactId>
	<version>1.5.9.RELEASE</version>
</parent>
<dependencies>
	<dependency>
		<groupId>org.springframework.boot</groupId>
		<artifactId>spring-boot-starter-web</artifactId>
	</dependency>
	<dependency>
		<groupId>org.springframework.boot</groupId>
		<artifactId>spring-boot-starter-test</artifactId>
		<scope>test</scope>
	</dependency>
</dependencies>
最終效果如下: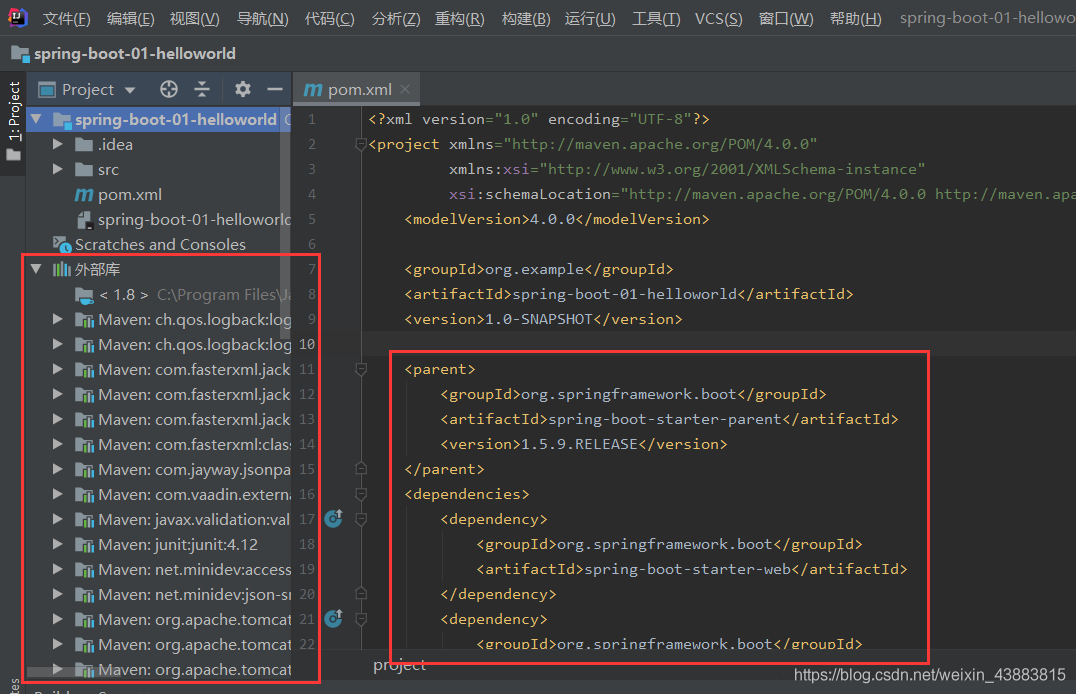
7.3 編寫Main主程式
用於啟動springboot應用
7.3.1 新建Main類
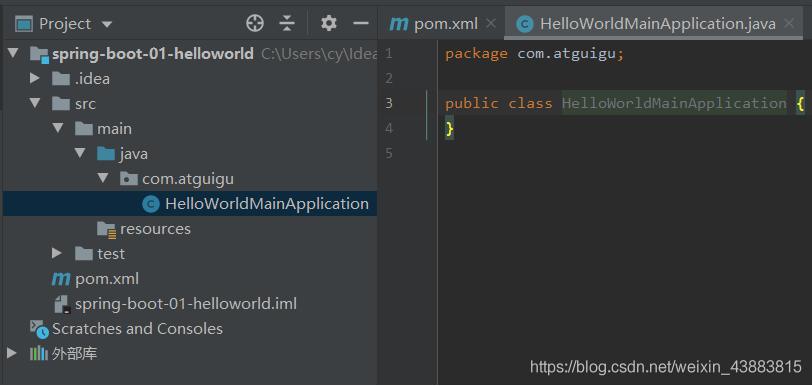
在左側Src-Main-java資料夾,右鍵-新建Java class-起名HelloWorldMainApplication或者com.xxx.HelloWorldMainApplication(這樣更好,是放到了包下面,這樣起名idea會自動建立對應的包),最終效果如下:
7.3.2 加入註解
在package(如果上一步寫的是com.xxx的話)和pulic class之間寫上import和@SpringBootApplication用於說明是springboot應用。
import org.springframework.boot.autoconfigure.SpringBootApplication;

@SpringBootApplication
public class HelloWorldMainApplication{

}
7.3.3 寫Main class內容
在class裡寫
@SpringBootApplication
public class HelloWorldMainApplication{
	public static void main(String[]args){
		SpringApplication.run(HelloWorldMainApplication.class,args);
	}
}
這裡遇到 cannot resolve method 'run'的錯誤,經查詢可能是maven包安裝問題,嘗試以下2個方法後成功。
-
在cmd下進入專案的根目錄下,執行以下程式碼,用於清理所有的依賴並重新安裝
mvn dependency:purge-local-repository
7.4 編寫Controller和Service
7.4.1 新建Controller類
在com.xxx的包下新建Java類,命名為controller.HelloController,則會建立一個controller包,下面有HelloController類
7.4.2 加入註解和import
同Main類一樣,在Controller類裡面加入以下程式碼:
import org.springframework.stereotype.Controller;

@Controller
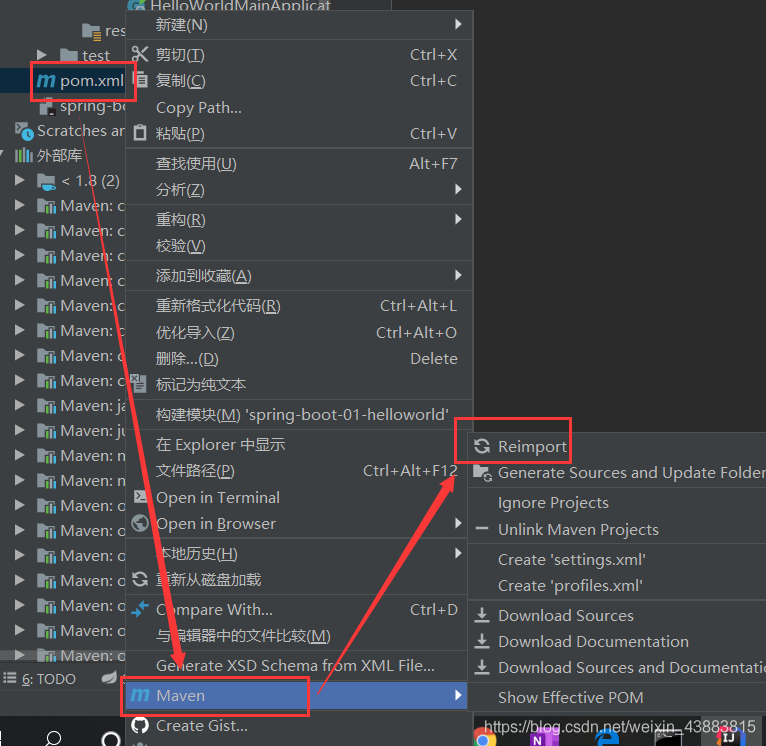
但是由於剛剛更換了maven包,導致dependency沒有及時更新,所以出現了import時springframework後面沒有stereotype包的問題。
解決:將pom檔案重新匯入reimport即可。
7.4.3 寫controller程式碼
@Controller
public class HelloController {
    @ResponseBody
    @RequestMapping("/hello")
    public String hello(){
        return "Hello World";
    }
}
@RequestMapping("/hello")意為接收瀏覽器的hello請求
return "Hello World"意為Controller向瀏覽器返回一個"Hello World"字串
7.5 效果測試
測試方法:
- 執行主程式的main方法
即點main函數(而非class)旁邊的綠色按鈕-選擇第一個選項
控制檯會列印資訊,如下:
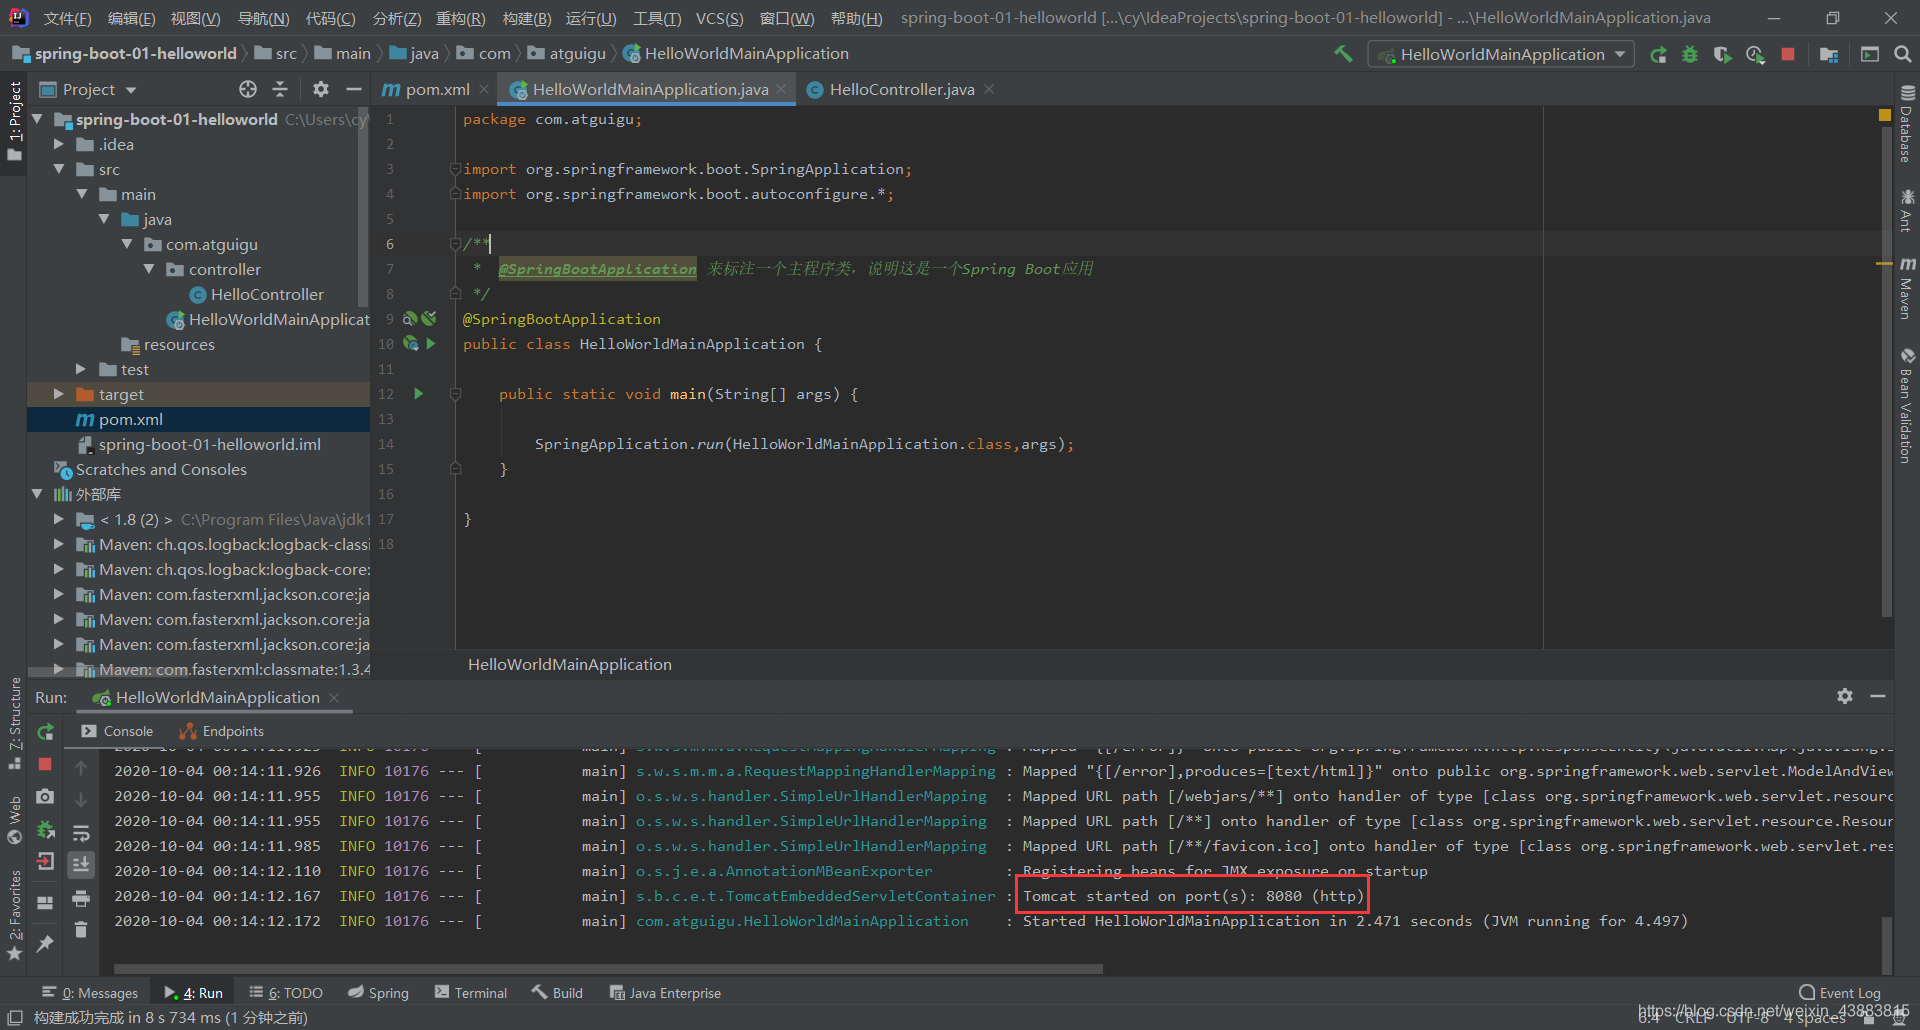
說明tomcat在8080埠已經啟動
-
開啟瀏覽器,輸入
localhost:8080,預設出現白色介面如下,不用管
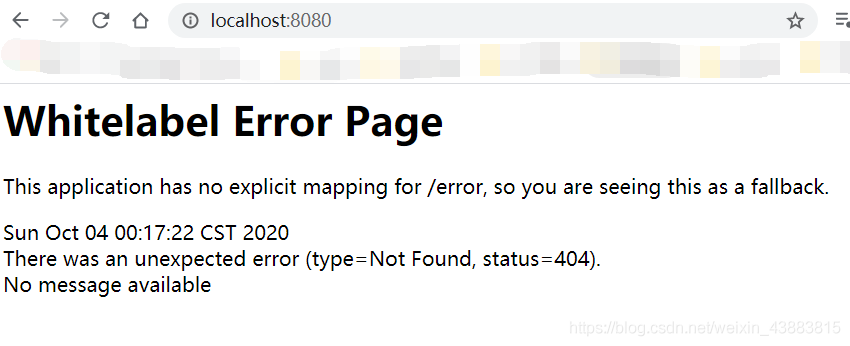
-
瀏覽器輸入改成
localhost:8080/hello表示瀏覽器發出hello請求 -
瀏覽器出現「Hello World」字樣,則成功

-
點選這裡可停止該應用
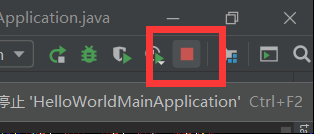
7.6 將專案打jar包
7.6.1 加入用於打包的外掛
在pom中增加以下程式碼(用於增加外掛):
<build>
        <plugins>
            <plugin>
                <groupId>org.springframework.boot</groupId>
                <artifactId>spring-boot-maven-plugin</artifactId>
            </plugin>
        </plugins>
    </build>
這裡遇到spring-boot-maven-plugin出現 not found 的錯誤
解決方法:
- 據說該包不是maven內部的,所以找不到,因此嘗試在pom和maven\setting裡面增加設定,仍失敗
- 參考此方法寫plugin時加上
<version>標籤再reimport一下pom(注意,每次修改完要把pom reimport一下 ,不然不會修改),成功。<version>2.2.2.RELEASE</version>
7.6.2 開始打包
雙擊執行package方法
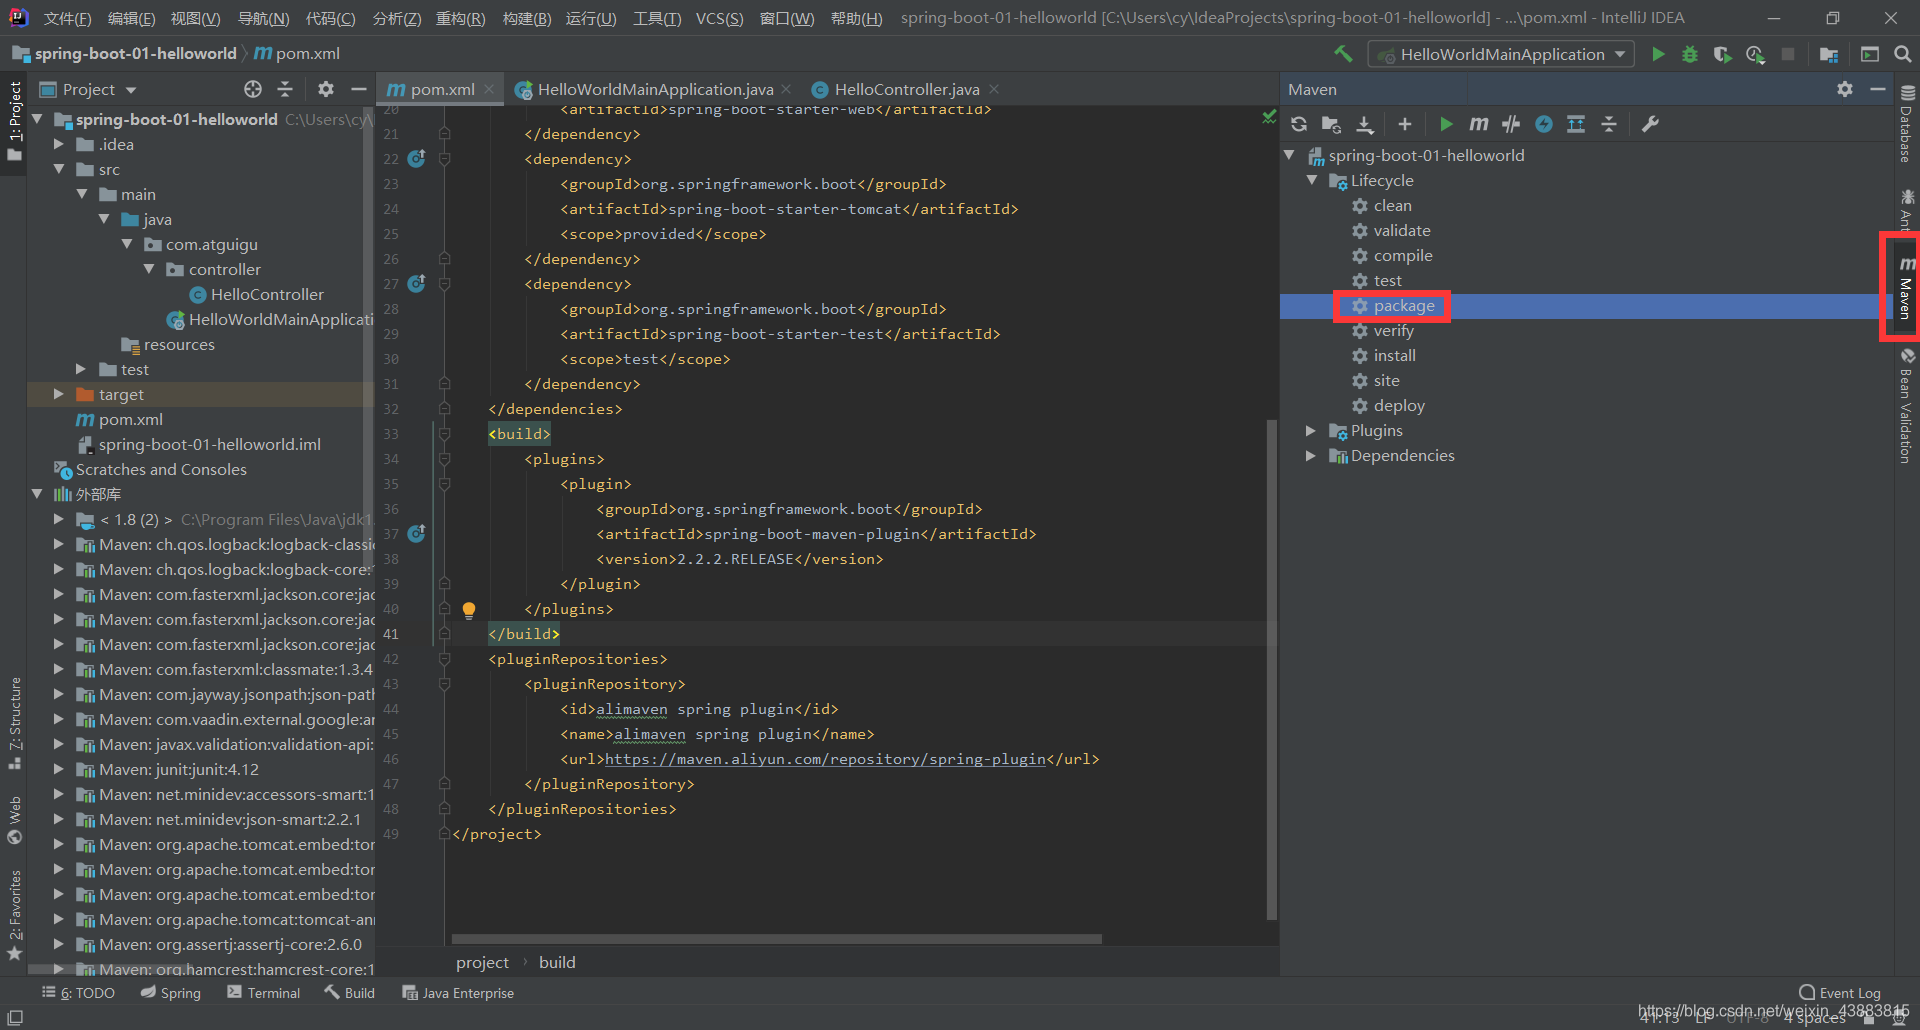
從控制檯可以看到,jar包的位置

從資料夾也可看到
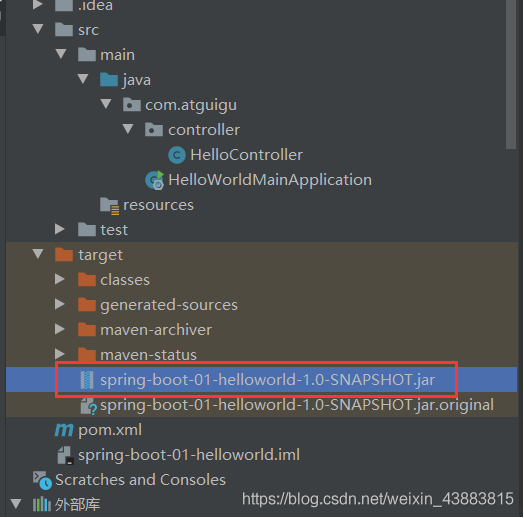
7.6.3 執行jar包
現在可以直接在命令列用jar命令啟動
- cd到jar的目錄
- 用Java -jar命令執行
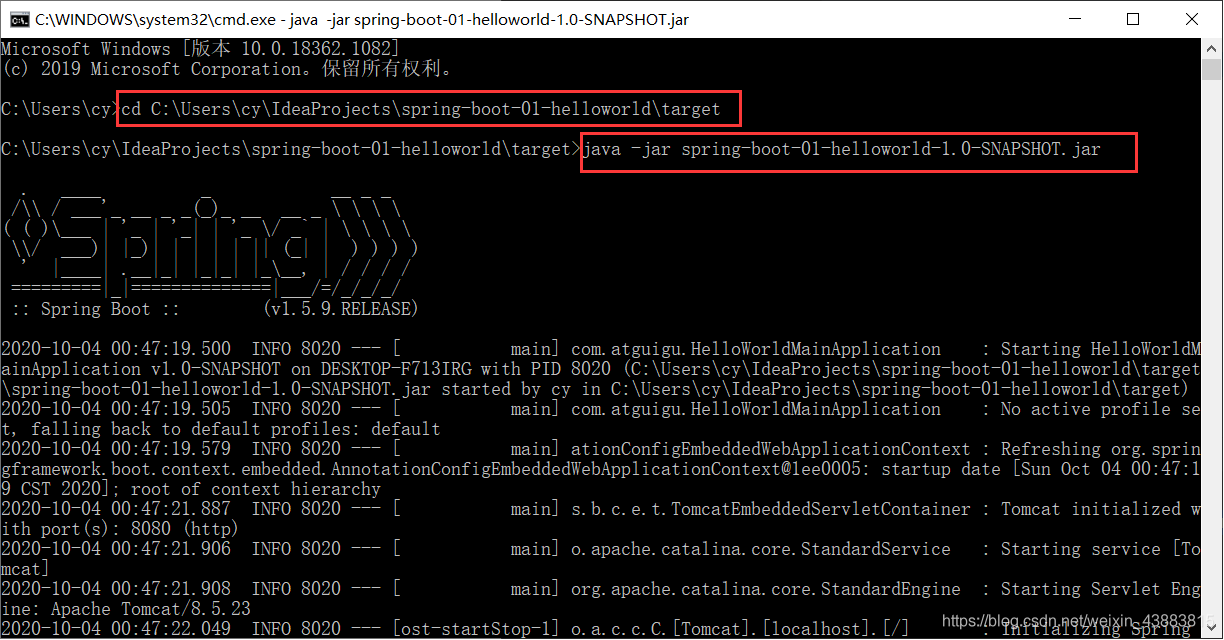
瀏覽器顯示如下,執行成功

8 附錄:程式碼彙總
似乎增加@會自動import,而且中途pom檔案增加了好幾個依賴,因此將完整程式碼附到下面。
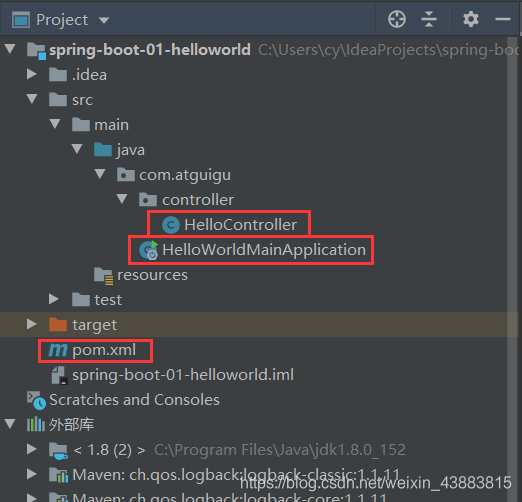
HelloWorldMainApplication.java:
package com.atguigu;

import org.springframework.boot.SpringApplication;
import org.springframework.boot.autoconfigure.*;


@SpringBootApplication
public class HelloWorldMainApplication {

    public static void main(String[] args) {

        SpringApplication.run(HelloWorldMainApplication.class,args);
    }

}
HelloController.java:
package com.atguigu.controller;
import org.springframework.stereotype.Controller;
import org.springframework.web.bind.annotation.RequestMapping;
import org.springframework.web.bind.annotation.ResponseBody;

@Controller
public class HelloController {
    @ResponseBody
    @RequestMapping("/hello")
    public String hello(){
        return "Hello World";
    }
}
pom.xml:
<?xml version="1.0" encoding="UTF-8"?>
<project xmlns="http://maven.apache.org/POM/4.0.0"
         xmlns:xsi="http://www.w3.org/2001/XMLSchema-instance"
         xsi:schemaLocation="http://maven.apache.org/POM/4.0.0 http://maven.apache.org/xsd/maven-4.0.0.xsd">
    <modelVersion>4.0.0</modelVersion>

    <groupId>org.example</groupId>
    <artifactId>spring-boot-01-helloworld</artifactId>
    <version>1.0-SNAPSHOT</version>

    <parent>
        <groupId>org.springframework.boot</groupId>
        <artifactId>spring-boot-starter-parent</artifactId>
        <version>1.5.9.RELEASE</version>
        <relativePath/> <!-- lookup parent from repository -->
    </parent>
    <dependencies>
        <dependency>
            <groupId>org.springframework.boot</groupId>
            <artifactId>spring-boot-starter-web</artifactId>
        </dependency>
        <dependency>
            <groupId>org.springframework.boot</groupId>
            <artifactId>spring-boot-starter-tomcat</artifactId>
            <scope>provided</scope>
        </dependency>
        <dependency>
            <groupId>org.springframework.boot</groupId>
            <artifactId>spring-boot-starter-test</artifactId>
            <scope>test</scope>
        </dependency>
    </dependencies>
    <build>
        <plugins>
            <plugin>
                <groupId>org.springframework.boot</groupId>
                <artifactId>spring-boot-maven-plugin</artifactId>
                <version>2.2.2.RELEASE</version>
            </plugin>
        </plugins>
    </build>
    <pluginRepositories>
        <pluginRepository>
            <id>alimaven spring plugin</id>
            <name>alimaven spring plugin</name>
            <url>https://maven.aliyun.com/repository/spring-plugin</url>
        </pluginRepository>
    </pluginRepositories>
</project>