SpringBoot-web開發(四): SpringMVC的拓展、接管(原始碼分析)
[SpringBoot系列】前文:
SpringBoot-web開發(一): 靜態資源的匯入(原始碼分析)
SpringBoot-web開發(二): 頁面和圖示客製化(原始碼分析)
SpringBoot-web開發(三): 模板引擎Thymeleaf
目錄
一. 解讀官方檔案
SpringBoot在底層對我們的SpringMVC新增了很多設定,我們接下來需要了解如何擴充套件,如何客製化自己的設定
官方檔案點選這裡:官方檔案
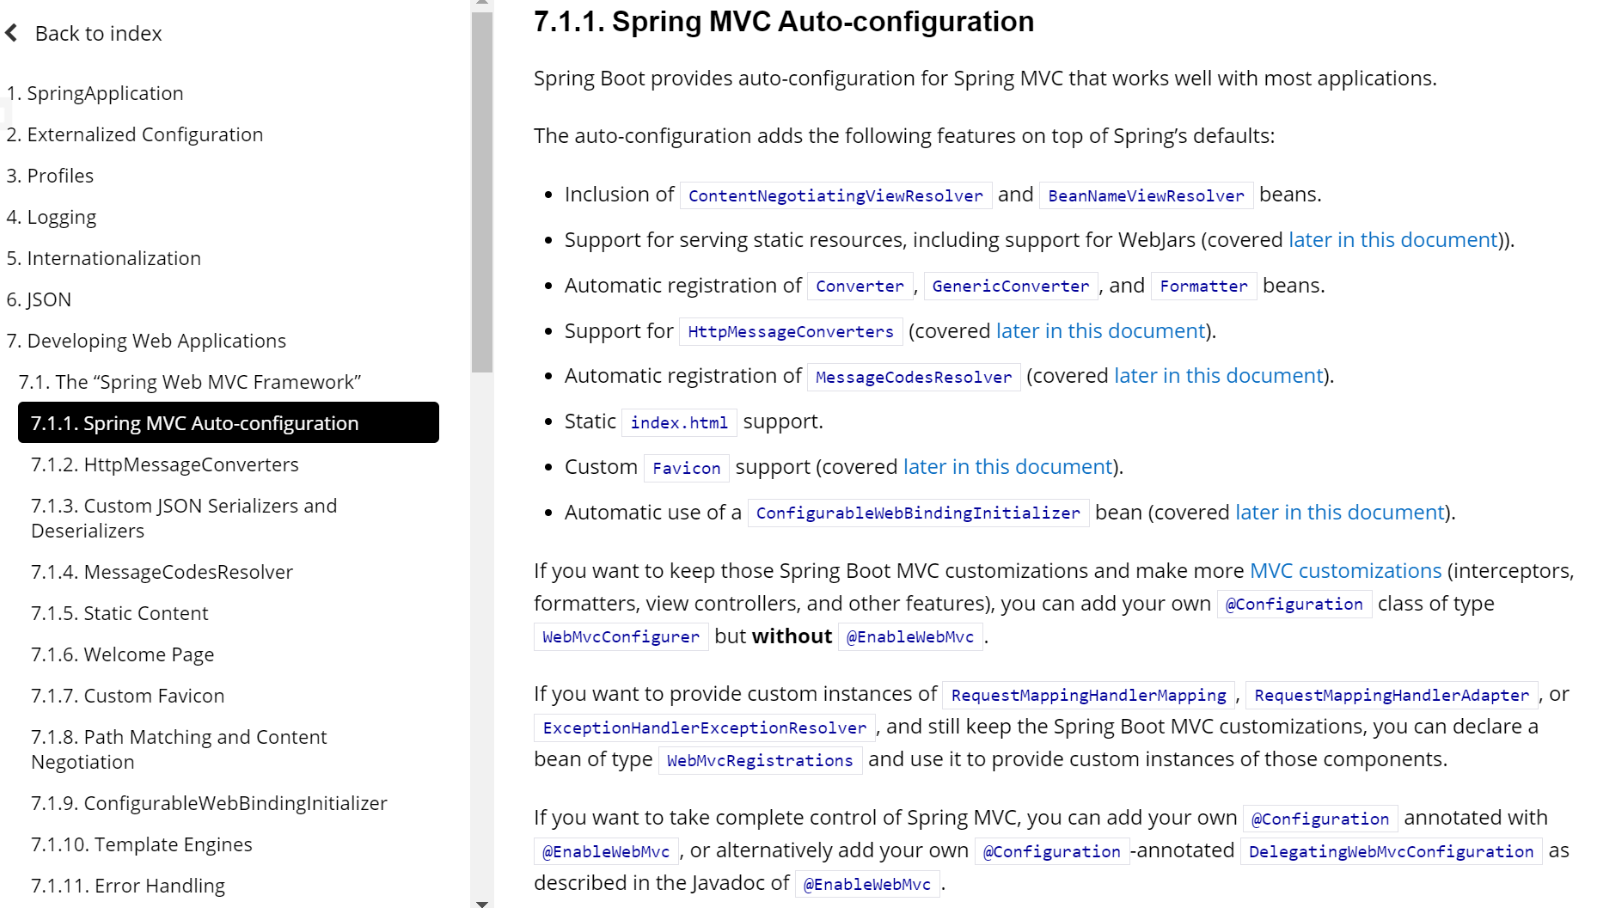
Spring Boot為Spring MVC提供了自動設定,可與大多數應用程式完美配合
自動設定在Spring的預設設定之上新增了以下功能:
- 包含
ContentNegotiatingViewResolver和BeanNameViewResolverbeans(檢視解析器) - 支援服務靜態資源,包括對WebJars的支援
- 自動註冊
Converter,GenericConverter(型別轉換器)和Formatter(格式化器)beans - 對
HttpMessageConverters(訊息轉換,轉換Http請求和響應)的支援 - 自動註冊
MessageCodesResolver(生成繫結錯誤訊息) - 靜態
index.html支援(首頁對映) - 自定義
Favicon支援(圖示自定義) - 自動使用
ConfigurableWebBindingInitializerbean(資料web的初始化繫結)
使用方法:
如果要保留這些SpringBoot MVC特點並新增更多的MVC功能(攔截器,格式化程式,檢視控制器和其他功能),則將@Configuration註解新增到型別為WebMvcConfigurer的類上,但不新增@EnableWebMvc註解
如果要提供RequestMappingHandlerMapping,RequestMappingHandlerAdapter或ExceptionHandlerExceptionResolver的自定義範例,並且仍然保留Spring Boot MVC自定義,則可以宣告WebMvcRegistrations型別的bean,並使用它提供這些元件的自定義範例
如果要完全控制Spring MVC,則可以新增用@EnableWebMvc註解的自己的@Configuration,或者按照@EnableWebMvc的Javadoc中的說明新增自己的@Configuration註解的DelegatingWebMvcConfiguration
二. 拓展SpringMVC
根據官方檔案:如果要保留這些SpringBoot MVC特點並新增更多的MVC功能(攔截器,格式化程式,檢視控制器和其他功能),則將
@Configuration註解新增到型別為WebMvcConfigurer的類上,但不新增@EnableWebMvc註解
1. 拓展原理
我們檢視SpringBoot底層webmvc自動設定類WebMvcAutoConfiguration中的自動適配類WebMvcAutoConfigurationAdapter

可以看到這樣一個註解@Import(EnableWebMvcConfiguration.class)
也就是匯入了EnableWebMvcConfiguration這個類
我們繼續檢視該類原始碼,發現它繼承了一個父類別DelegatingWebMvcConfiguration
我們繼續檢視DelegatingWebMvcConfiguration的原始碼,可以找到這樣一個方法

@Autowired(required = false)
public void setConfigurers(List<WebMvcConfigurer> configurers) {
    if (!CollectionUtils.isEmpty(configurers)) {
        this.configurers.addWebMvcConfigurers(configurers);
    }
}
該方法就是從Spring容器中獲取所有的webmvcConfigurer,及所有的設定類
也就是SpringBoot在底層自動獲取了所有的設定類,包括預設的設定類以及我們自定義的設定類,這也就是我們拓展的原理,我們可以新增自己設定類,注入到Spring容器中,然後SpringBoot即可自動設定
2. 環境搭建:編寫拓展設定類
接下來,我們搭建一個拓展設定類環境進行實驗:
首先在主程式同級目錄下新建一個
congfig包,用來放置的設定類,其中新建設定類MyMvcConfiguration用來拓展裝配MVC的設定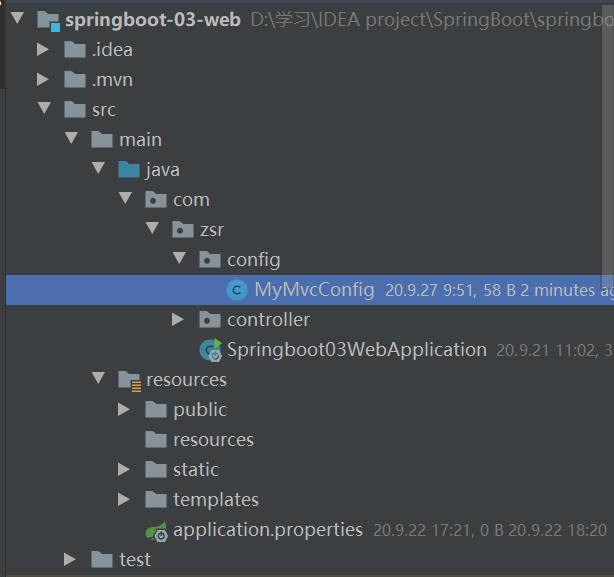
通過官方檔案的介紹,我們需要將@Configuration註解新增到型別為WebMvcConfigurer的類上,但不新增@EnableWebMvc註解
因此我們現在IDEA中搜尋(連按shift)一下WebMvcConfigurer,可以發現它是一個介面
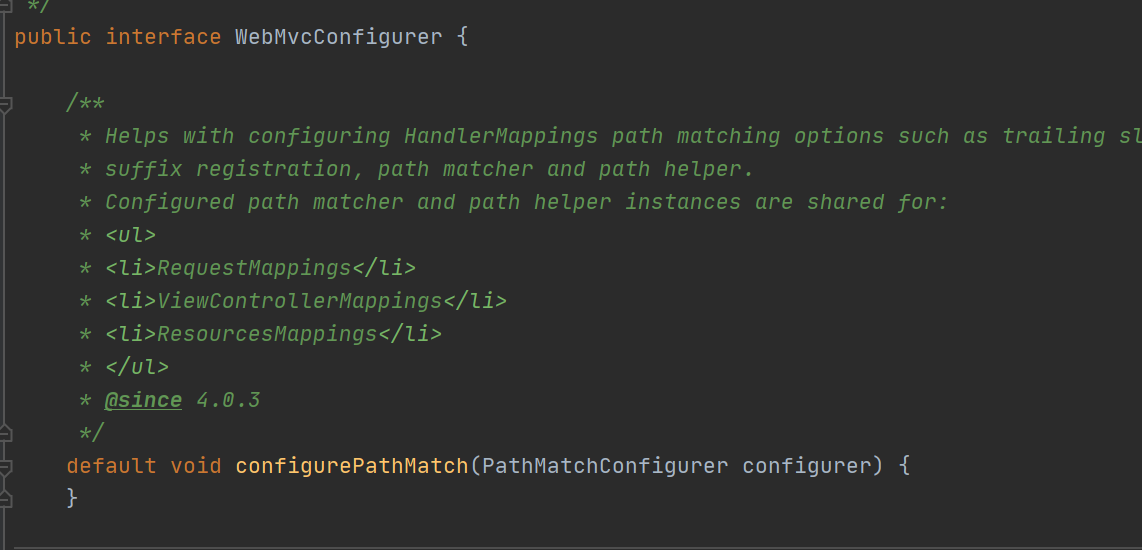
因此我們需要自定義的設定類MyMvcConfiguration需要實現這個介面
package com.zsr.config;

import org.springframework.context.annotation.Configuration;
import org.springframework.web.servlet.config.annotation.WebMvcConfigurer;

@Configuration
public class MyMvcConfig implements WebMvcConfigurer {

}
3. 範例:拓展檢視解析器
搭建好設定類環境後,我們接下來以官方檔案中的第一條檢視解析器為例,設定拓展一個自定義的檢視解析器
在SpringMVC中,我們在其組態檔中手動設定
檢視解析器;<!--檢視解析器:DispatcherServlet給他的ModelAndView 1.獲取了ModelAndView的資料 2.解析ModelAndView的檢視名字 3.拼接檢視名字,找到對應的檢視 hello 4.將資料渲染到這個檢視上 --> <bean class="org.springframework.web.servlet.view.InternalResourceViewResolver" id="InternalResourceViewResolver"> <!--字首--> <property name="prefix" value="/WEB-INF/jsp/"/> <!--字尾--> <property name="suffix" value=".jsp"/> </bean>而在SpringBoot,自動設定了檢視解析器;我們接下來檢視原始碼,分析一下其設定好的的檢視解析器;
1. 預設檢視解析器原始碼分析
官網檔案中提到SpringBoot預設的一個檢視解析器
ContentNegotiatingViewResolver,我們來分析分析
我們在IDEA中搜尋ContentNegotiatingViewResolver類
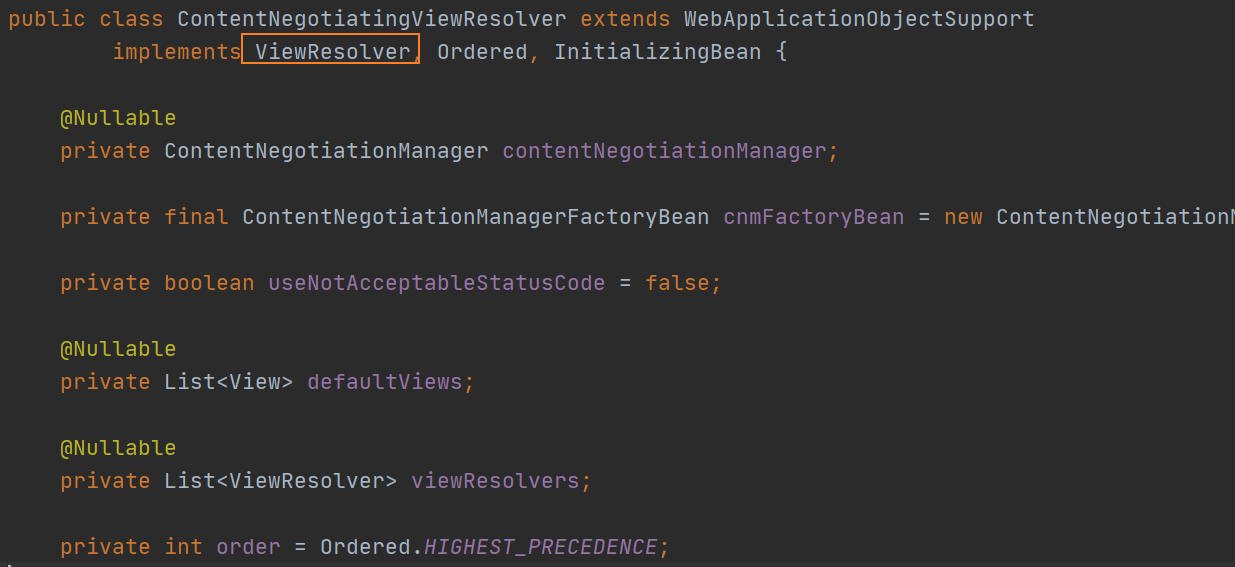
發現它實現了ViewResolver介面,我們繼續檢視ViewResolver的原始碼
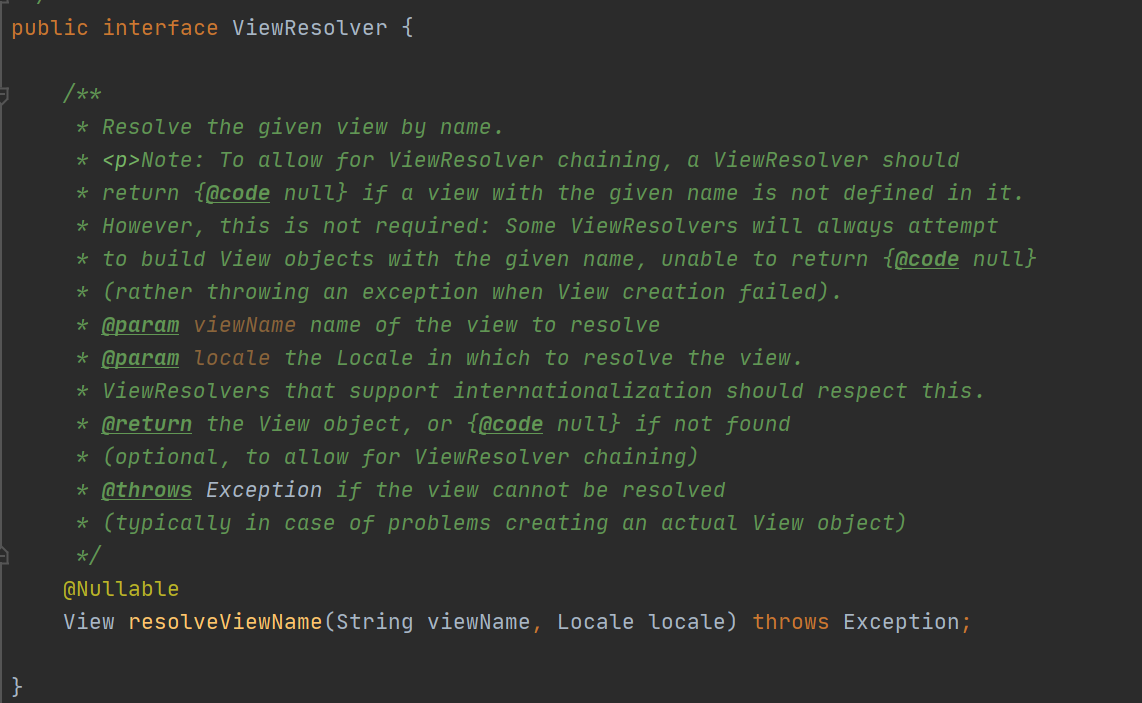
其中有一個解析檢視名稱方法resolveViewName
我們檢視ContentNegotiatingViewResolver繼承ViewResolver介面實現的該方法
public View resolveViewName(String viewName, Locale locale) throws Exception {
    RequestAttributes attrs = RequestContextHolder.getRequestAttributes();
    Assert.state(attrs instanceof ServletRequestAttributes, "No current ServletRequestAttributes");
    List<MediaType> requestedMediaTypes = getMediaTypes(((ServletRequestAttributes) attrs).getRequest());
    if (requestedMediaTypes != null) {
        // 獲取候選的檢視物件
        List<View> candidateViews = getCandidateViews(viewName, locale, requestedMediaTypes);
        // 選擇一個最適合的檢視物件,然後把這個物件返回
        View bestView = getBestView(candidateViews, requestedMediaTypes, attrs);
        if (bestView != null) {
            return bestView;
        }
    }

    String mediaTypeInfo = logger.isDebugEnabled() && requestedMediaTypes != null ?
        " given " + requestedMediaTypes.toString() : "";

    if (this.useNotAcceptableStatusCode) {
        if (logger.isDebugEnabled()) {
            logger.debug("Using 406 NOT_ACCEPTABLE" + mediaTypeInfo);
        }
        return NOT_ACCEPTABLE_VIEW;
    }
    else {
        logger.debug("View remains unresolved" + mediaTypeInfo);
        return null;
    }
}
可以發現該方法,就是從候選的檢視中篩選出最好的檢視,我們點開getCandidateViews方法看看如何獲取候選的檢視
private List<View> getCandidateViews(String viewName, Locale locale, List<MediaType> requestedMediaTypes)
    throws Exception {

    List<View> candidateViews = new ArrayList<>();
    if (this.viewResolvers != null) {
        Assert.state(this.contentNegotiationManager != null, "No ContentNegotiationManager set");
        //遍歷所有檢視
        for (ViewResolver viewResolver : this.viewResolvers) {
            //將檢視封裝成一個物件
            View view = viewResolver.resolveViewName(viewName, locale);
            if (view != null) {
                //新增到候選檢視
                candidateViews.add(view);
            }
            for (MediaType requestedMediaType : requestedMediaTypes) {
                List<String> extensions = this.contentNegotiationManager.resolveFileExtensions(requestedMediaType);
                for (String extension : extensions) {
                    String viewNameWithExtension = viewName + '.' + extension;
                    view = viewResolver.resolveViewName(viewNameWithExtension, locale);
                    if (view != null) {
                        candidateViews.add(view);
                    }
                }
            }
        }
    }
    if (!CollectionUtils.isEmpty(this.defaultViews)) {
        candidateViews.addAll(this.defaultViews);
    }
    //返回候選檢視
    return candidateViews;
}
那麼所有的檢視是從那裡來的呢?我們可以找到initServletContext方法,該方法就是得到所有檢視解析器的方法
@Override
protected void initServletContext(ServletContext servletContext) {
    //從BeanFactoryUtils工具類中獲取容器中的所有檢視解析器
    Collection<ViewResolver> matchingBeans =
        BeanFactoryUtils.beansOfTypeIncludingAncestors(obtainApplicationContext(), ViewResolver.class).values();//ViewRescolver.class 把所有的檢視解析器來組合的
    if (this.viewResolvers == null) {
        this.viewResolvers = new ArrayList<>(matchingBeans.size());
        for (ViewResolver viewResolver : matchingBeans) {
            if (this != viewResolver) {
                this.viewResolvers.add(viewResolver);
            }
        }
    }
    //...
}
其中從BeanFactoryUtils工具類中獲取容器中的所有檢視解析器,然後再對其進行賦值,拿來組合
因此:SpringBoot預設的ContentNegotiatingViewResolver檢視解析器就是用來組合所有的檢視解析器的
2. 自定義檢視解析器
上述預設的
ContentNegotiatingViewResolver類通過在Spring容器中去找檢視解析器並進行組合那如果我們自己向Spring容器中去新增一個檢視解析器,這個類也會幫我們自動的將它組合進來
這樣是不是就實現了拓展一個自定義的檢視解析器呢?我們可以試試!
在上述編寫好的設定類MyMvcConfig類中編寫一個自己的檢視解析器靜態內部類,實現檢視解析器ViewResolver介面,重寫其抽象方法
@Configuration
public class MyMvcConfig implements WebMvcConfigurer {


    //將自定義檢視解析器實現類物件注入到bean中
    @Bean
    public ViewResolver myViewResolver() {
        return new MyViewResolver();
    }

    //自定義檢視解析器實現類
    static class MyViewResolver implements ViewResolver {
        @Override
        public View resolveViewName(String viewName, Locale locale) throws Exception {
            return null;
        }
    }
}
接下來我們通過打斷點檢視我們自定義的檢視解析器是否生效
我們給DispatcherServlet類中的doDispatch方法加個斷點進行偵錯一下,因為所有的請求都會走到這個方法中
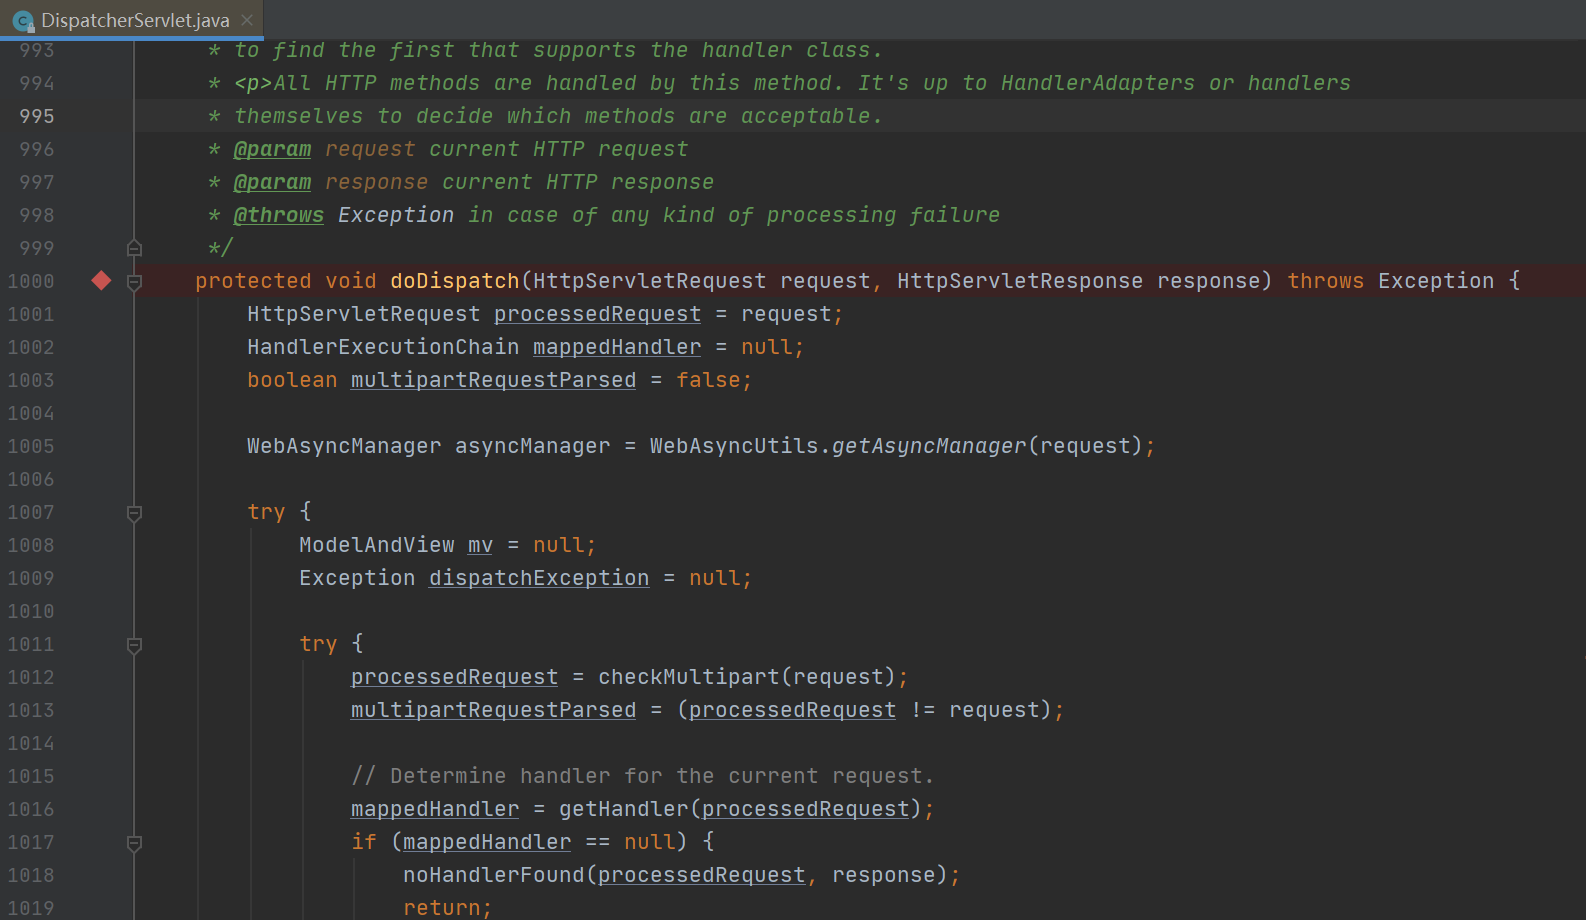
然後我們Debug主程式

程式啟動後,存取localhost:8080,程式進入doDispatcher方法
我們點選this可以檢視所有的檢視解析器物件
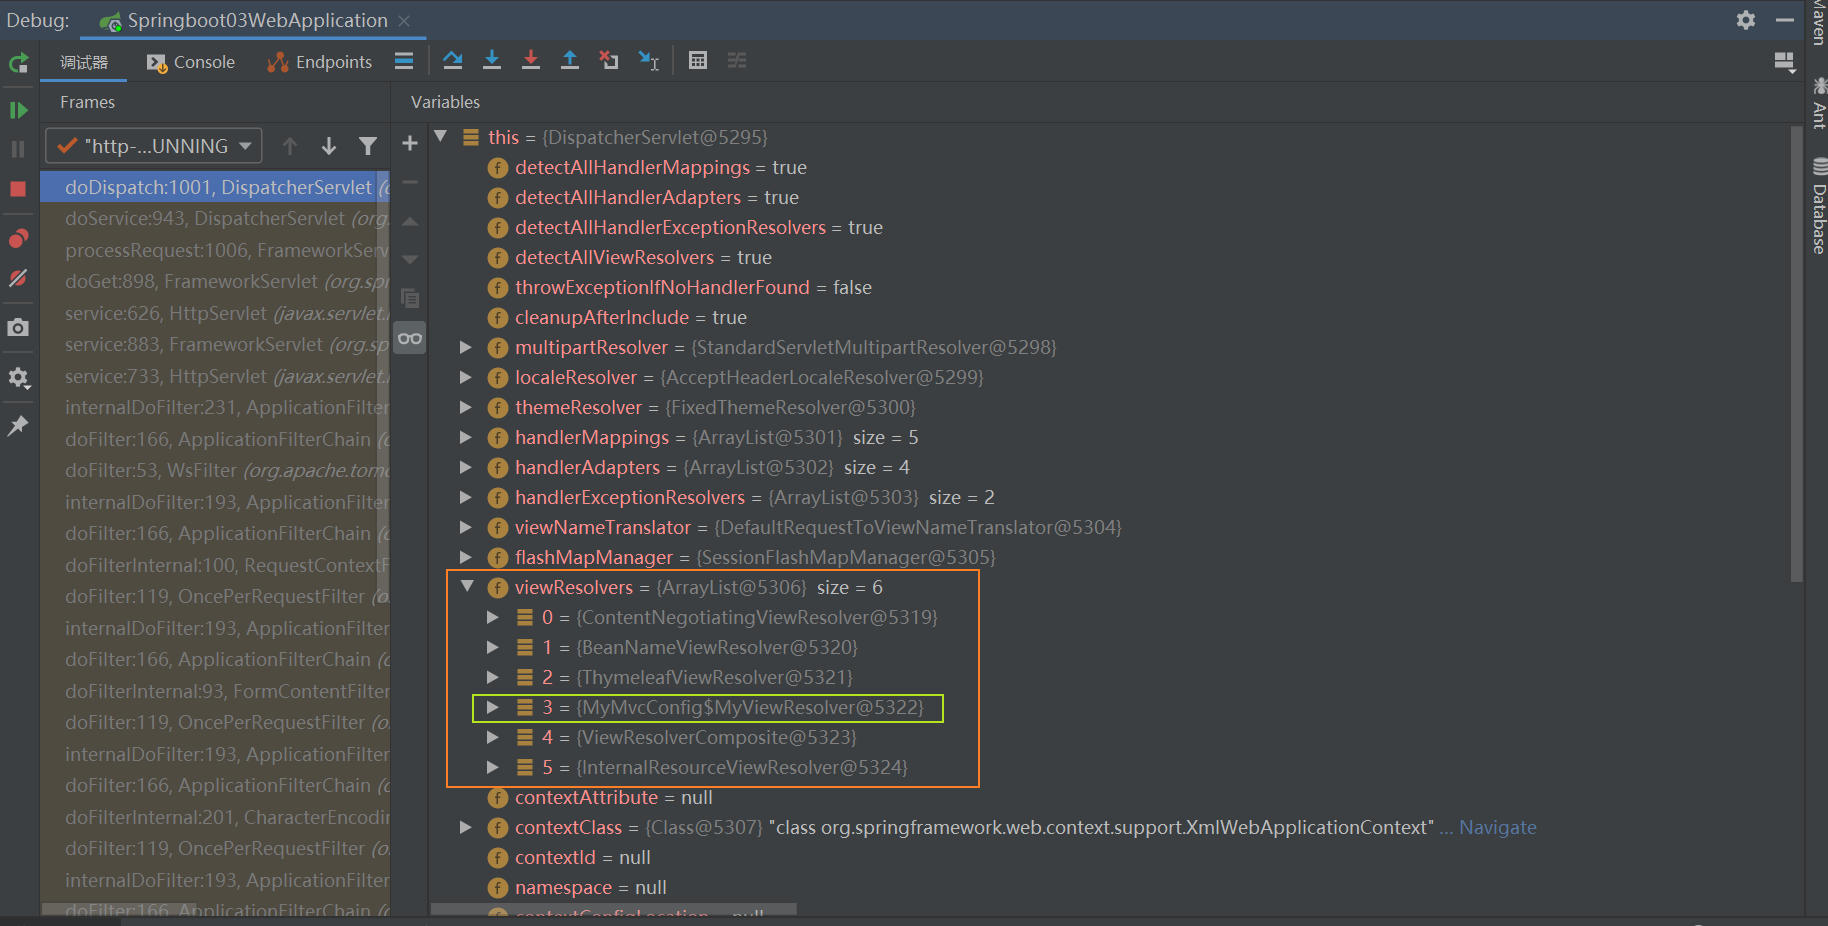
`ContentNegotiatingViewResolver`:SpringBoot預設檢視解析器
`BeanNameViewResolver`:SpringBoot預設檢視解析器
`TymeleafViewResolver`:匯入了Tymeleaf模板引擎後Tymeleaf的檢視解析器
`MyViewResolver`:我們自定義的檢視解析器
我們發現了自定義的檢視解析器,證明ContentNegotiatingViewResolver成功將我們自定義的檢視解析器組合進來;
4. 修改SpringBoot預設設定
上述我們通過拓展檢視解析器的例子簡單瞭解瞭如何在SpringBoot新增自定義功能
我們還可以直接通過修改預設的設定達到自己想要的效果,接下來我們以修改預設的日期格式為例,找尋修改預設設定的方法
範例:修改預設日期格式
SpringBoot底層的自動裝配,都在
WebMvcAutoConfiguration自動設定類中,可以在其中找到關於格式化的方法mvcConversionService()
找到格式化轉換器:
@Bean
@Override
public FormattingConversionService mvcConversionService() {
    //獲取組態檔中的格式化規則
    Format format = this.mvcProperties.getFormat();
    WebConversionService conversionService = new WebConversionService(new DateTimeFormatters()
                                                                      .dateFormat(format.getDate()).timeFormat(format.getTime()).dateTimeFormat(format.getDateTime()));
    addFormatters(conversionService);
    return conversionService;
}
可以發現是從組態檔中獲取格式化的規則,然後我們按住ctrl點選mvcProperties
private final WebMvcProperties mvcProperties;
然後點選進入WebMvcPropertieswebMVC的組態檔類,可以找到關於日期格式化的方法
可以看到我們可以通過spring.mvc.format.date在組態檔中設定自定義日期格式,但是已經不推薦使用了
@Deprecated
@DeprecatedConfigurationProperty(replacement = "spring.mvc.format.date")
public String getDateFormat() {
    return this.format.getDate();
}
我們再點選getDate方法
public String getDate() {
   return this.date;
}
再點選date
public static class Format {
   /**
    * Date format to use, for example `dd/MM/yyyy`.
    */
   private String date;
   ...
}
可以看到預設的日期格式為dd/MM/yyyy
我們可以在組態檔中修改預設的格式,自定義日期格式,比如這裡為dd-MM-yyyy
spring.mvc.format.date=dd-MM-yyyy
如果設定了自己的格式化方式,就會註冊到Bean中生效,以後就必須按照自定義的日期格式書寫
其餘的預設設定亦是如此,我們都可以在原始碼中找到答案
5. 總結
通過上述拓展原理以及範例,我們可以得出以下結論:
- SpringBoot的底層,大量用到了上述設計細節思想,很多的自動設定,原理都相同;
- 如果我們想自定義一些功能元件,只需要給Spring容器中新增這個元件,然後SpringBoot就會幫我們自動設定了
- SpringBoot在自動設定很多元件的時候,先看容器中有沒有使用者自己設定的(如果使用者自己設定@bean),如果有就用使用者設定的,如果沒有就用自動設定的;
- 如果有些元件可以存在多個,比如我們的檢視解析器,就將使用者設定的和自己預設的組合起來!
三. 全面接管SpringMVC
1. 什麼是全面接管?
全面接管:SpringBoot對SpringMVC的自動設定不再需要,所有東西都是我們自己去設定!
- 實際開發中,並不推薦使用全面接管SpringMVC
- 而是推薦拓展設定,使用SpringBoot的自動設定和我們自己寫的擴充套件設定相結合的方式進行開發
在官方檔案中可以看到:如果要完全控制Spring MVC
-
可以新增用
@EnableWebMvc註解的自己的@Configuration -
或者按照
@EnableWebMvc的Javadoc中的說明新增自己的@Configuration註解的DelegatingWebMvcConfiguration
2. 測試
根據官方檔案,我們在設定類上新增@EnableWebMvc註解即實現全面接管SpringMVC
package com.zsr.config;

import org.springframework.context.annotation.Bean;
import org.springframework.context.annotation.Configuration;
import org.springframework.web.servlet.View;
import org.springframework.web.servlet.ViewResolver;
import org.springframework.web.servlet.config.annotation.EnableWebMvc;
import org.springframework.web.servlet.config.annotation.ViewControllerRegistry;
import org.springframework.web.servlet.config.annotation.WebMvcConfigurer;

import java.util.Locale;

@Configuration
@EnableWebMvc
public class MyMvcConfig implements WebMvcConfigurer {
    //將自定義檢視解析器實現類物件注入到bean中
    @Bean
    public ViewResolver myViewResolver() {
        return new MyViewResolver();
    }

    //自定義檢視解析器實現類
    static class MyViewResolver implements ViewResolver {
        @Override
        public View resolveViewName(String viewName, Locale locale) throws Exception {
            return null;
        }
    }
}
我們重新啟動主程式進行測試,存取localhost:8080

可以看到先前設定的主頁已經失效,所有都回歸到了最初的樣子
3. @EnableWebMvc原理
為什麼加了這個註解,自動設定就失效了,我們來一探究竟~
我們檢視@EnableWebMvc註解原始碼,發現匯入了類DelegatingWebMvcConfiguration類
@Retention(RetentionPolicy.RUNTIME)
@Target(ElementType.TYPE)
@Documented
@Import(DelegatingWebMvcConfiguration.class)
public @interface EnableWebMvc {
}
進入該類看看,發現它繼承了一個父類別WebMvcConfigurationSupport
public class DelegatingWebMvcConfiguration extends WebMvcConfigurationSupport {
   	//...
}
也就是說,我們使用了@EnableWebMvc註解,就相當於匯入了WebMvcConfigurationSupport類
我們再檢視Webmvc自動設定類WebMvcAutoConfiguration
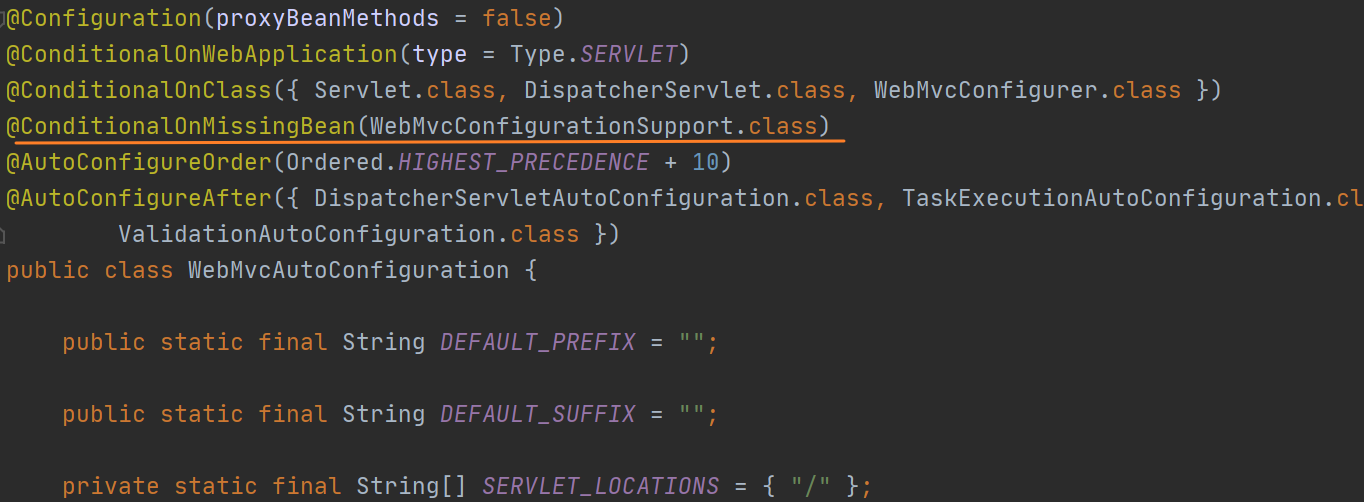
可以這樣一個註解@ConditionalOnMissingBean(WebMvcConfigurationSupport.class)
意思是:在WebMvcConfigurationSupport類不存在的情況下生效
也就是如果這個類存在,則整個WebMvcAutoConfiguration自動設定類會失效,即SpringBoot的自動設定全部失效
而我們匯入@EnableWebMvc註解,就匯入了WebMvcConfigurationSupport類,因此SpringBoot所有的自動設定失效