Centos 8 LNMP環境部署zabbix監控
2020-09-29 17:00:58
LNMP環境構建
本次構建LNMP環境採用原始碼的方式來進行構建
| 軟體包 | 下載地址 |
|---|---|
| nginx-1.19.2.tar.gz | http://nginx.org/download/ |
| mysql | mysql-8.0.13-linux-glibc2.12-x86_64.tar.xz |
| php-7.4.10.tar.gz | https://www.php.net/downloads.php |
準備工作
1.準備一臺centos 8 的系統
2.提前關閉防火牆以及selinux
3.提前解決相關原始碼包的依賴問題
防火牆以及selinux的關閉
[root@localhost ~]# hostnamectl set-hostname zabbix  //修改主機名
[root@localhost ~]# su     //輸入su 或者base 生效主機名的設定
[root@zabbix ~]# systemctl stop firewalld       //關閉防火牆
[root@zabbix ~]# systemctl disable firewalld
Removed /etc/systemd/system/multi-user.target.wants/firewalld.service.
Removed /etc/systemd/system/dbus-org.fedoraproject.FirewallD1.service.
[root@zabbix ~]# vim /etc/selinux/config    //修改selinux的組態檔
......
SELINUX=disabled
......
[root@zabbix ~]# setenforce 0      //生效設定
原始碼編譯依賴關係解決
[root@zabbix ~]# yum install gcc gcc-c++ autoconf automake libtool make zlib zlib-devel openssl openssl-devel pcre* pcre-devel -y
Nginx的安裝
編譯安裝過程
[root@zabbix ~]# mkdir /lnmp      //建立一個目錄用於存放原始碼包
[root@zabbix ~]# cd /lnmp/
[root@zabbix lnmp]# wget http://nginx.org/download/nginx-1.19.2.tar.gz   //下載Nginx原始碼包
[root@zabbix lnmp]# useradd -s /sbin/nologin -M nginx   //建立Nginx使用者
[root@zabbix lnmp]# tar -xf nginx-1.19.2.tar.gz   //解壓原始碼包
[root@zabbix lnmp]# cd nginx-1.19.2/    //進入Nginx目錄
[root@zabbix nginx-1.19.2]# ./configure --prefix=/usr/local/nginx --with-http_dav_module --with-http_stub_status_module --with-http_addition_module --with-http_sub_module --with-http_flv_module --with-http_mp4_module --with-pcre    //然後進行原始碼編譯
[root@zabbix nginx-1.19.2]# mkae -j 2 && make install
make  -j  引數 使用這個引數可以加快編譯的效率
[root@zabbix nginx-1.19.2]# cd /usr/local/nginx/    //編譯完成以後,在對應的目錄下就會多出如下的內容
[root@zabbix nginx]# ls
conf  html  logs  sbin
對Nginx進行設定
[root@zabbix ~]# /usr/local/nginx/sbin/nginx    //啟動測試
[root@zabbix ~]# ss -tan | grep 80         //檢視埠是否正常開啟
LISTEN   0         128                 0.0.0.0:80              0.0.0.0:
[root@zabbix ~]# vim /usr/local/nginx/conf/nginx.conf    //編輯Nginx的組態檔
......
4 user nginx nginx;
43         location / {
44             root   html;
45             index  index.php index.html index.htm;
46         }
65         location ~ \.php$ {
66             root           html;
67             fastcgi_pass   127.0.0.1:9000;
68             fastcgi_index  index.php;
69             fastcgi_param  SCRIPT_FILENAME  /usr/local/nginx/html$fastcgi_script_name;
70             include        fastcgi_params;
71         }
72
[root@zabbix ~]# /usr/local/nginx/sbin/nginx -t   //檢測組態檔是否有誤
nginx: the configuration file /usr/local/nginx/conf/nginx.conf syntax is ok
nginx: configuration file /usr/local/nginx/conf/nginx.conf test is successful
[root@zabbix ~]# /usr/local/nginx/sbin/nginx -s reload   //重新啟動服務即可
存取測試

mysql的安裝
安裝過程
[root@zabbix lnmp]# wget https://dev.mysql.com/get/Downloads/MySQL-8.0/mysql-8.0.13-linux-glibc2.12-x86_64.tar.xz    //下載mysql對應的軟體包
[root@zabbix lnmp]# tar -xf  mysql-8.0.13-linux-glibc2.12-x86_64.tar.xz  -C /usr/local/   //然後進行解壓,解壓路徑為/usr/local/mysql
[root@zabbix local]# mv mysql-8.0.13-linux-glibc2.12-x86_64 mysql
[root@zabbix local]# cd mysql/   //進入資料庫的目錄會發現很多檔案
[root@zabbix mysql]# ls
bin   include  LICENSE         man     README.router  support-files
docs  lib      LICENSE.router  README  share
[root@zabbix mysql]# mkdir data    //建立資料目錄
[root@zabbix mysql]# useradd -s /sbin/nologin -M mysql    //建立mysql使用者
[root@zabbix mysql]# chown -R mysql:mysql data/   把data目錄的所屬組以及使用者都給mysql使用者
[root@zabbix mysql]# bin/mysqld --initialize --user=mysql --basedir=/usr/local/mysql --datadir=/usr/local/mysql/data     //然後初始化資料庫
......
2020-09-28T06:36:47.435694Z 5 [Note] [MY-010454] [Server] A temporary password is generated for root@localhost: rf!i!svaS6dh   初始化密碼登入資料庫用
[root@zabbix mysql]# cd support-files/
[root@zabbix support-files]# cp -a mysql.server /etc/init.d/    //複製mysql的啟動指令碼到/etc/init.d 目錄下
[root@zabbix support-files]# chmod a+x /etc/init.d/mysql.server    //給mysql啟動指令碼執行許可權
[root@zabbix ~]# /etc/init.d/mysql.server start   //啟動資料庫
Starting MySQL.Logging to '/usr/local/mysql/data/zabbix.err'.
... SUCCESS!
[root@zabbix ~]# ss -tan |grep 3306     //檢視埠
LISTEN   0         70                        *:33060                  *:*
LISTEN   0         128                       *:3306                   *:*
[root@zabbix ~]# vim /etc/profile            //編輯環境變陣列態檔
PATH=$PATH:$HOME/bin:/usr/local/mysql/bin   //新增mysql bin目錄的位置
[root@zabbix ~]# source .bash_profile     //生效環境變數檔案
[root@zabbix ~]# mysql -uroot -p      //啟動如果出現如下問題
mysql: error while loading shared libraries: libtinfo.so.5: cannot open shared object file: No such file or directory
[root@zabbix ~]# ln -s /usr/lib64/libtinfo.so.6.1 /usr/lib64/libtinfo.so.5      //執行這一步操作即可
[root@zabbix ~]# mysql -uroot -p    //登入驗證
mysql> alter user 'root'@'localhost' identified by '123';     //修改密碼  初始密碼太複雜
PHP的安裝
依賴包安裝
[root@zabbix ~]# yum -y install gcc gcc-c++ libxml2-devel openssl-devel curl-devel libjpeg-devel libpng-devel libicu-devel freetype-devel openldap-devel openldap openldap-devel php-pear sqlite-devel          //解決PHP相關的依賴包
注:7.0以上的PHP還需要支援兩個軟體包(預設用yum源來下載下載不了 所以我們先進行原始碼編譯安裝)

安裝libmcrypt
ftp://mcrypt.hellug.gr/pub/crypto/mcrypt/libmcrypt 軟體包下載地址
[root@zabbix lnmp]# ll
libmcrypt-2.5.8.tar.gz     //準備這個軟體包
[root@zabbix lnmp]# tar -xf libmcrypt-2.5.8.tar.gz   //進行解壓操作
[root@zabbix lnmp]# cd libmcrypt-2.5.8/
[root@zabbix libmcrypt-2.5.8]# ./configure --prefix=/usr/local/libmcrypt     //然後進行編譯安裝
[root@zabbix libmcrypt-2.5.8]# make && make install   //然後進行安裝操作
[root@zabbix local]# vim /etc/ld.so.conf   //然後編輯這個組態檔
......
/usr/local/libmcrypt/lib
/usr/local/mysql/lib
新增如上兩條路徑   如果不新增後面操作會有誤
[root@zabbix local]# ldconfig     //執行這個生效設定
[root@zabbix local]# echo "ldconfig" >> /etc/rc.local   //把這個命令寫入開機自啟中

安裝oniguruma
https://github.com/kkos/oniguruma/archive/v6.9.4.tar.gz   //下載地址
[root@zabbix lnmp]# wget https://github.com/kkos/oniguruma/archive/v6.9.4.tar.gz   //下載原始碼包
[root@zabbix lnmp]# tar -xf v6.9.4.tar.gz    //解壓操作
[root@zabbix lnmp]# cd oniguruma-6.9.4/    //進入目錄
[root@zabbix oniguruma-6.9.4]#  ./autogen.sh && ./configure --prefix=/usr     //執行這個命令
PHP的安裝過程
[root@zabbix lnmp]# wget https://www.php.net/distributions/php-7.4.10.tar.gz    //下載PHP7.4.10原始碼包
[root@zabbix lnmp]# cd php-7.4.10/
[root@zabbix php-7.4.10]#   ./configure --prefix=/usr/local/php --with-config-file-path=/usr/local/php --with-mysqli=mysqlnd --with-pdo-mysql=mysqlnd --with-iconv-dir --with-freetype --with-jpeg --with-png-dir --with-zlib --with-libxml=/usr --enable-xml --disable-rpath --enable-bcmath --enable-shmop --enable-sysvsem --enable-inline-optimization --with-curl --enable-mbregex  --enable-fpm --enable-mbstring --enable-gd --enable-mysqlnd  --with-openssl --with-mhash --enable-pcntl --enable-sockets --with-xmlrpc --enable-soap --with-gettext
         //然後在進行編譯安裝
注意  --enable-gd   要寫為這個 不能夠寫完 --with-gd
[root@zabbix php-7.4.10]# make -j 2 && make install    //然後在來進行編譯安裝即可
[root@zabbix php-7.4.10]# cp php.ini-development /usr/local/php/php.ini     //然後複製組態檔到指定目錄下
[root@zabbix php-7.4.10]# cd /usr/local/php/etc/
[root@zabbix etc]# mv php-fpm.conf.default php-fpm.conf
[root@zabbix etc]# mv php-fpm.d/www.conf.default php-fpm.d/www.conf
[root@zabbix fpm]# cp -a /lnmp/php-7.4.10/sapi/fpm/
init.d.php-fpm.in /etc/init.d/php-fpm
[root@zabbix fpm]# chmod a+x /etc/init.d/php-fpm
[root@zabbix ~]# /etc/init.d/php-fpm start
[root@zabbix ~]# ss -tan | grep 9000
LISTEN   0         128               127.0.0.1:9000             0.0.0.0:*
測試Nginx能否識別PHP檔案
[root@zabbix ~]# echo "<?php phpinfo(); ?>" >> /usr/local/nginx/html/index.php
[root@zabbix ~]# /usr/local/nginx/sbin/nginx -s reload
存取測試

zabbix監控搭建
本次zabbix採用原始碼的方式來進行搭建
https://cdn.zabbix.com/zabbix/sources zabbix原始碼包下載地址
zabbix平臺搭建
[root@zabbix ~]# yum install -y net-snmp-devel  libevent libevent-devel     //解決相關依賴關係
[root@zabbix ~]# mkdir zabbix    //建立一個zabbix目錄用於存放zabbix原始碼包
[root@zabbix ~]# cd zabbix/
[root@zabbix zabbix]# wget https://cdn.zabbix.com/zabbix/sources/stable/5.0/zabbix-5.0.3.tar.gz      //然後下載原始碼包
[root@zabbix zabbix]# tar -xf zabbix-5.0.3.tar.gz    //解壓zabbix
[root@zabbix zabbix]# cd zabbix-5.0.3
[root@zabbix zabbix-5.0.3]# useradd -s /sbin/nologin -M zabbix              //建立zabbix使用者
[root@zabbix zabbix-5.0.3]# ./configure --prefix=/usr/local/zabbix --enable-server --enable-agent --with-mysql=/usr/local/mysql/bin/mysql_config  --with-net-snmp --with-libcurl --with-mysql       //然後進行編譯安裝
[root@zabbix zabbix-5.0.3]# make install    //最後執行安裝即可
匯入資料庫
[root@zabbix zabbix-5.0.3]# mysql -uroot -p     //登入資料庫
mysql> create database zabbix character set utf8 collate utf8_bin;     //建立一個zabbix資料庫
Query OK, 1 row affected, 2 warnings (0.05 sec)
mysql> create user 'zabbix'@'localhost' identified by 'zabbix';    //建立一個使用者為zabbix
Query OK, 0 rows affected (0.07 sec)
mysql>  grant all privileges on *.* to 'zabbix'@'localhost' with grant option;   //賦權操作
Query OK, 0 rows affected (0.08 sec)
mysql> flush privileges;
Query OK, 0 rows affected (0.01 sec)

匯入資料庫操作如下:
[root@zabbix zabbix-5.0.3]# mysql -uzabbix -p zabbix < database/mysql/schema.sql
Enter password:
[root@zabbix zabbix-5.0.3]# mysql -uzabbix -p zabbix < database/mysql/images.sql
Enter password:
[root@zabbix zabbix-5.0.3]# mysql -uzabbix -p zabbix < database/mysql/data.sql
Enter password:
[root@zabbix zabbix-5.0.3]#
設定zabbix-server端
[root@zabbix ~]# vim /usr/local/zabbix/etc/zabbix_server.conf    //編輯zabbix_server.conf
85 DBHost=localhost        //本地系統的名稱
94 DBName=zabbix           //資料庫的名稱
110 DBUser=zabbix          //資料庫使用者名稱
118 DBPassword=zabbix      //資料庫使用者名稱的密碼
[root@zabbix ~]# vim /usr/local/zabbix/etc/zabbix_agentd.conf   //編輯zabbix_agent.conf
113 Server=127.0.0.1        //zabbix_server 伺服器的地址
154 ServerActive=127.0.0.1
165 Hostname=Zabbix server

以上設定完成以後我們就可以啟動zabbix_server 伺服器了
[root@zabbix ~]# /usr/local/zabbix/sbin/zabbix_server
[root@zabbix ~]# netstat -lnupt | grep zabbix
tcp        0      0 0.0.0.0:10051           0.0.0.0:*               LISTEN      94031/zabbix_server
zabbix優化設定
[root@zabbix ~]# cd zabbix/zabbix-5.0.3/misc/init.d/fedora/core    //進入這個目錄
[root@zabbix core]# ls
zabbix_agentd  zabbix_server
[root@zabbix core]# cp -a * /etc/init.d/   //拷貝里面的檔案到啟動目錄下
[root@zabbix core]# vim /etc/init.d/zabbix_server  //編輯zabbix_server 啟動指令碼
 22         BASEDIR=/usr/local/zabbix     //編輯這一行
[root@zabbix core]# vim /etc/init.d/zabbix_agentd
 22         BASEDIR=/usr/local/zabbix     //編輯這一行
啟動測試:
[root@zabbix ~]# /etc/init.d/zabbix_server restart
Reloading systemd:                                         [  確定  ]
正在重新啟動 zabbix_server(通過 systemctl):                 [  確定  ]
[root@zabbix ~]# /etc/init.d/zabbix_agentd start
正在啟動 zabbix_agentd (via systemctl):                   [  確定  ]
[root@zabbix ~]# netstat -lnupt | grep zabbix
tcp        0      0 0.0.0.0:10050           0.0.0.0:*               LISTEN      103587/zabbix_agent
tcp        0      0 0.0.0.0:10051           0.0.0.0:*               LISTEN      94031/zabbix_server
設定zabbix瀏覽器登入介面
[root@zabbix ~]# cp -r zabbix/zabbix-5.0.3/ui/* /usr/local/nginx/html/ //複製原始碼包目錄下ui的所有內容到Nginx的釋出目錄中
登入測試
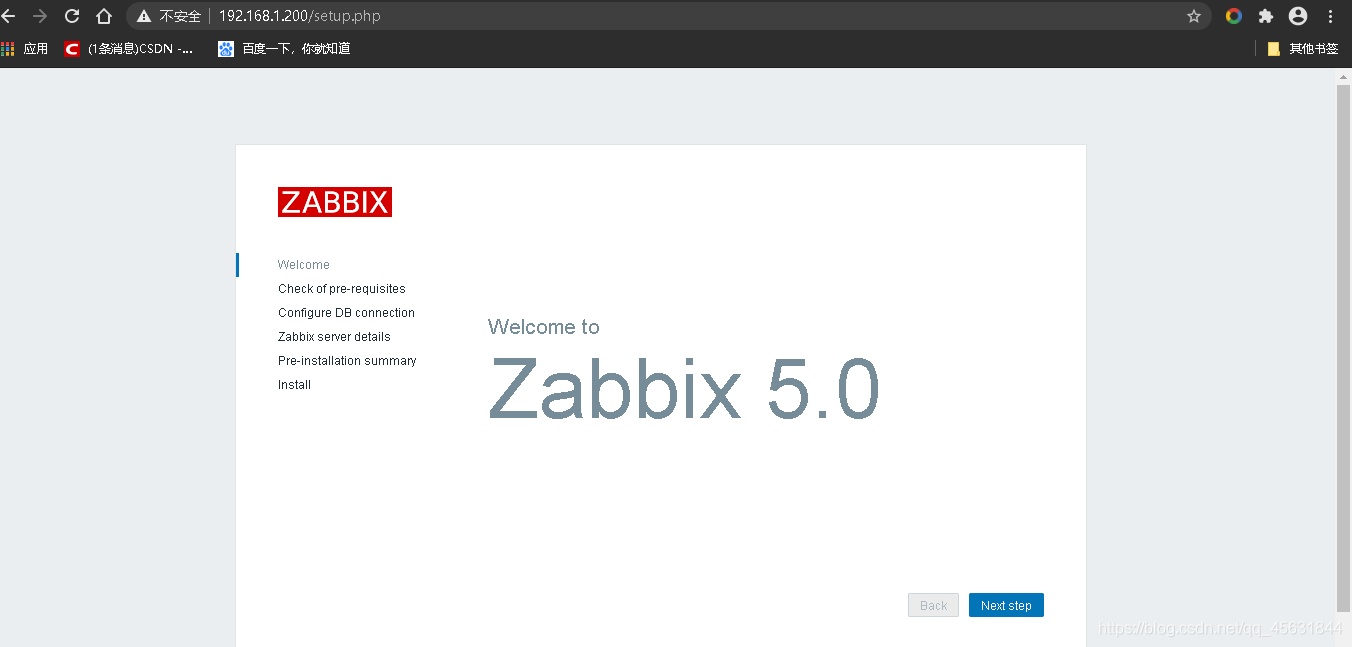
然後我們點選下一步
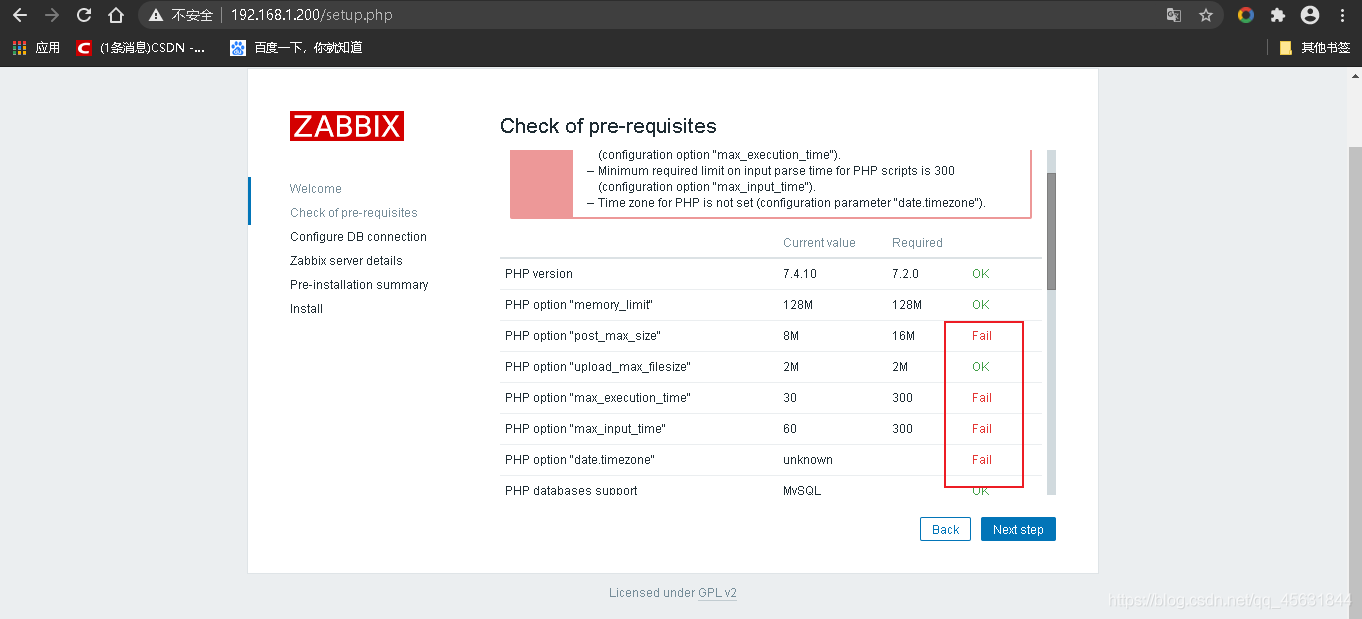
在以上畫紅框框的地方出現了一些問題,現在我們來進行解決:
[root@zabbix ~]# vim /usr/local/php/php.ini     //編輯PHP的組態檔
2 always_populate_raw_post_data = -1    //這兩個是沒有的自行新增
3 mysqli.default_socket = /tmp/mysql.sock
386 max_execution_time = 300
396 max_input_time = 300
690 post_max_size = 16M
958 date.timezone = Asia/Shanghai
[root@zabbix ~]# /etc/init.d/php-fpm restart    //重新啟動php-fpm 服務即可
如下,如果又出現以下警告
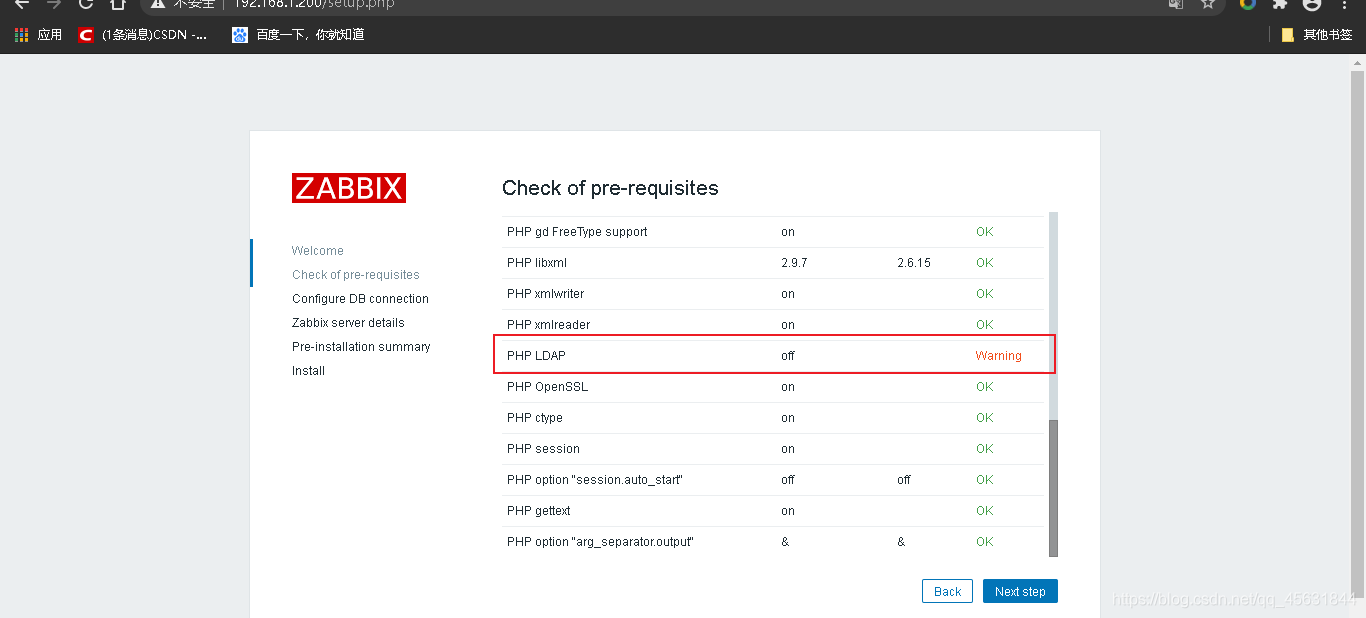
針對以上警告,為了不影響後面的功能,我們現在來進行解決操作
[root@zabbix ~]# cd /lnmp/php-7.4.10/ext/ldap/    //進入PHP原始碼編譯目錄
[root@zabbix ldap]# /usr/local/php/bin/phpize
Configuring for:
PHP Api Version:         20190902
Zend Module Api No:      20190902
Zend Extension Api No:   320190902
[root@zabbix ldap]# ./configure --with-php-config=/usr/local/php/bin/php-config --with-ldap   //如果報錯如下錯誤
configure: error: Cannot find ldap libraries in /usr/lib.
解決方案:
[root@zabbix ldap]# cp -r /usr/lib64/libldap* /usr/lib/   //執行這一項即可  然後在來重新編譯安裝
[root@zabbix ldap]# make && make install    //成功後執行這個即可
Installing shared extensions:     /usr/local/php/lib/php/extensions/no-debug-non-zts-20190902/

然後編輯php.ini檔案寫入如下內容即可:
[root@zabbix ~]# vim /usr/local/php/php.ini
extension = ldap.so
[root@zabbix ~]# /etc/init.d/php-fpm restart    /重新啟動PHP服務
[root@zabbix ~]# /usr/local/nginx/sbin/nginx -s reload   //重新啟動Nginx服務
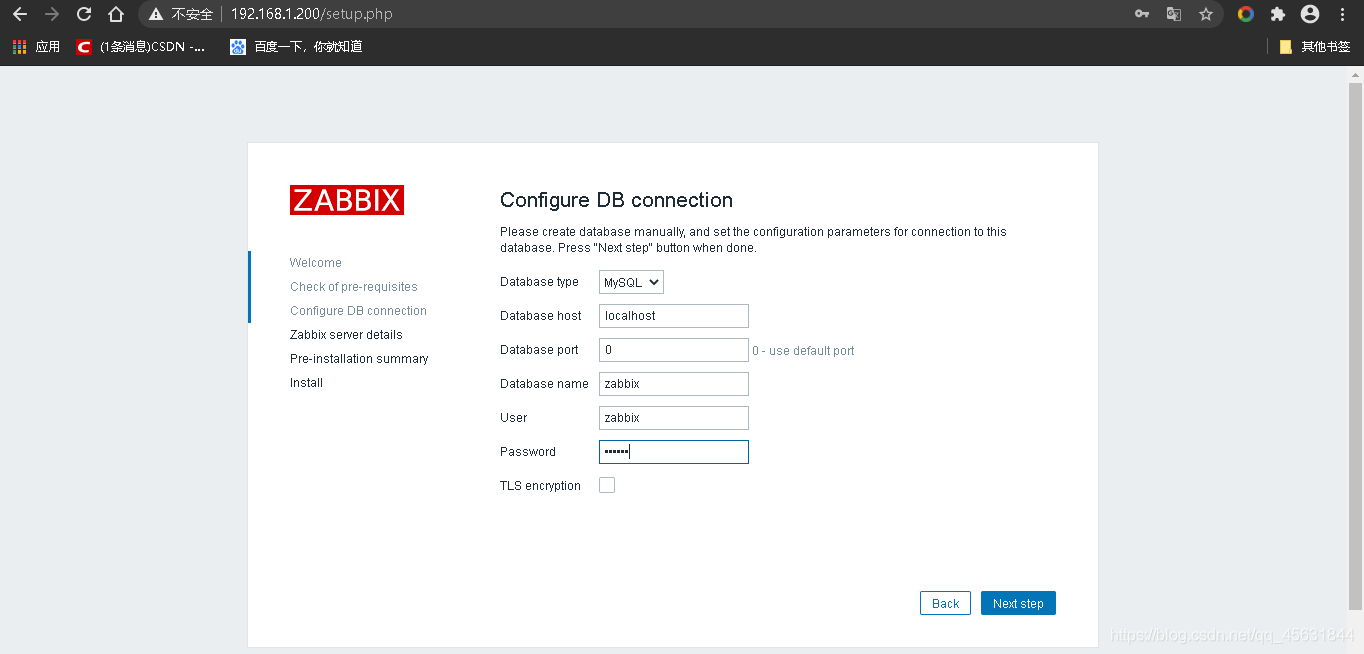
然後點選下一步如下圖(輸入zabbix 以及zabbix的密碼)
然後以下操作預設,點選下一步
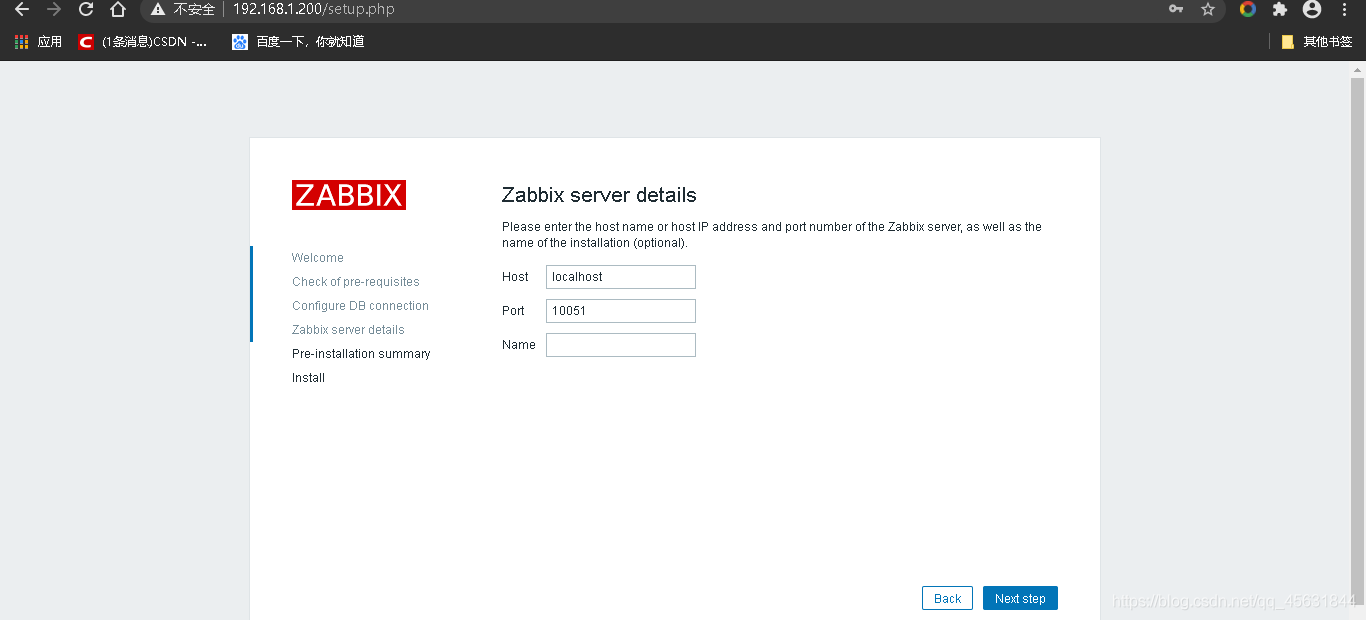
然後點選下一步
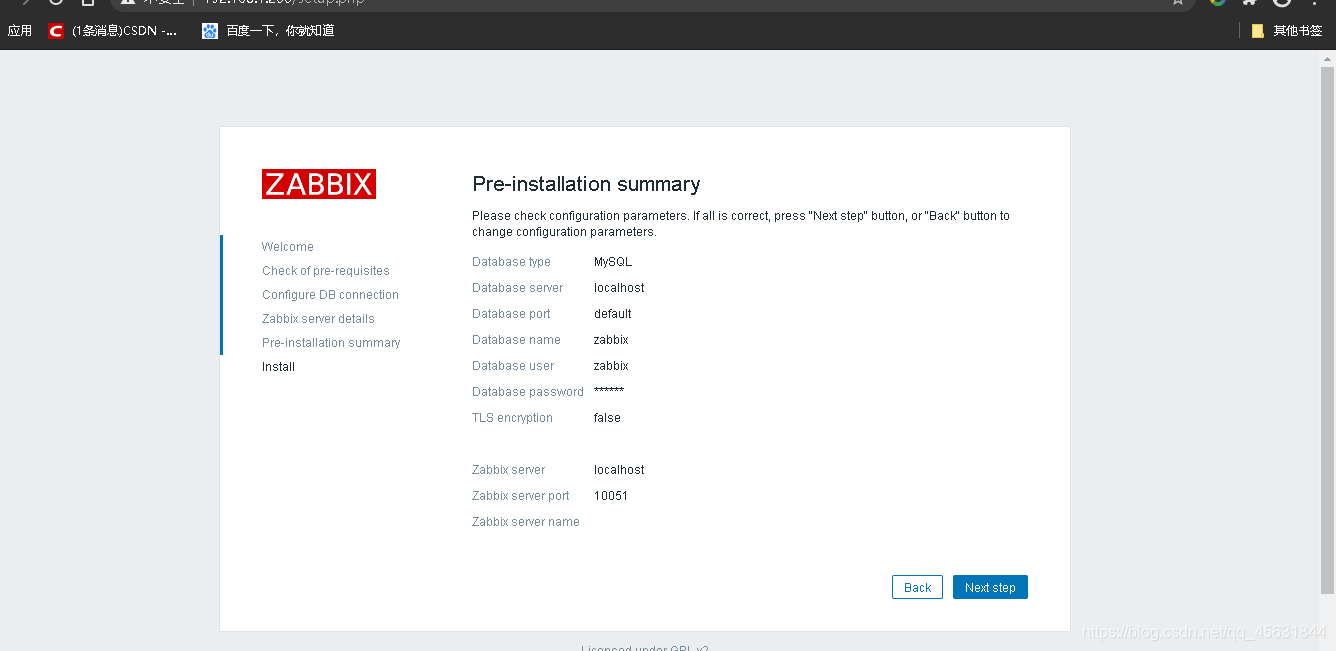
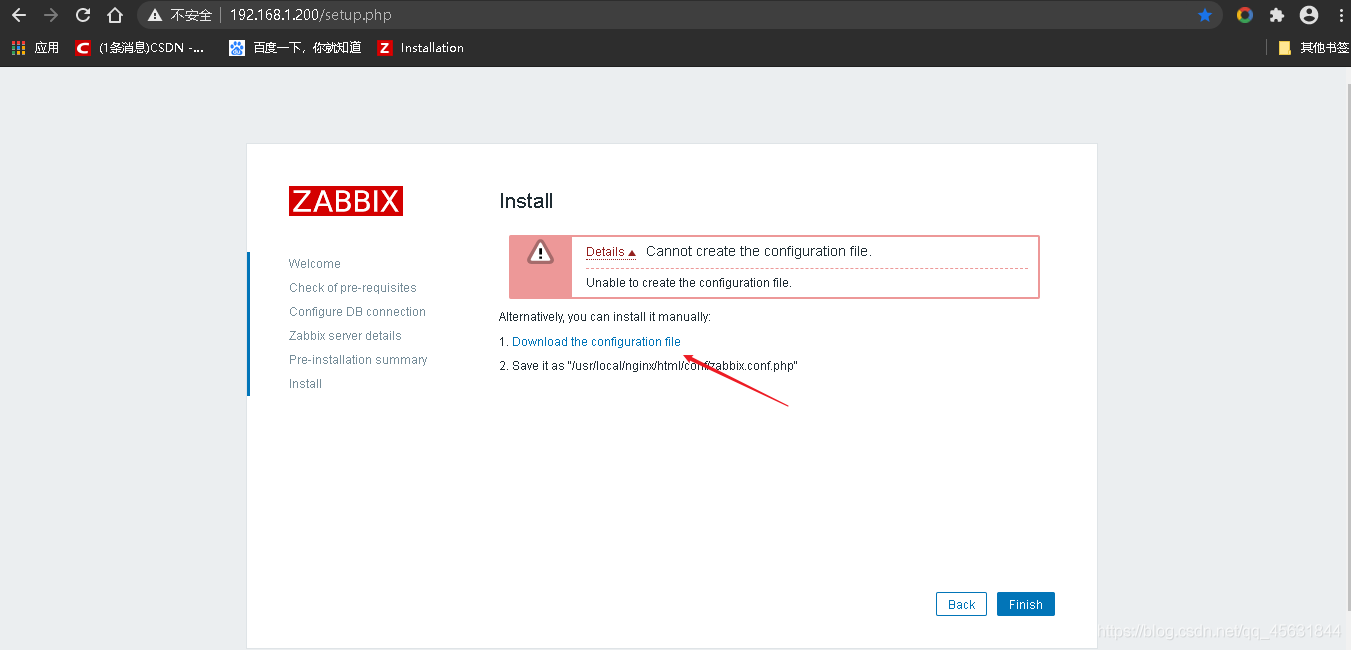
報瞭如下的錯誤
我們點選紅色箭頭的位置,然後會下載一個,我們把這個檔案上傳到Linux伺服器上/usr/local/nginx/html/conf
[root@zabbix /]# ls
 zabbix.conf.php
[root@zabbix /]# mv zabbix.conf.php /usr/local/nginx/html/conf
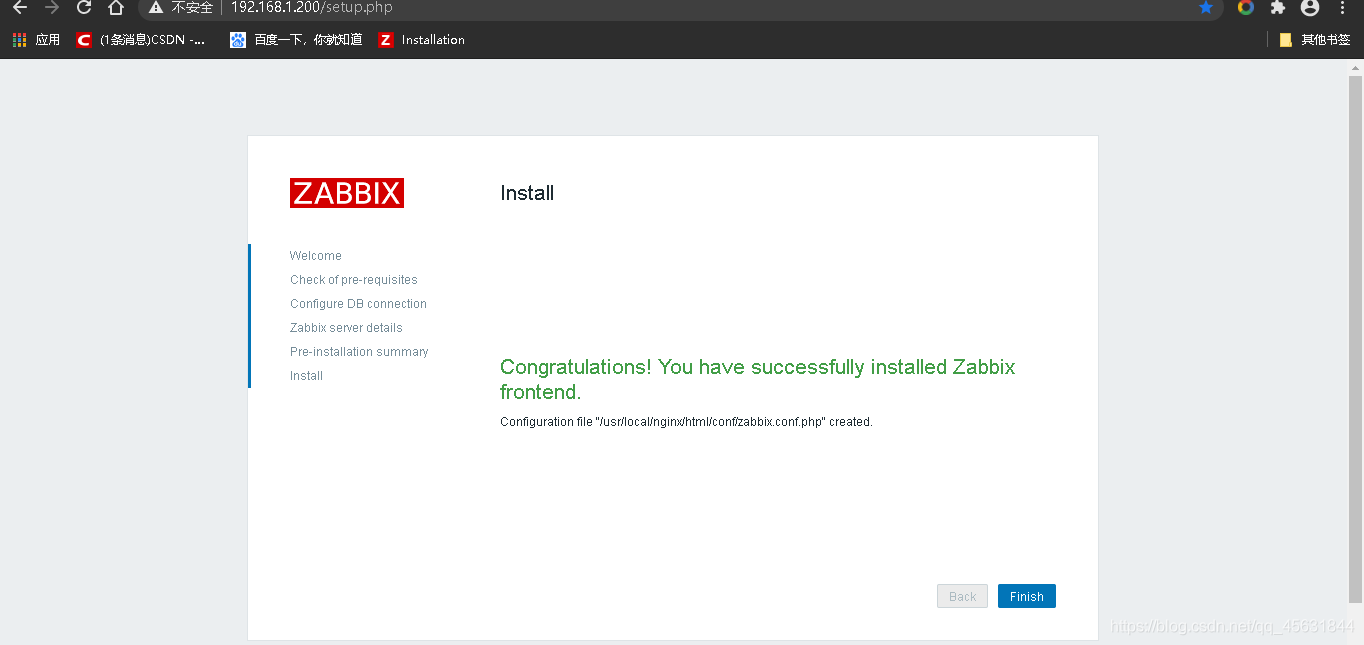
然後點選finish即可
登入介面如下圖
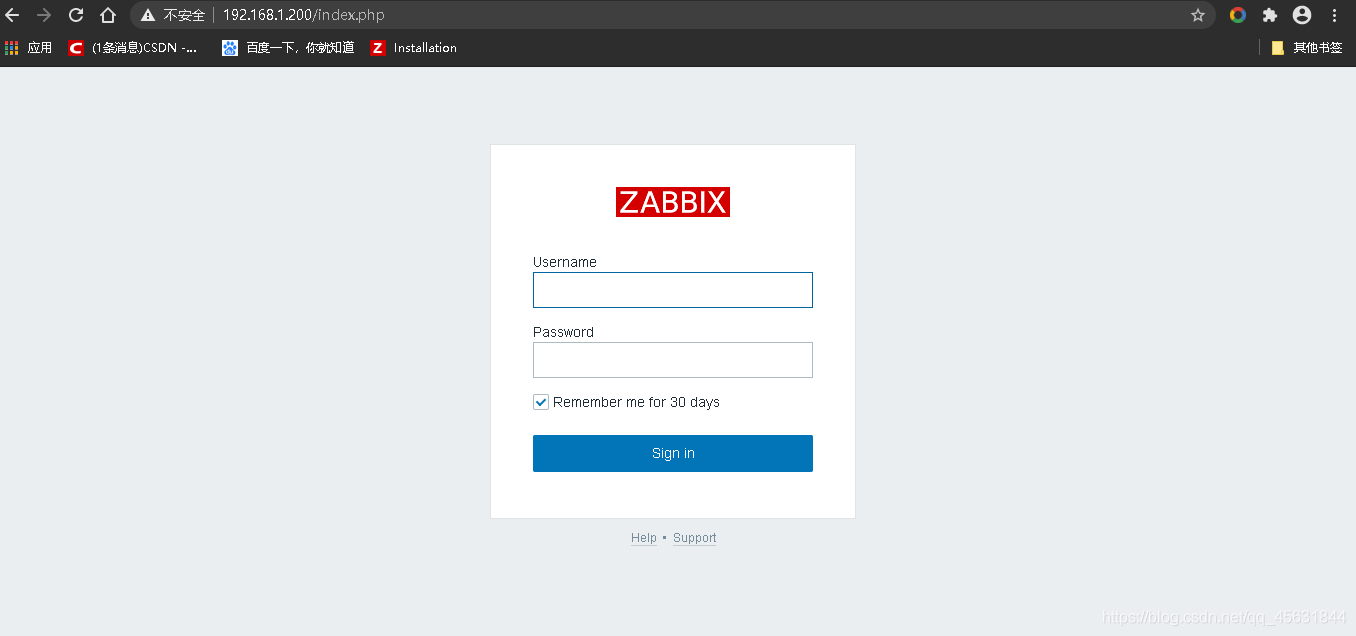
登入介面如下:
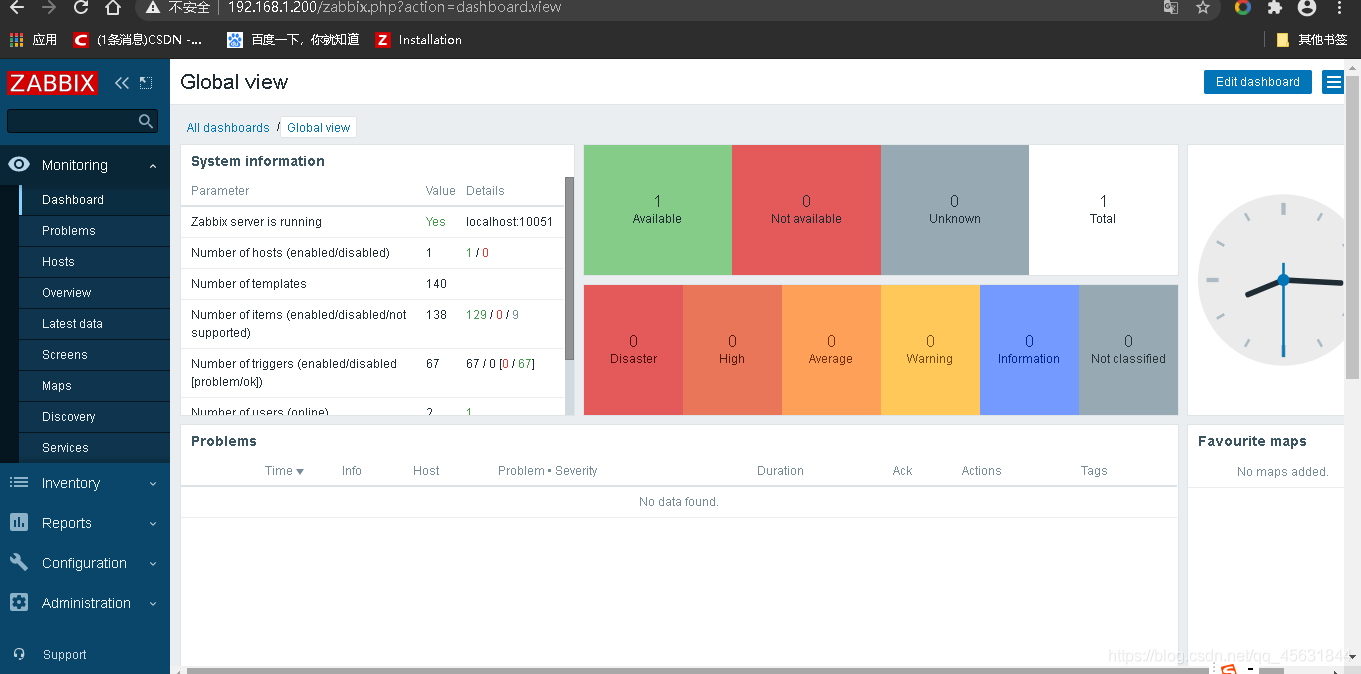
至此,LNMP環境搭建zabbix監控就此完成了,過程當中遇到的問題也是非常多。如有問題,提出加以改進,是一位還在努力中的小白網工