SpringBoot總結(十五)——介面架構風格(RESTful)
【第一部分】歷史文章:
SpringBoot總結(一)——第一個SpringBoot專案
SpringBoot總結(二)——Spring Boot的自動設定
SpringBoot總結(三)——SpringBoot的組態檔
SpringBoot總結(四)——@Value和@ConfigurationProperties的區別
SpringBoot總結(五)——@PropertySource註解與@ImportResource註解
SpringBoot總結(六)——SpringBoot組態檔預留位置
SpringBoot總結(七)——Profile的使用
SpringBoot總結(八)——組態檔的載入位置
SpringBoot總結(九)——@Conditional註解與自動設定報告
SpringBoot總結(十)——SpringBoot+Mybatis實現資料庫的CRUD(從建立到實現【超詳細附程式碼】)
SpringBoot總結(十一)——SpringBoot的靜態資源對映規則
SpringBoot總結(十二)——登入介面的實現
SpringBoot總結(十三)——修改嵌入式Servlet容器設定
SpringBoot總結(十四)——SpringBoot整合JDBCTemplate及Druid連線池
介面架構風格(RESTful)
文章目錄
前言
本篇文章主要介紹了RESTful的一些知識點,以及基於RESTful風格的CRUD的例子,和基於SpringBoot為手機APP、PC、構建統一風格的Restful API。
一、什麼是REST
REST是軟體架構的規範體系結構,它將資源的狀態以適合使用者端的形式從伺服器端傳送到使用者端(或者相反的方向)。在REST中,通過URL進行資源定位,用HTTP動作(GET、POST、DELETE、PUT等)描述操作完成功能。
遵循RESTful風格,可以使得開發的介面通用,以便呼叫者理解介面的作用。因此,基於REST構建的API就是RESTful(REST風格)API。
各大機構提供的API基本都是RESTful風格的。這樣可以統一規範,減少溝通,學習和開發的成本。
二、HTTP動作與CRUD動作對映
RESTful風格使用同一個URL,通過約定不同的HTTP方法來實施不同的業務。
下面是普通網頁的CRUD和RESTful風格的CRUD的區別:
| 動作 | 普通CRUD的URL | 普通CRUD的HTTP方法 | ReSTful的URL | RESTful的CRUD的HTTP方法 |
|---|---|---|---|---|
| 查詢 | Article/id=1 | GET | Article/{id} | GET |
| 新增 | Article?title=xxx&body=xxx | GET/POST | Article | POST |
| 修改 | Article/update?id=xxx | GET | Article/{id} | PUT或者PATCH |
| 刪除 | Article/delete?id=xxx | GET | Article/{id} | DELETE |
三、基於RESTful風格的CRUD例子
3.1、主要程式碼
下面是基於RESTful風格的CRUD的例子,並且定義了統一的資料返回格式。
運算元據庫的方式採用了SpringBoot與SpringDataJPA整合的方式;具體這裡將不再詳細介紹,下面附上一些主要的程式碼。
ArticleController.java
package com.example.controller;
import com.example.entity.Article;
import com.example.repository.ArticleRepository;
import com.example.result.ExceptionMsg;
import com.example.result.Response;
import com.example.result.ResponseData;
import io.github.yedaxia.apidocs.ApiDoc;
import org.springframework.beans.factory.annotation.Autowired;
import org.springframework.web.bind.annotation.*;

import java.io.IOException;
import java.util.ArrayList;
import java.util.List;

/**
 * 文章介面類
 */
@RequestMapping("/article")
@RestController
public class ArticleController {

    protected Response result(ExceptionMsg msg){
        return new Response(msg);
    }
    protected Response result(){
        return new Response();
    }

    @Autowired
    private ArticleRepository articleRepository;


    /**
     * 查詢所有文章
     * @return
     */
    @RequestMapping(value = "/", method = RequestMethod.GET)
    public ResponseData getArticleList() {
        List<Article> list = new ArrayList<Article>(articleRepository.findAll());
        return new ResponseData(ExceptionMsg.SUCCESS,list);

    }

    /**
     * 增加文章資訊
     * @param article  文章物件
     * @return
     */
    @RequestMapping(value = "/", method = RequestMethod.POST)
    public ResponseData add(@RequestBody Article article) {
        articleRepository.save(article);
        return new ResponseData(ExceptionMsg.SUCCESS,article);
    }


    /**
     * 刪除文章資訊
     * @param id  文章id
     * @return  Response
     */
    @RequestMapping(value = "/{id}", method = RequestMethod.DELETE)
    public Response delete(@PathVariable("id") int id) {
        articleRepository.deleteById(id);
        return result(ExceptionMsg.SUCCESS);

    }


    /**
     * 修改文章資訊
     * @param model  文章物件
     * @return ResponseData
     */
    @RequestMapping(value = "/{id}", method = RequestMethod.PUT)
    public ResponseData update(@RequestBody Article model) {
        articleRepository.save(model);
        return new ResponseData(ExceptionMsg.SUCCESS,model);
    }

    /**
     * 根據文章id 查詢文章資訊
     * @param id
     * @return ResponseData
     * @throws IOException
     */
    @RequestMapping(value = "/{id}", method = RequestMethod.GET)
    public ResponseData findArticle(@PathVariable("id") int id) throws IOException {
        Article article = articleRepository.findById(id);
        if (article != null) {
            return new ResponseData(ExceptionMsg.SUCCESS,article);
        }
        return new ResponseData(ExceptionMsg.FAILED,article);
    }

}
3.2、測試資料
啟動專案,進行如下的測試。
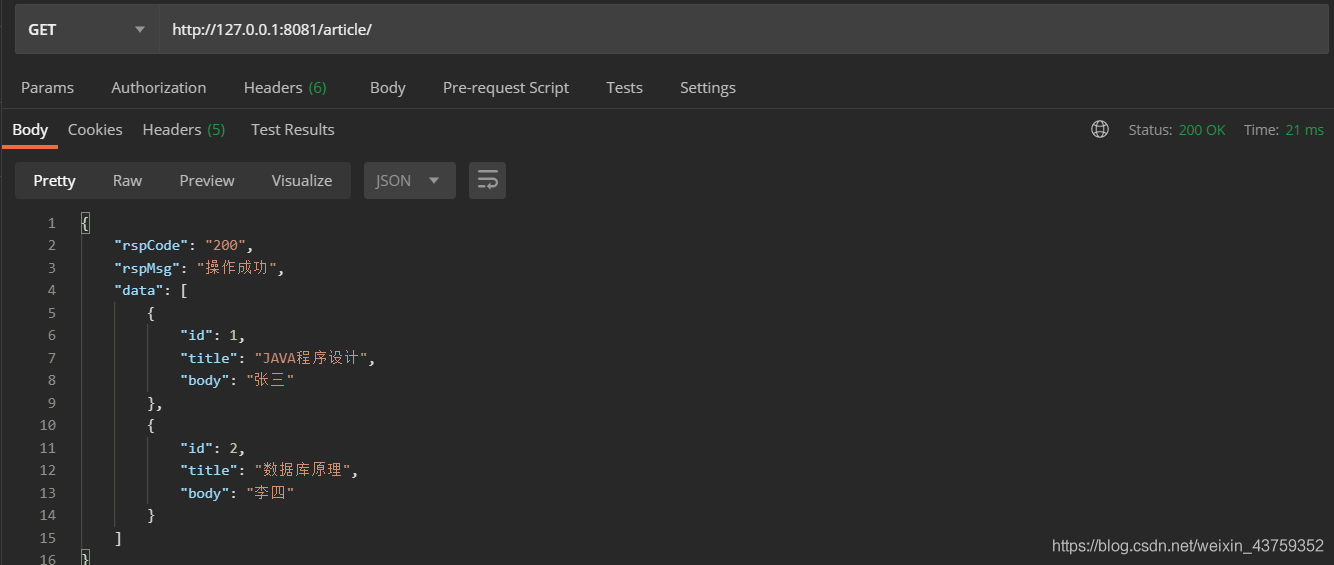
- 查詢所有資料。用GET方法存取:http://127.0.0.1:8081/article/返回的結果如下:

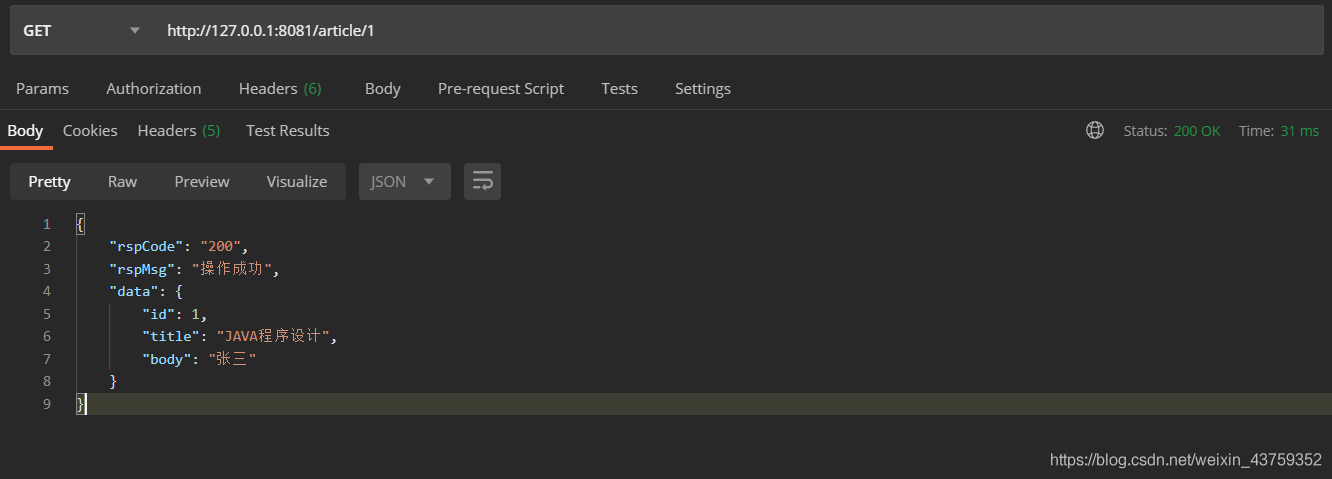
- 查詢指定的資料。用GET方法存取:http://127.0.0.1:8081/article/1返回的結果如下:

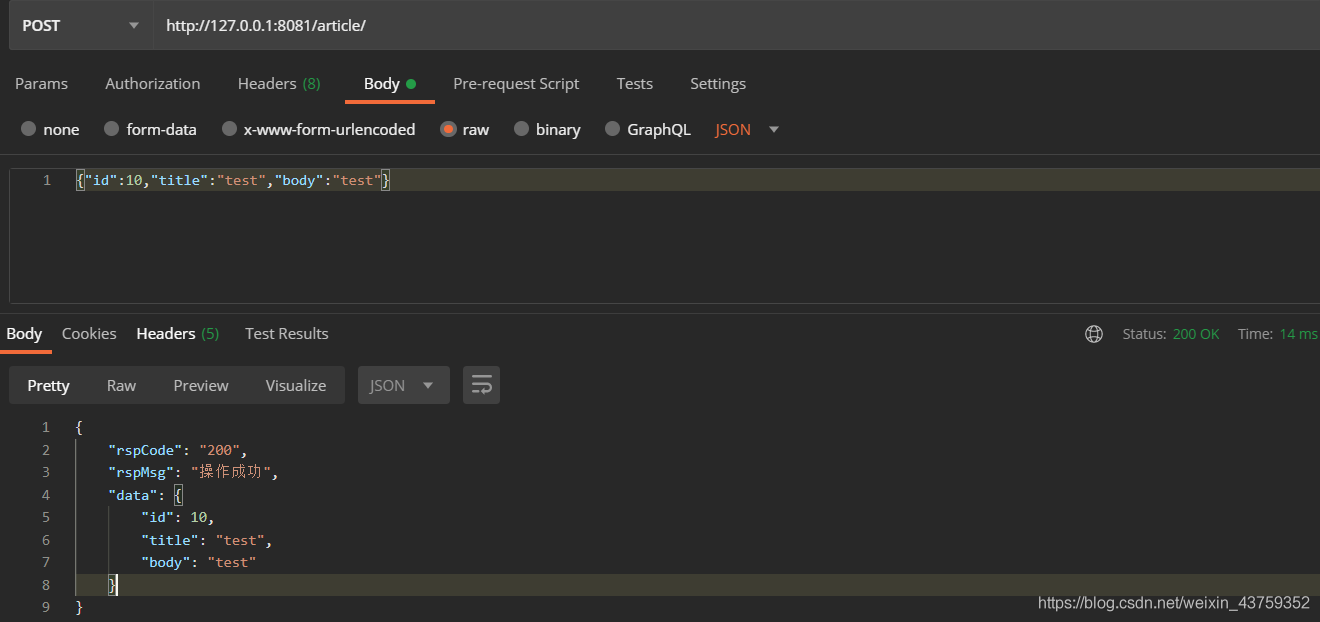
- 新增資料。用POST方法存取:http://127.0.0.1:8081/article/返回的結果如下:

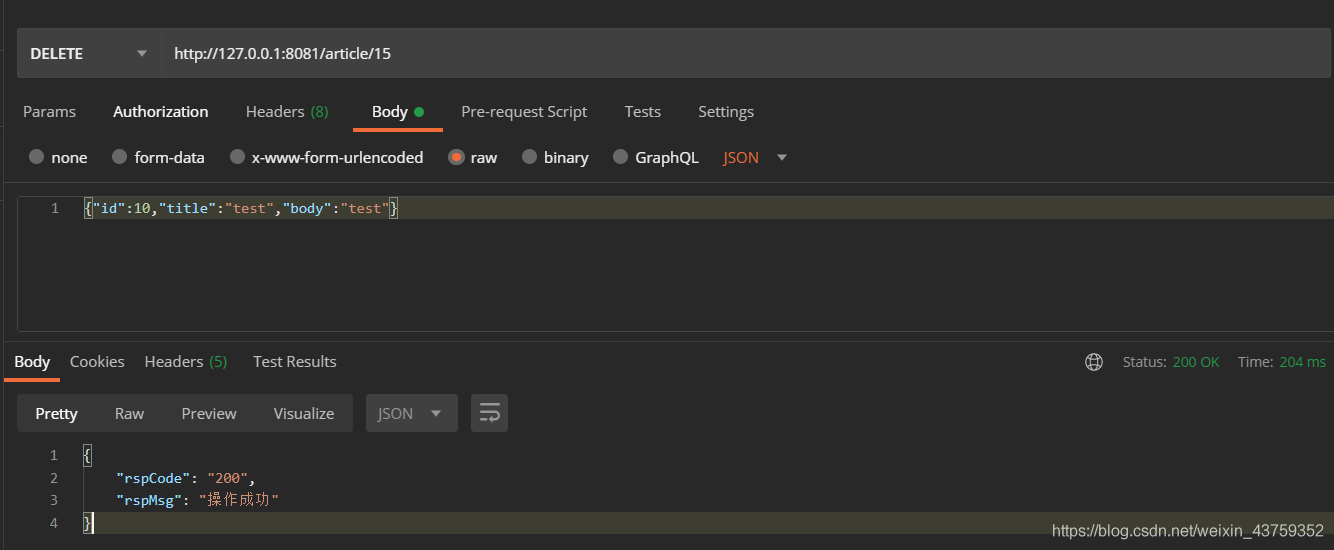
- 刪除資料。用DELETE方法存取:http://127.0.0.1:8081/article/15返回的結果如下:則代表刪除成功。

四、為手機APP、PC、H5網頁提供統一風格的API
4.1、實現響應的列舉類
package com.example.result;
//實現響應的列舉類
public enum ExceptionMsg {
	SUCCESS("200", "操作成功"),
	FAILED("999999","操作失敗"),
    ParamError("000001", "引數錯誤!"),
    FileEmpty("000400","上傳檔案為空"),
    LimitPictureSize("000401","圖片大小必須小於2M"),
    LimitPictureType("000402","圖片格式必須為'jpg'、'png'、'jpge'、'gif'、'bmp'")
    ;
   private ExceptionMsg(String code, String msg) {
        this.code = code;
        this.msg = msg;
    }
    private String code;
    private String msg;

	public String getCode() {
		return code;
	}
	public String getMsg() {
		return msg;
	}


}
4.2、實現返回的物件實體
package com.example.result;

/**
 * @author 2017810402084
 * 實現返回物件實體
 */
public class Response {
	/** 返回資訊碼*/
	private String rspCode="000000";
	/** 返回資訊內容*/
	private String rspMsg="操作成功";

	public Response() {
	}

	public Response(ExceptionMsg msg){
		this.rspCode=msg.getCode();
		this.rspMsg=msg.getMsg();
	}

	public Response(String rspCode) {
		this.rspCode = rspCode;
		this.rspMsg = "";
	}

	public Response(String rspCode, String rspMsg) {
		this.rspCode = rspCode;
		this.rspMsg = rspMsg;
	}
	public String getRspCode() {
		return rspCode;
	}
	public void setRspCode(String rspCode) {
		this.rspCode = rspCode;
	}
	public String getRspMsg() {
		return rspMsg;
	}
	public void setRspMsg(String rspMsg) {
		this.rspMsg = rspMsg;
	}

	@Override
	public String toString() {
		return "Response{" +
				"rspCode='" + rspCode + '\'' +
				", rspMsg='" + rspMsg + '\'' +
				'}';
	}
}
4.3、封裝返回結果
package com.example.result;

import com.example.exception.BusinessException;

/**
 * @author 2017810402084
 * 返回結果資料格式封裝
 */
public class ResponseData extends Response {
    private Object data;


    public ResponseData() {

    }

    public ResponseData(Object data) {
        this.data = data;
    }

    public ResponseData(ExceptionMsg msg) {
        super(msg);
    }

    public ResponseData(String rspCode, String rspMsg) {
        super(rspCode, rspMsg);
    }

    public ResponseData(String rspCode, String rspMsg, Object data) {
        super(rspCode, rspMsg);
        this.data = data;
    }

    public ResponseData(ExceptionMsg msg, Object data) {
        super(msg);
        this.data = data;
    }

    public Object getData() {
        return data;
    }

    public void setData(Object data) {
        this.data = data;
    }


    /**
     * 自定義異常的返回結果
     * @param de
     * @return
     */
    public static ResponseData defineBusinessException(BusinessException de) {
        ResponseData responseData = new ResponseData();
        responseData.setRspCode(de.getCode());
        responseData.setRspMsg(de.getMsg());
        responseData.setData(null);
        return responseData;
    }
}
4.4、統一處理異常
package com.example.exception;
import com.example.result.ResponseData;
import org.springframework.http.HttpStatus;
import org.springframework.web.bind.annotation.ExceptionHandler;
import org.springframework.web.bind.annotation.ResponseBody;
import org.springframework.web.bind.annotation.ResponseStatus;
import org.springframework.web.bind.annotation.RestControllerAdvice;
/**
 * @author 2017810402084
 * 定義全域性例外處理類:來處理各種的異常,包括自己定義的異常和內部的異常
 */
@RestControllerAdvice
public class GlobalExceptionHandler {

    /**
     * (1)處理自定義異常BusinessException
     */

    @ExceptionHandler(value = BusinessException.class)
    @ResponseBody
    public ResponseData bizBusinessException(BusinessException e) {
        return  ResponseData.defineBusinessException(e);
    }


    /**
     * (2)處理其他的異常
     */
    @ExceptionHandler(value = Exception.class)
    @ResponseBody
    public ResponseData exceptionHandler(Exception e) {
        return new ResponseData(e);
    }
}
4.5、自定義異常
package com.example.exception;
/**
 * @author 2017810402084
 * 建立自定義例外處理類:BusinessException.java
 */

public class BusinessException extends RuntimeException{

    private String code;
    private String msg;

    public BusinessException(String code, String msg) {
       this.msg = msg;
        this.code = code;
    }

    public String getCode() {
        return code;
    }

    public void setCode(String code) {
        this.code = code;
    }

    public String getMsg() {
        return msg;
    }

    public void setMsg(String msg) {
        this.msg = msg;
    }
}
4.6、進行測試
package com.example.controller;
import com.example.exception.BusinessException;
import com.example.exception.UserNameNotMatchPasswordException;
import com.example.result.ResponseData;
import org.springframework.http.HttpStatus;
import org.springframework.web.bind.annotation.RequestMapping;
import org.springframework.web.bind.annotation.RequestParam;
import org.springframework.web.bind.annotation.ResponseStatus;
import org.springframework.web.bind.annotation.RestController;
/**
 *
 * 統一異常測試類
 */

@RestController
@RequestMapping("/test")

public class TestController {

    /**
     * 自定義異常測試
     * @return
     */
    @RequestMapping("/BusinessException")
    public ResponseData DeException() {
        throw new BusinessException("40000000", "出錯了!");
    }


    /**
     * 處理其他的異常
     * @return
     */
    @RequestMapping("/getException")
    public ResponseData Exception() {

        ResponseData responseData = new ResponseData();
        responseData.setRspCode("400");
        responseData.setRspMsg("出錯");

        return responseData;
    }
}


總結
以上就是本篇所介紹的內容,以一個簡單的例子,來演示了基於RESTful風格的CRUD操作,以及構造統一風格的RESTful API。希望通過這個例子能給予大家幫助。😊關於本專案程式碼獲取方式:關注+私信並回復:【RESTful專案】即可獲取哦
