黑馬vue實戰專案-(五)參數列元件的開發
2020-09-28 11:00:59
一,建立元件,設定路由,實現基本佈局:
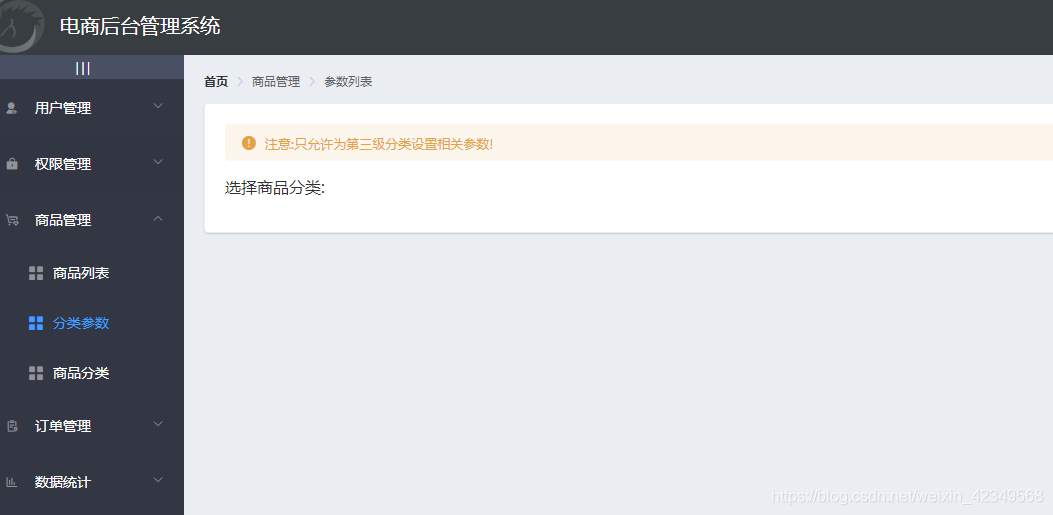
<template>
	<div>
		<!-- 麵包屑導航區 -->
		<el-breadcrumb separator-class="el-icon-arrow-right">
		  <el-breadcrumb-item :to="{ path: '/welcome' }">首頁</el-breadcrumb-item>
		  <el-breadcrumb-item>商品管理</el-breadcrumb-item>
		  <el-breadcrumb-item>參數列</el-breadcrumb-item>
		</el-breadcrumb>
		<!-- 卡片檢視區域 -->
		<el-card>
			<!-- 警告提示框 -->
			 <el-alert
			    title="注意:只允許為第三級分類設定相關引數!"
			    type="warning"
				:closable="false"
				show-icon>
			  </el-alert>
			  <!-- 選擇商品分類區域 -->
			  <el-row class="cat_opt">
				  <el-col>
					  <span>選擇商品分類:</span>
					  <!-- 選擇商品分類的級聯選擇框 -->

				  </el-col>
			  </el-row>
		</el-card>
	</div>
</template>
二,傳送請求,獲取所有列表的資料
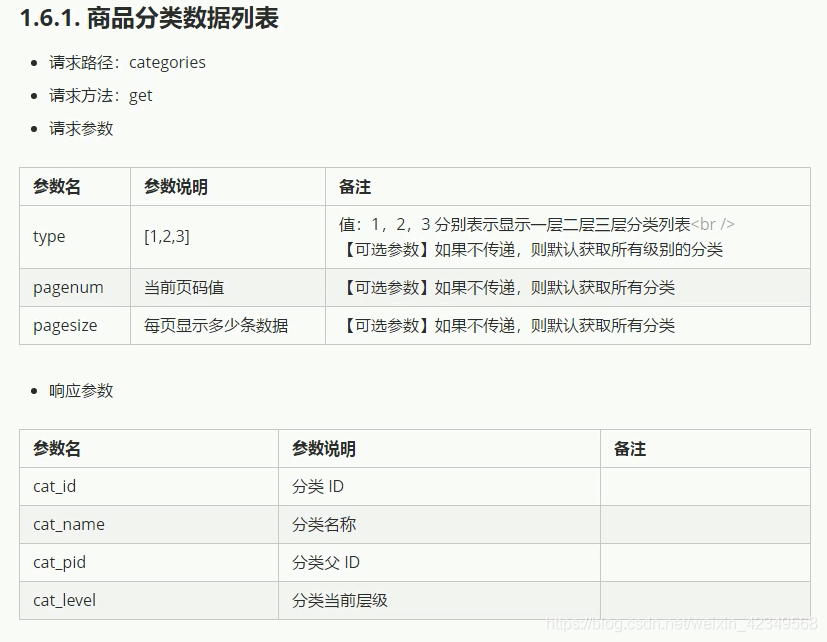
created(){
			this.getCateList()
		},
		methods:{
			//獲取所有的分類的資料列表
			async getCateList(){
				const{data:res}=await this.$http.get('categories')
				if(res.meta.status!==200)return this.$message.error(res.meta.msg)
				this.$message.sucess(res.meta.msg)
				this.cateList=res.data
			},
		}
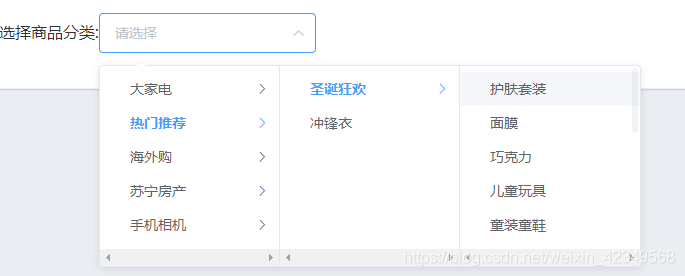
三,建立選擇商品分類的級聯選擇框
 <!-- 選擇商品分類的級聯選擇框 -->
					  <el-cascader
					      v-model="selectedKeys"
					      :options="cateList"
					      :props="cascaderProps"
					      @change="handleChange"
						 ></el-cascader>
//選中級聯選擇框時發生
			handleChange(){
				//它只能選中第三級
				this.addcatForm.cat_pid=this.selectedKeys[this.selectedKeys.length-1]
				this.addcatForm.cat_level=3
			}
實現的效果:
四,實現tabs導航欄
<!-- tabs導航欄 -->
			  <el-tabs v-model="activeName" @tab-click="handleTabClick">
				  <!-- 新增動態引數的面板 -->
			      <el-tab-pane label="動態引數" name="first">
					  <el-button type="primary" size="mini" :disabled="isBtnDisables">新增引數</el-button>
				  </el-tab-pane>
				  <!-- 新增靜態屬性的面板 -->
			      <el-tab-pane label="靜態屬性" name="second">
					  <el-button type="primary" size="mini" :disabled="isBtnDisables">靜態屬性</el-button>
				  </el-tab-pane>
			  </el-tabs>
computed:{
			//因為要麼不選中,要麼選中三級,所以:
			isBtnDisables(){
				if(this.selectedKeys.length!==3)return true
				return false
			}
		}
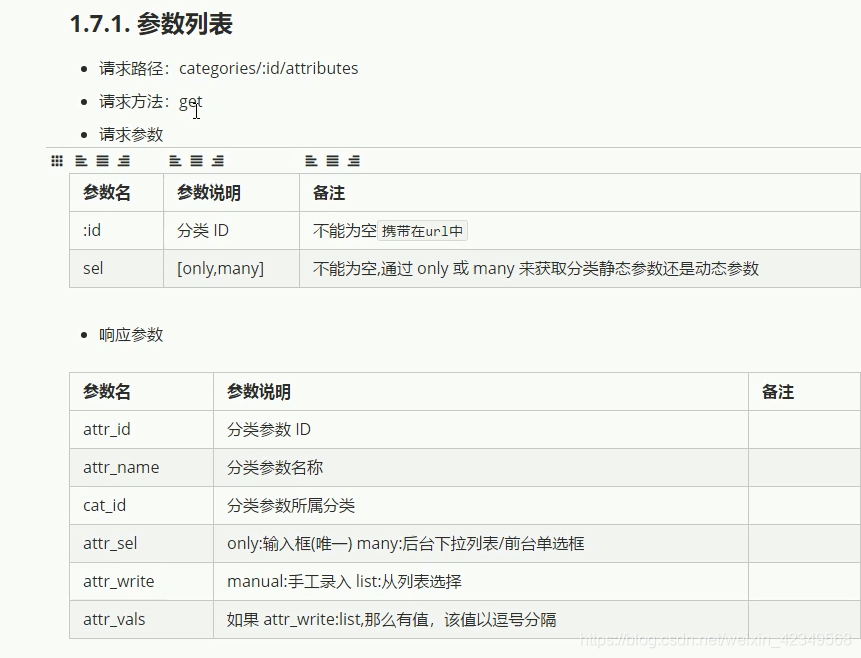
五,獲取參數列
對應的介面檔案:
			//選中級聯選擇框時發生
			handleChange(){
				this.getParamsData()
			},
			//tab便籤點選事件
		  handleTabClick(tab, event) {
			  this.getParamsData()
		  },
		  //獲取對應引數的列表資料(靜態/動態)
		  async getParamsData(){
			  //它只能選中第三級
			  this.addcatForm.cat_pid=this.selectedKeys[this.selectedKeys.length-1]
			  this.addcatForm.cat_level=3
			  //根據所選分類的id,和當前所處的面板,獲取對應的引數
			  const {data:res}=await this.$http.get(`categories/${this.cateId}/attributes`,{
			  	params:{sel:this.activeName}
			  })
			  if(res.meta.status!==200)return this.$message.error(res.meta.msg)
		  }
然後渲染參數列:
<!-- tabs導航欄 -->
			  <el-tabs v-model="activeName" @tab-click="handleTabClick">
				  <!-- 新增動態引數的面板 -->
			      <el-tab-pane label="動態引數" name="many">
					  <el-button type="primary" size="mini" :disabled="isBtnDisables">新增引數</el-button>
				<!-- 動態表格區域 -->
					   <el-table
						  :data="manyTableData"
						  border
						  stripe
						  style="width: 100%">
					  <el-table-column type="expand"></el-table-column>
					  <el-table-column type="index"></el-table-column>
					  <el-table-column
					     prop="attr_name"
					     label="引數名稱">
				        </el-table-column>
				         <el-table-column
						label="操作">
						<template slot-scope="scope">
							<el-button type="primary" icon="el-icon-edit" size="mini">搜尋</el-button>
							<el-button type="danger" icon="el-icon-delete" size="mini">s刪除</el-button>
						</template>
						</el-table-column>
				</el-table>
				  </el-tab-pane>
				  <!-- 新增靜態屬性的面板 -->
				  <el-tab-pane label="靜態屬性" name="only">
					  <el-button type="primary" size="mini" :disabled="isBtnDisables">新增屬性</el-button>
				   <!-- 靜態表格區域 -->
					   <el-table
						  :data="onlyTableData"
						  border
						  stripe
						  style="width: 100%">
						  <el-table-column type="expand"></el-table-column>
						  <el-table-column type="index"></el-table-column>
						  <el-table-column
							prop="attr_name"
							label="屬性名稱">
						  </el-table-column>
						  <el-table-column
							label="操作">
							<template slot-scope="scope">
								<el-button type="primary" icon="el-icon-edit" size="mini">搜尋</el-button>
								<el-button type="danger" icon="el-icon-delete" size="mini">s刪除</el-button>
							</template>
						  </el-table-column>
						</el-table>
				  </el-tab-pane>
			  </el-tabs>
六,新增動態引數對話方塊
要實現的效果如下:
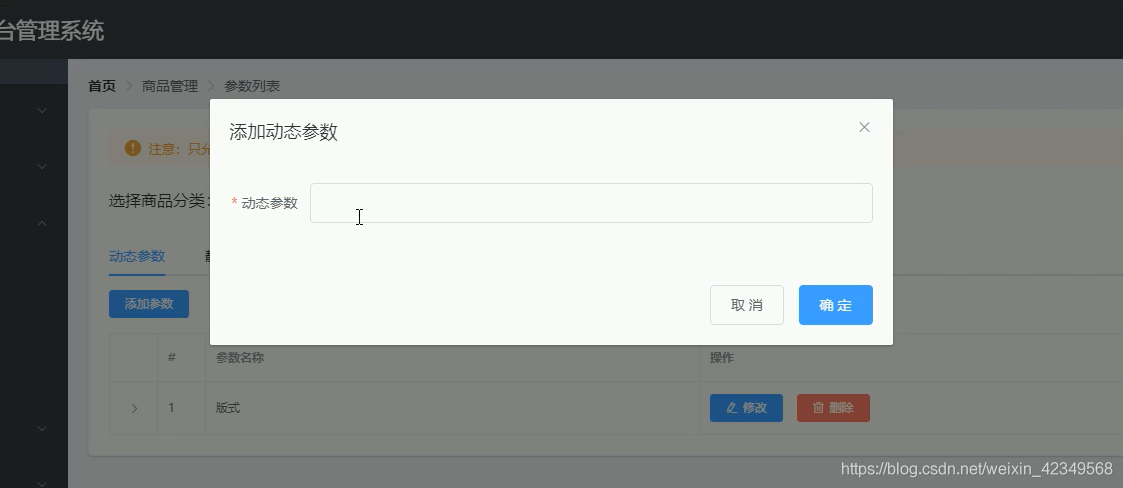
第一步:先把對話方塊建立出來,點選新增引數,則會彈出這個對話方塊:
為了讓新增屬性和新增引數都複用這個對話方塊。就需要使用到計算屬性:
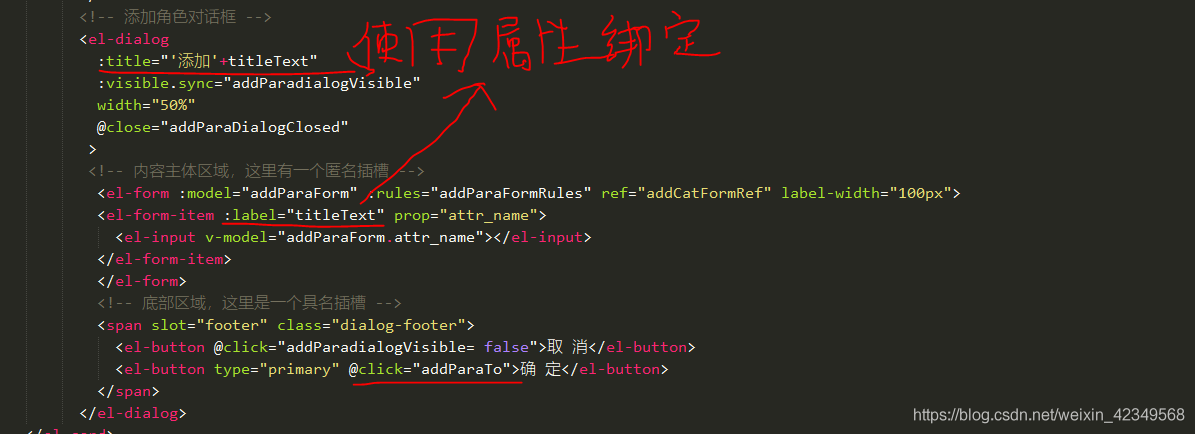
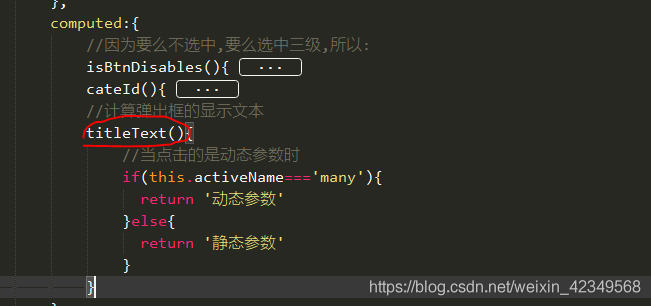
相關資料:

計算屬性:
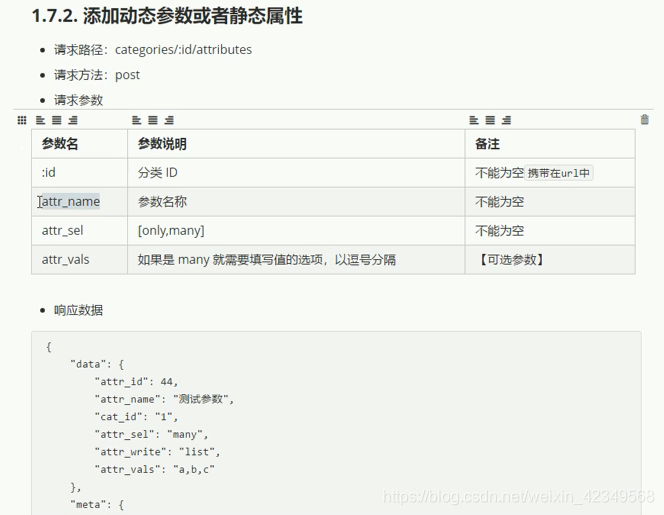
七,發起請求,完成引數/屬性的新增
具體的介面檔案如下:
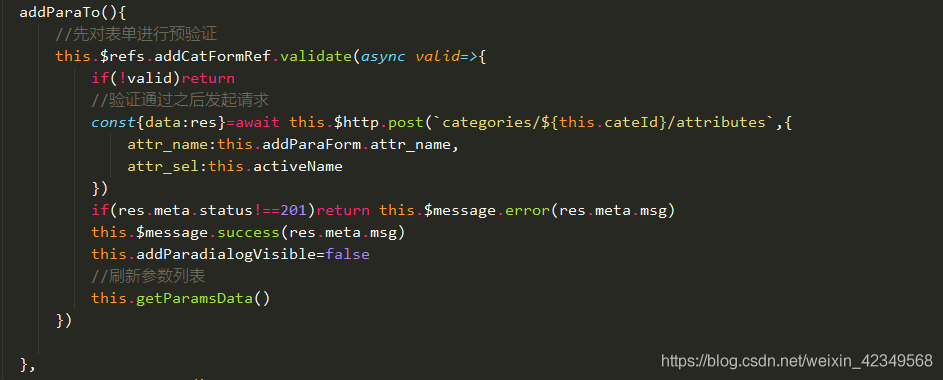
八,修改引數的對話方塊
對話方塊寫好的效果:
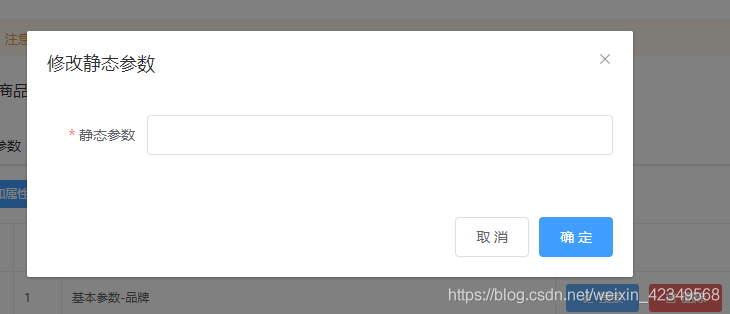
但是還需要把對應的資料填充到這個對話方塊中,這個時候,就需要利用作用域插槽獲取對應的資料,然後繫結到這裡來。
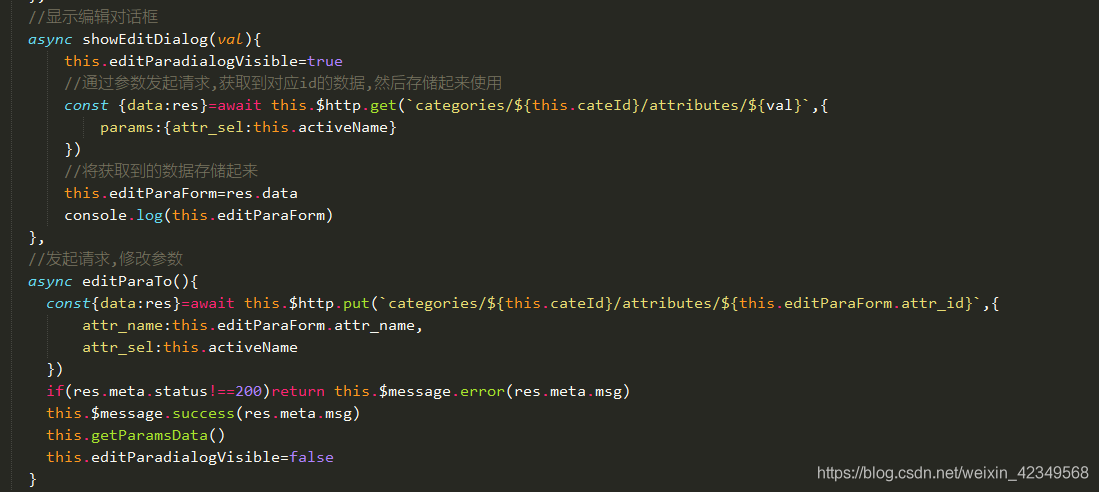
再發起請求,完成引數的更改,對應的介面檔案是:
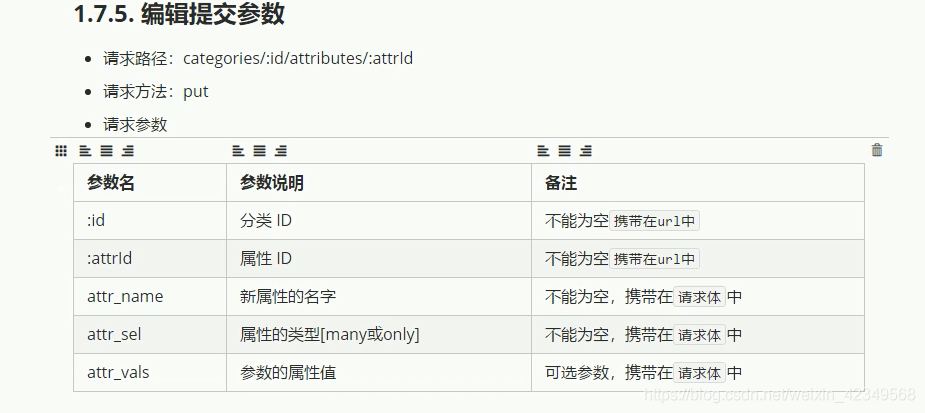
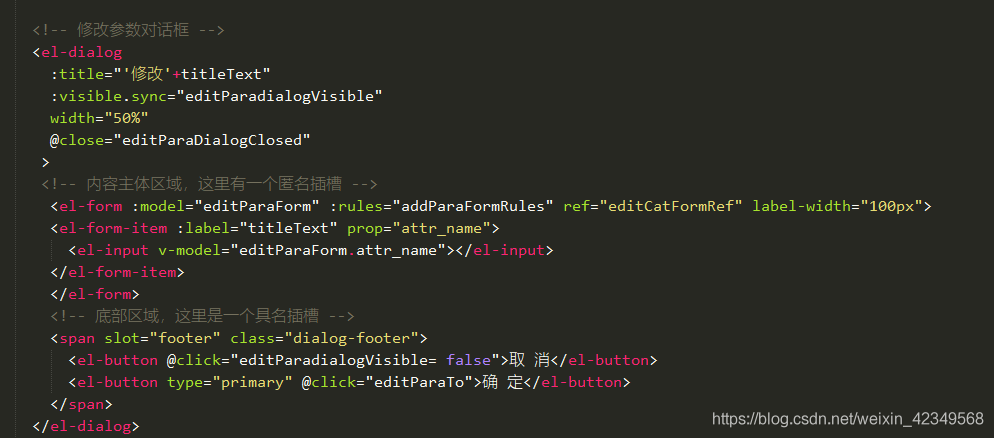
對應函數:
九,刪除引數
		  //刪除屬性/引數
		  async removeParaById(id){
		  	//彈窗詢問是否刪除資料
		  	const confirmResult=await this.$confirm('此操作將永久刪除該引數, 是否繼續?', '提示', {
		  	          confirmButtonText: '確定',
		  	          cancelButtonText: '取消',
		  	          type: 'warning'
		  	        }).catch(err=>err)
		  	//如果使用者確認刪除,則返回字串confirm
		  	//如果使用者確認取消,則返回字串cancel
		  	if(confirmResult!=='confirm')return this.$message.info("已經取消了刪除")
		  	const{data:res}=await this.$http.delete(`categories/${this.cateId}/attributes/${id}`)
		  	if(res.meta.status!==200)return this.$message.error(res.meta.msg)
		  	this.$message.success(res.meta.msg)
		  	this.getParamsData()
		  }
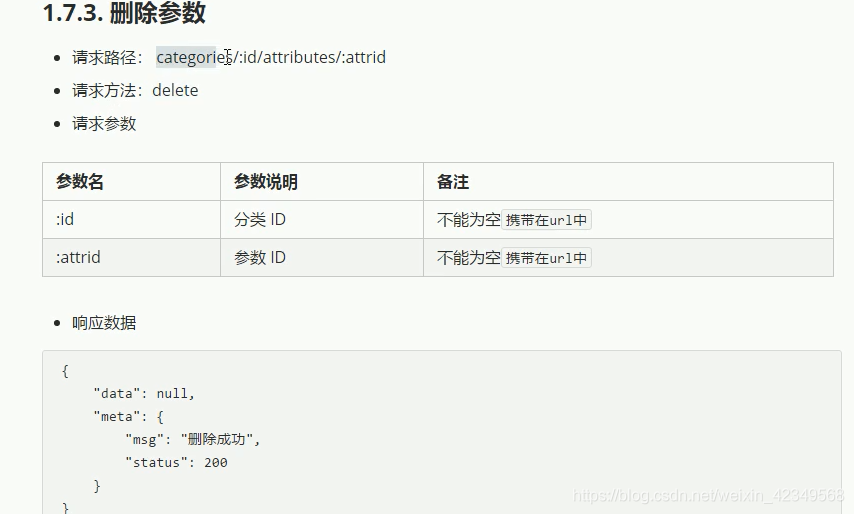
十,引數的展開標籤 繪製

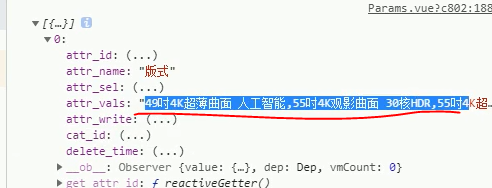
可以看到,每行的資料存在這裡面,並且是通過空格分開的。
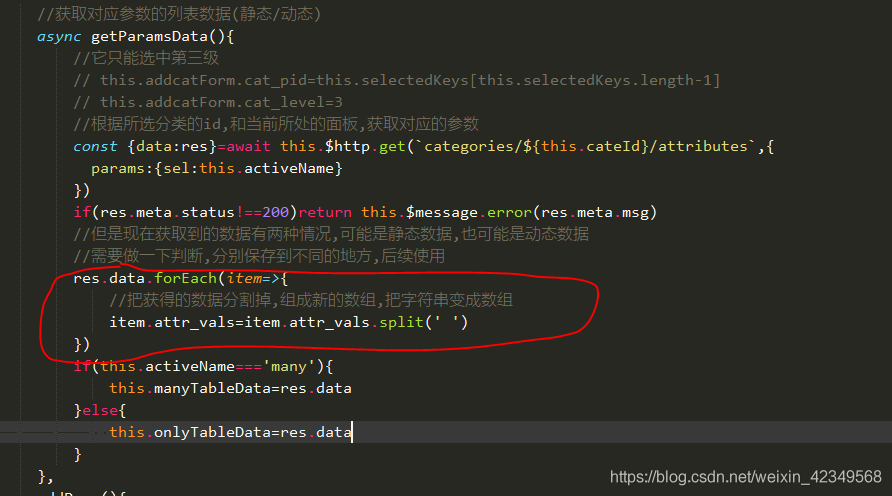
想要使用,則需要用空格做一次分割。得到一個陣列:
然後把這裡的資料渲染到頁面上:
//  //tag標籤的事件顯示input
		  showInput(val) {
		  	val.inputVisible = true;
			//$nextTick方法的作用.當頁面上的元素被重新渲染之後,才執行這裡面回撥函數的程式碼
			//在這裡,是變成input函數之後,再獲取焦點
		  	this.$nextTick(_ => {
			//文字方塊自動獲得焦點
		  	  this.$refs.saveTagInput.$refs.input.focus();
		  	});
		    },
		  //tag標籤的事件,把新增的標籤顯示出來,並儲存到資料庫
		   async handleInputConfirm(val) {
				//如果輸入的字串全是字元,則清空輸入框
				if(val.inputValue.trim().length ===0){
					val.inputValue=''
					val.inputVisible=false
					return
				}
				//如果沒有return,則需要做後續處理
				let inputValue = val.inputValue;
				if (inputValue) {
				 //發起請求,新增新的標籤
				  val.attr_vals.push(val.inputValue.trim())
				  val.inputValue=''
				  val.inputVisible=false
				  //發起請求,儲存本次引數到資料庫
				  const{data:res}=await this.$http.put(`categories/${this.cateId}/attributes/${val.attr_id}`,{
				  	attr_name:val.attr_name,
				  	attr_sel:val.attr_sel,
					attr_vals:val.attr_vals.join(' ')
				  })
				 if(res.meta.status!==200)return this.$message.error(res.meta.msg)
				 this.$message.success(res.meta.msg)
				 //這裡不需要重新重新整理,一旦重新重新整理,下拉式選單就會收起來
				}
			},
			//刪除對應的tag標籤
			async closeTag(i,val){
				//這個splice會修改原陣列,所以修改完成之後,發起請求,就可以完成刪除了.
				val.attr_vals.splice(i,1)
				//發起請求:將對attr_vals的操作儲存到資料庫中
				const{data:res}=await this.$http.put(`categories/${this.cateId}/attributes/${val.attr_id}`,{
				 	attr_name:val.attr_name,
				 	attr_sel:val.attr_sel,
					attr_vals:val.attr_vals.join(' ')
				 })
				 if(res.meta.status!==200)return this.$message.error(res.meta.msg)
				 this.$message.success('刪除標籤成功')
			}
對應的html結構:
 <el-table-column type="expand">
						<template slot-scope="scope">
						  		<el-tag closable v-for="(item,i) in scope.row.attr_vals" :kye="i"
								@close="closeTag(i,scope.row)"
								> {{item}} </el-tag>
								<el-input
								  class="input-new-tag"
								  v-if="scope.row.inputVisible"
								  v-model="scope.row.inputValue"
								  ref="saveTagInput"
								  size="small"
								  @keyup.enter.native="handleInputConfirm(scope.row)"
								  @blur="handleInputConfirm(scope.row)"
								>
								</el-input>
								<el-button v-else class="button-new-tag" size="small" @click="showInput(scope.row)">+ New Tag</el-button>
						  </template>
					  </el-table-column>