Python給照片新增水印時間和地點 Mac OS
我們平時想列印圖片的時候,希望能給照片加上時間、地點,以便以後看到照片的時候不會忘記。
手工一張張新增太麻煩,而且容易出錯。以下是使用程式碼獲取原始圖片的拍攝時間和地點,並新增水印的方法,在Mac OS下對jpeg、jpg檔案處理已經測試通過了。
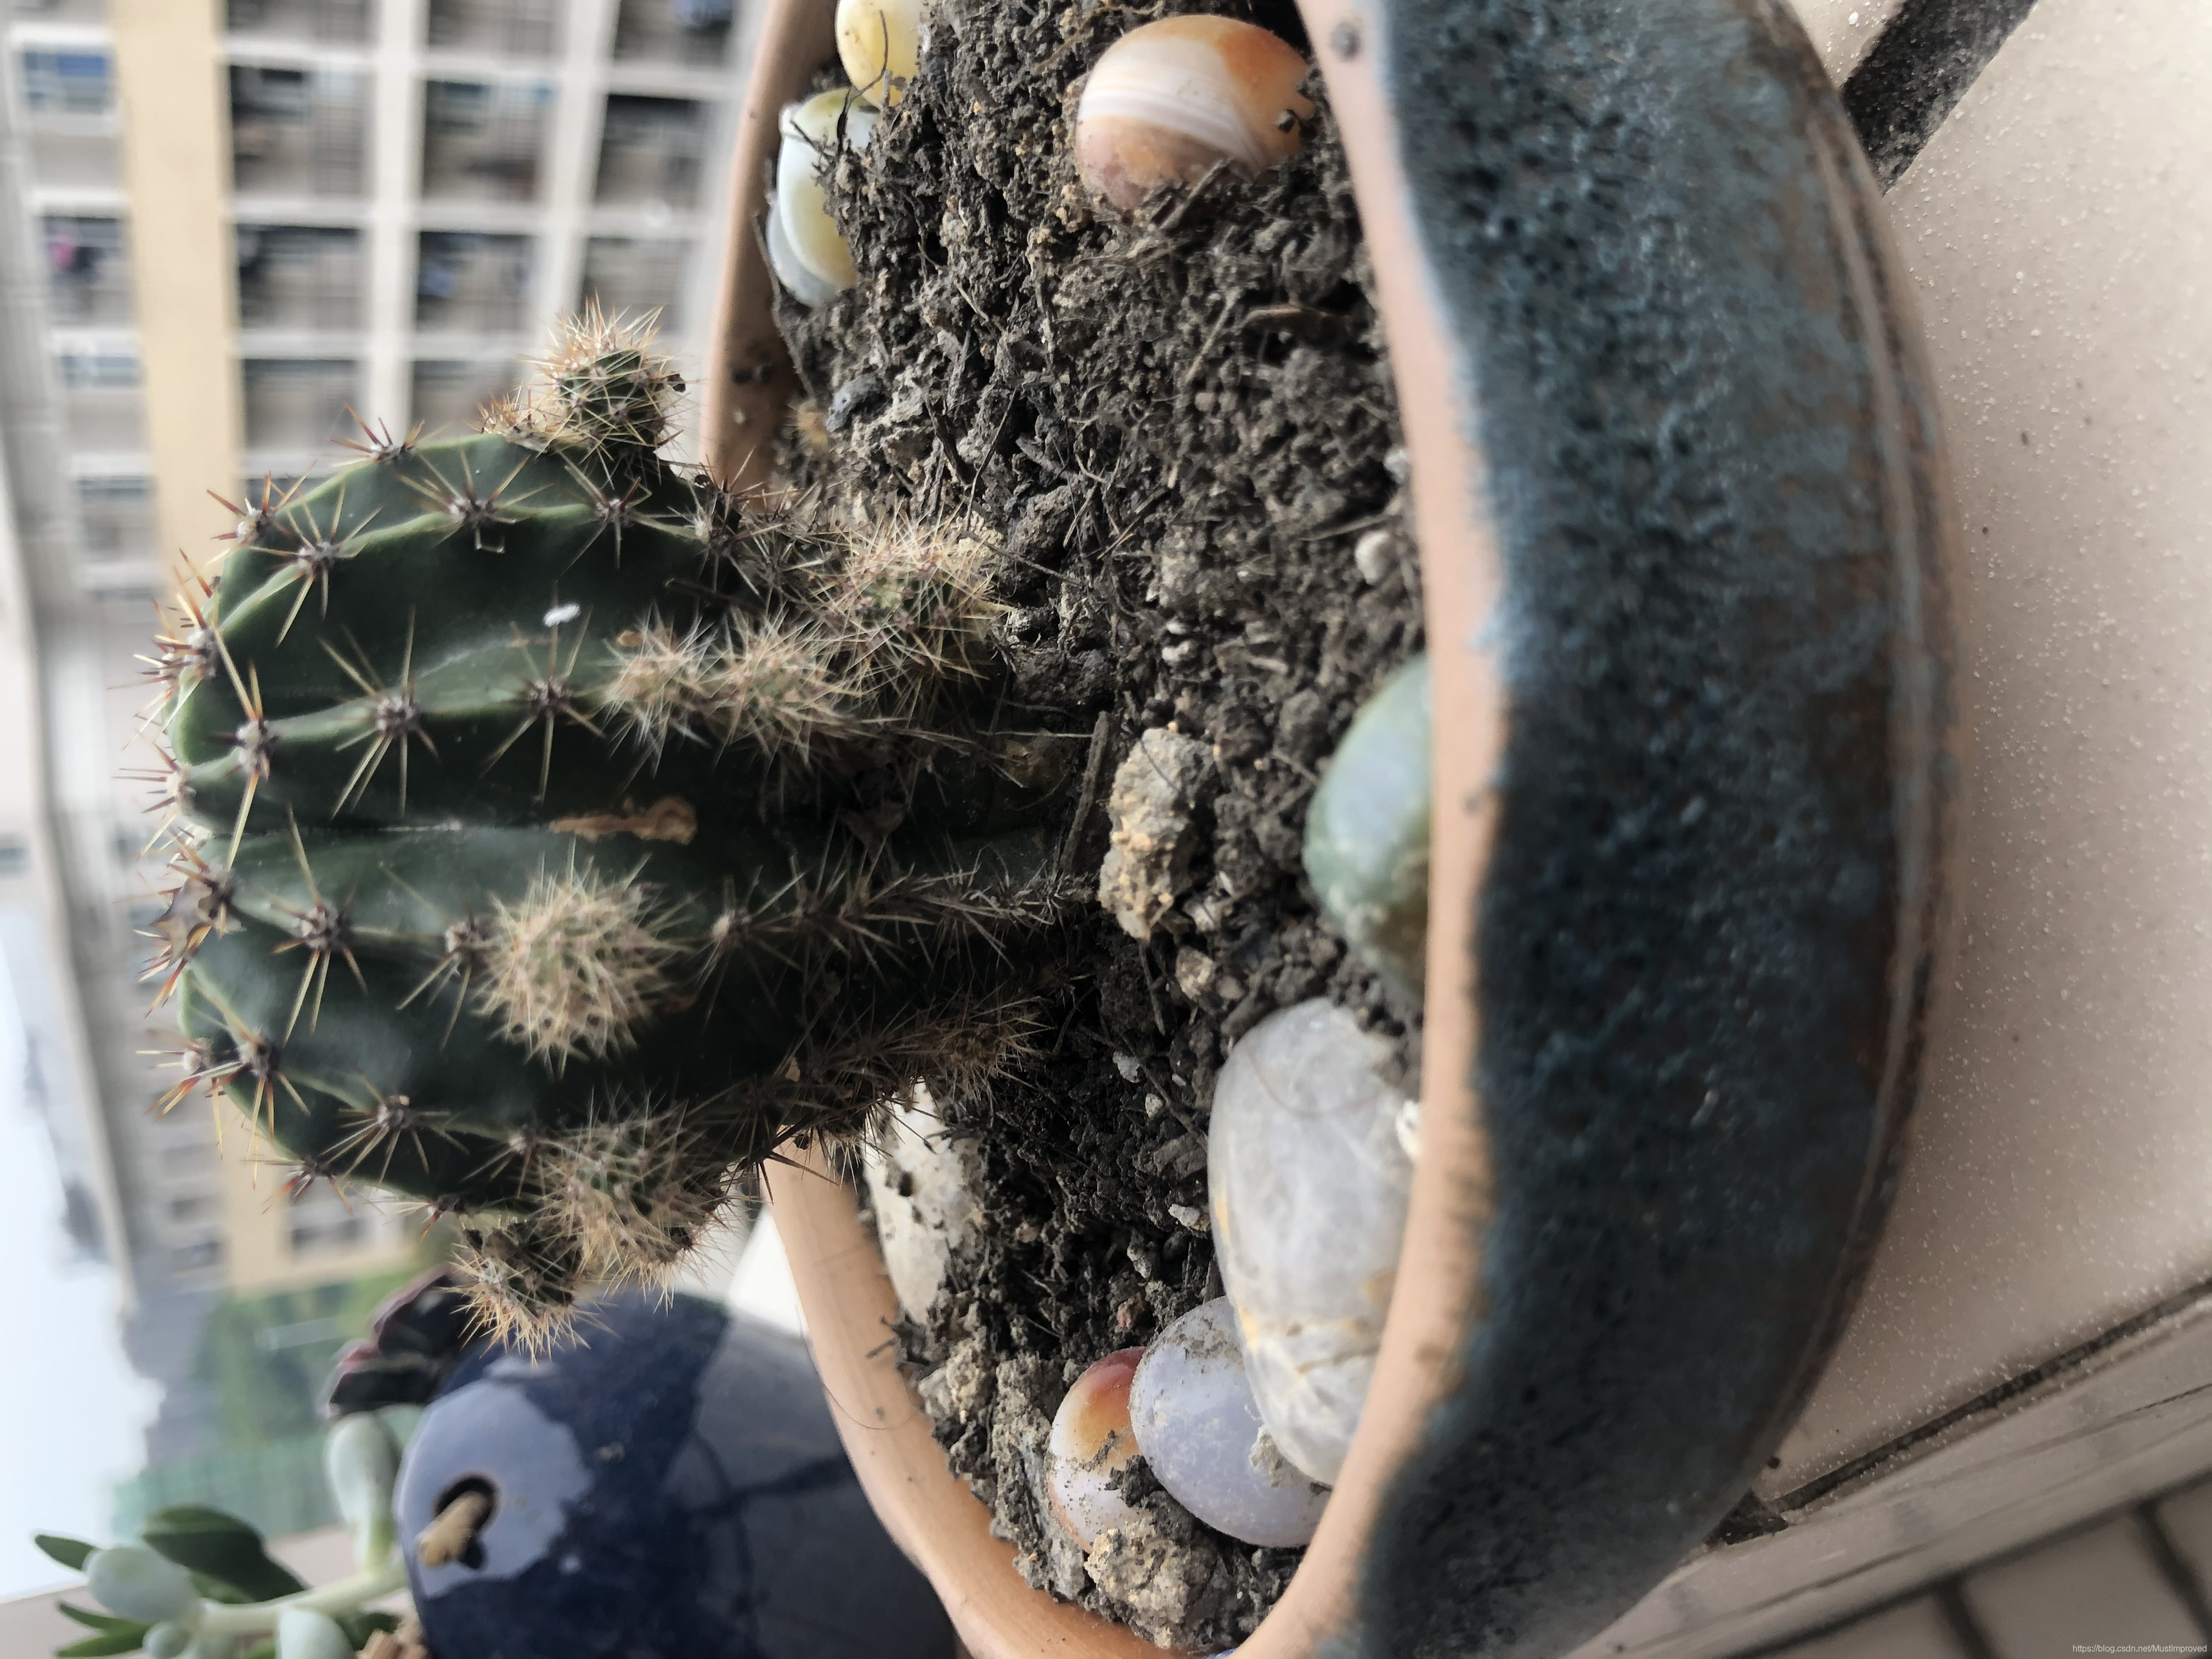
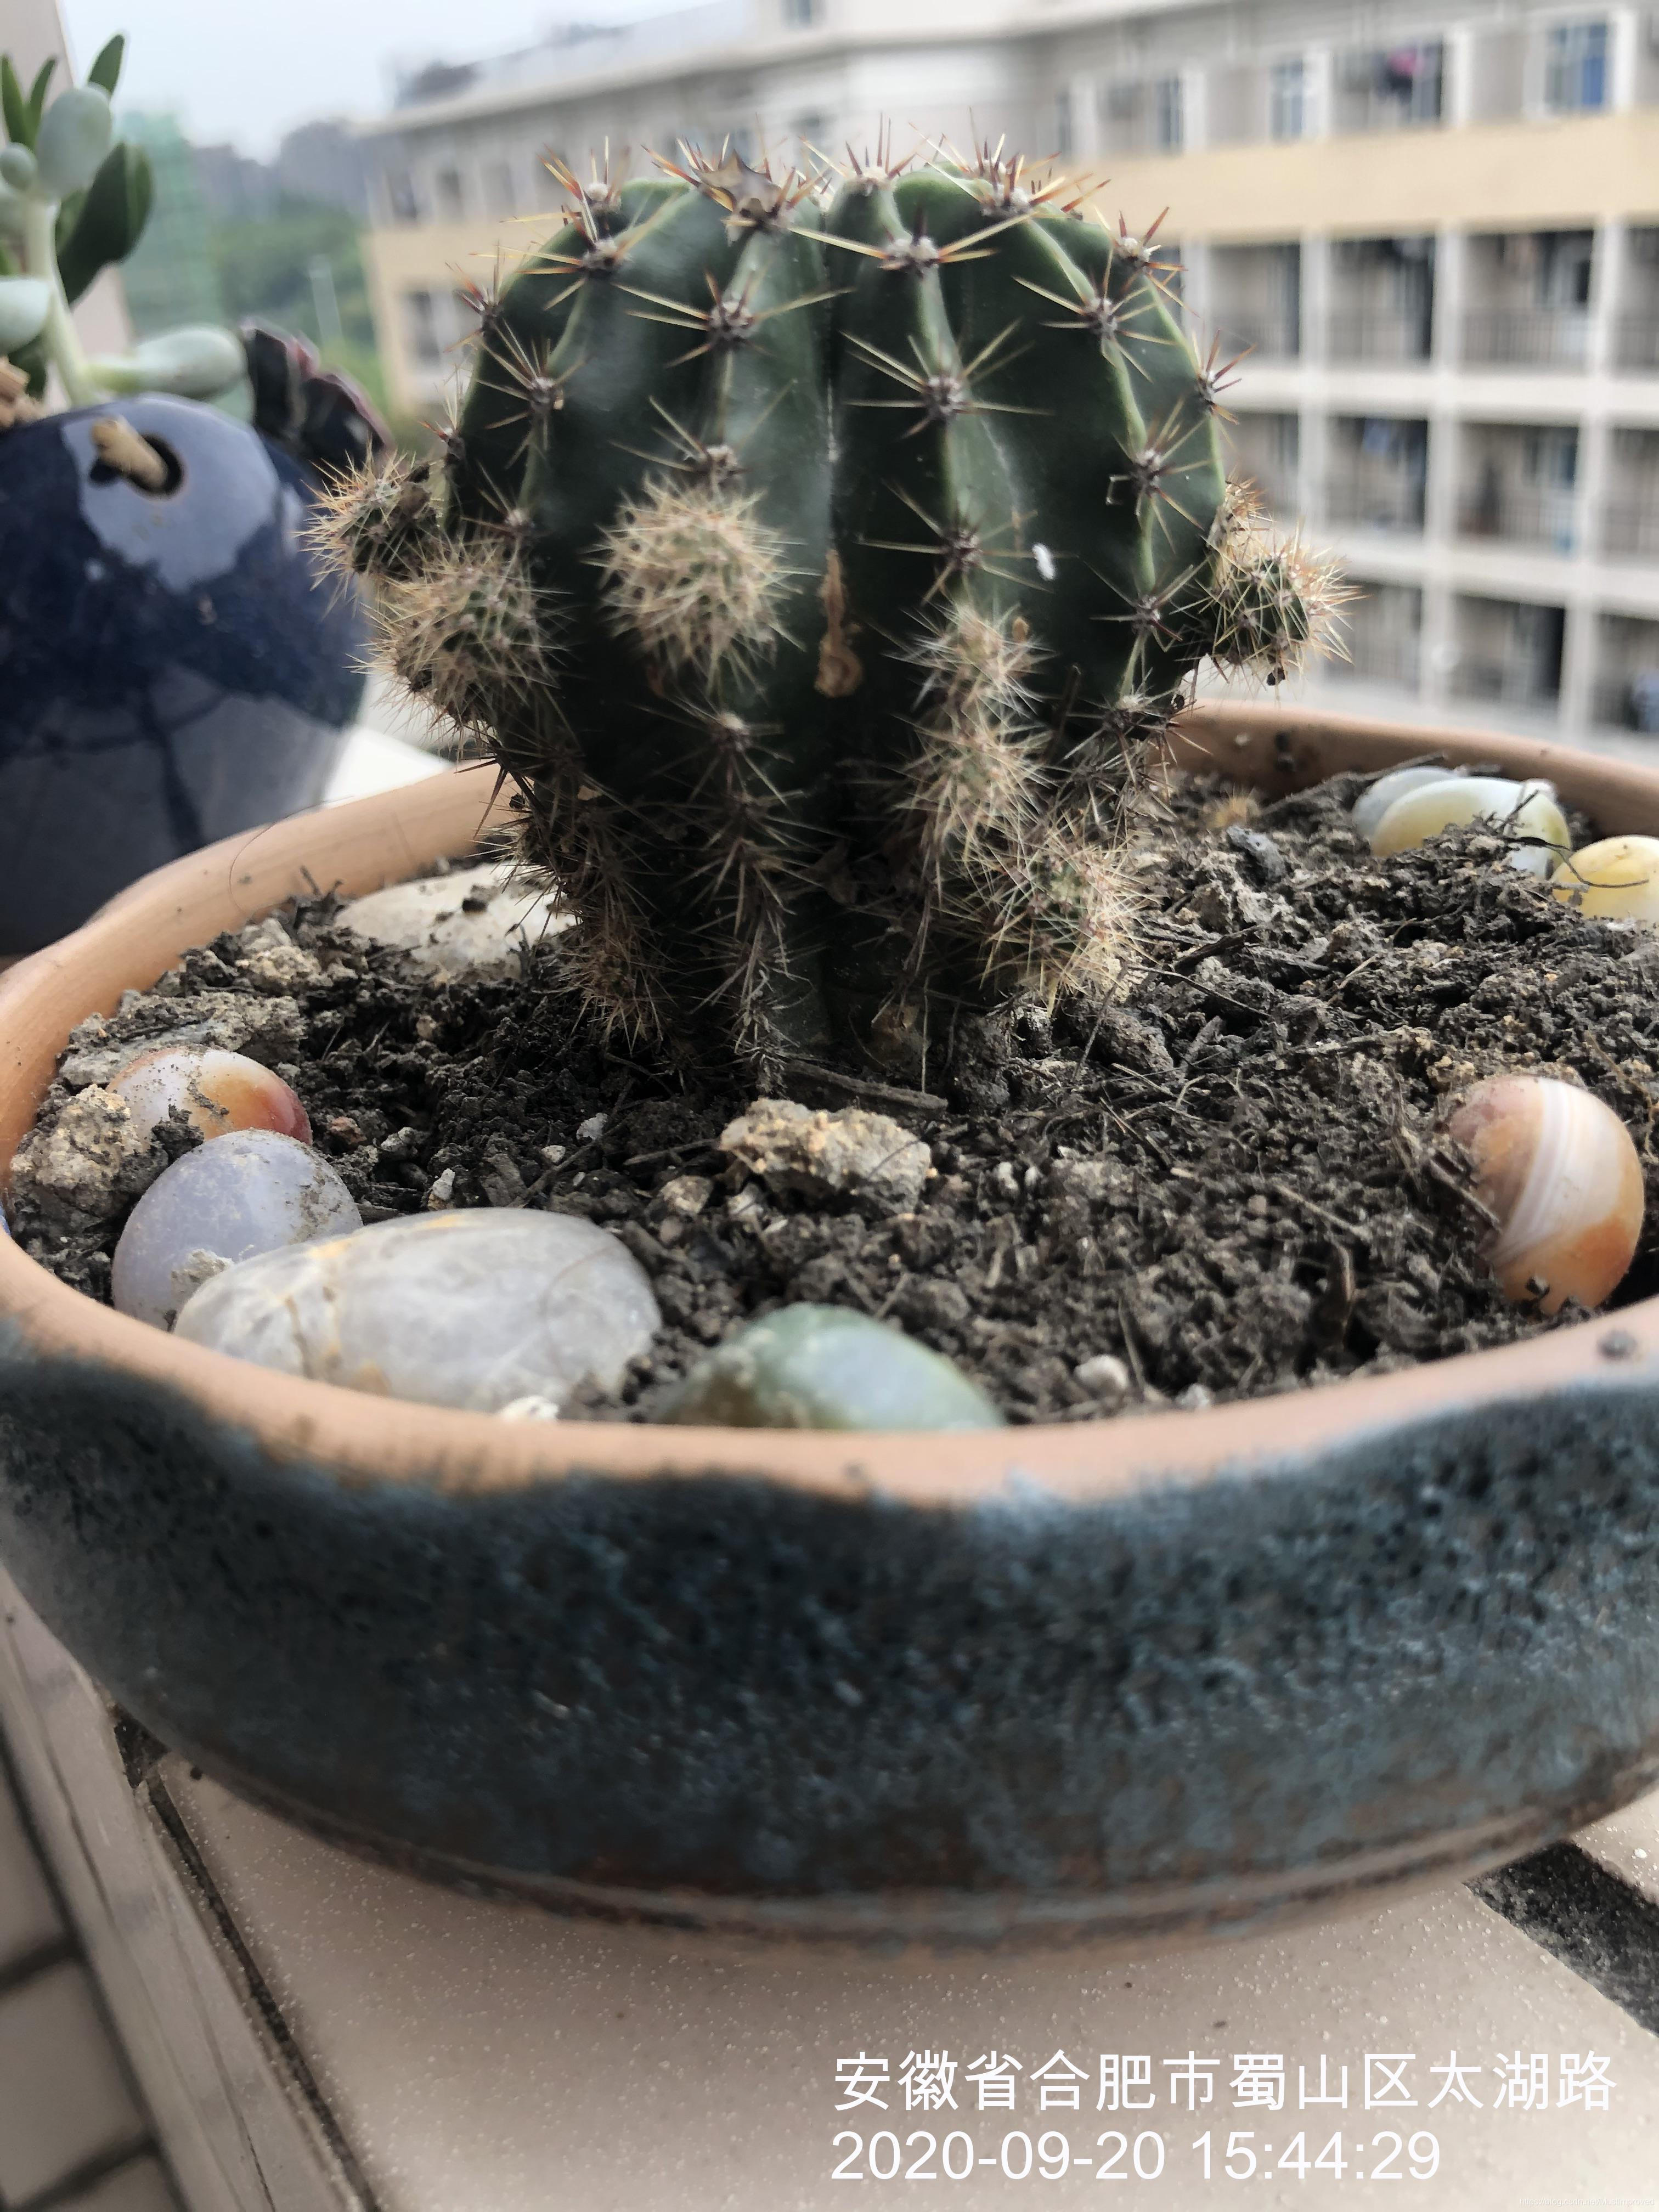
效果
首先我們看下效果,第一張是原圖,第二張是新增水印時間和地點後的圖:

需要用到的模組
exifread
PIL
requests
json
處理步驟以及程式碼講解
1、獲得照片的拍攝時間
這裡我們需要用到exifread模組以獲取照片的拍照時間。1
def getPhotoTime(filename):
    '''得到照片的拍照時間(如果獲取不到拍照時間,則使用檔案的建立時間)
    '''
    try:
        if os.path.isfile(filename):
            fd = open(filename, 'rb')
        else:
            raise "[%s] is not a file!\n" % filename
    except:
        raise "unopen file[%s]\n" % filename

    #預設用影象檔案的建立日期作為拍攝日期(如果有照片的拍攝日期,則修改為拍攝日期
    state = os.stat(filename)
    dateStr = time.strftime("%Y-%m-%d %H:%M:%S", time.localtime(state[-2]))

    data = exifread.process_file( fd )
    if data: #取得照片的拍攝日期,改為拍攝日期
        try:
            t = data['EXIF DateTimeOriginal'] #轉換成 yyyy-mm-dd_hh:mm:ss的格式
            dateStr = str(t).replace(":","-")[:10] + str(t)[10:]
        except:
            pass

    return dateStr
2、獲取拍照地點
這裡我們依然要用到exifread模組以獲取照片的拍照的經緯度,在使用baidu的api逆地理編碼得到對應的具體位置。2
注意在使用baidu的api之前需要去百度地圖開放平臺註冊賬號,申請secret_key,可以參考別人的申請ak3。
def format_lat_lng(data):
    '將exif得到的經緯度轉化成數值, 這個有點笨重'
    list_tmp=str(data).replace('[', '').replace(']', '').split(',')
    l= [ele.strip() for ele in list_tmp]
    data_sec = int(l[-1].split('/')[0]) /(int(l[-1].split('/')[1])*3600)# 秒的值
    data_minute = int(l[1])/60
    data_degree = int(l[0])
    result=data_degree + data_minute + data_sec
    return result

def getLocationBy_lat_lng(lat, lng):
    """
    使用Geocoding API把經緯度座標轉換為結構化地址。需要註冊baidu map api的key
    """
    secret_key = 'XXXXX你得ak金鑰'  # 請修改這裡

    # 使用說明http://lbsyun.baidu.com/index.php?title=webapi/guide/webservice-geocoding-abroad
    baidu_map_api = 'http://api.map.baidu.com/reverse_geocoding/v3/?ak={0}&output=json&coordtype=wgs84ll&location={1},{2}'.format(
        secret_key, lat, lng)
    response = requests.get(baidu_map_api)
    content = response.text
    baidu_map_address = json.loads(content)
    formatted_address = baidu_map_address["result"]["formatted_address"]
    return formatted_address

def getLocation(filename):
    '得到照片的拍照位置(如果獲取不到,則為空字串)'
    try:
        if os.path.isfile(filename):
            fd = open(filename, 'rb')
        else:
            raise "[%s] is not a file!\n" % filename
    except:
        raise "unopen file[%s]\n" % filename

    # 影象檔案的拍攝地址預設為空
    locationStr= ''

    data = exifread.process_file( fd )
    if data: #取得照片的拍攝位置
        try:
            lat= format_lat_lng(data['GPS GPSLatitude'])  # [34, 12, 9286743/200000] -> xx.xxxxx
            lng= format_lat_lng(data['GPS GPSLongitude']) # [108, 57, 56019287/1000000] -> xx.xxxx
            locationStr= getLocationBy_lat_lng(lat, lng)
        except:
            pass

    return locationStr
3、圖片轉正
對於手機、相機等裝置拍攝的照片,由於手持方向的不同,拍出來的照片可能是旋轉0°、90°、180°和270°。即使在電腦上利用軟體將其轉正,他們的exif資訊中還是會保留方位資訊。
在用PIL讀取這些影象時,讀取的是原始資料,也就是說,即使電腦螢幕上顯示是正常的照片,用PIL讀進來後,也可能是旋轉的影象,並且圖片的size也可能與螢幕上的不一樣。
對於這種情況,可以利用PIL讀取exif中的orientation資訊,然後根據這個資訊將圖片轉正後,再進行後續操作,具體如下。4
def orientate(img):
    '''利用PIL讀取exif中的orientation資訊,然後根據這個資訊將圖片轉正後,再進行後續操作
    '''
    try:
        orientation= None
        for i in ExifTags.TAGS.keys() :
            if ExifTags.TAGS[i]=='Orientation' : # 肯定會找到orientation,所以不需要對None做處理
                orientation= i
                break
        exif=dict(img._getexif().items())
        if   exif[orientation] == 3 :
            img=img.rotate(180, expand = True)
        elif exif[orientation] == 6 :
            img=img.rotate(270, expand = True)
        elif exif[orientation] == 8 :
            img=img.rotate(90, expand = True)
    except:
        pass
    return img
4、 新增水印
最後是新增水印,這一步是將上面的步驟整合起來,做處理。
這一步根據不同的圖片需要調整字型大小(size),字型位置(d_width,d_height)和字型填充顏色(fillcolor)。5
def add_watermark(filename, text):
    '為照片檔案新增水印,filename是照片檔名,text是水印時間和位置'
    # 建立輸出資料夾
    outdir= 'watermark/'
    mymkdir(outdir)

    # 建立繪畫物件
    image= Image.open(filename)
    image= orientate(image) # 將圖片轉正
    draw= ImageDraw.Draw(image)
    width, height= image.size # 寬度,高度
    size= int(0.04*width)  # 字型大小(可以調整0.04)
    myfont= ImageFont.truetype('/Library/Fonts/Arial Unicode.ttf', size=size) # 80, 4032*3024
    #fillcolor= '#000000' # RGB黑色
    fillcolor= '#fbfafe'

    # 引數一:位置(x軸,y軸);引數二:填寫內容;引數三:字型;引數四:顏色
    d_width, d_height=0.5*width, 0.92*height # 字型的相對位置(0.5, 0.92可以根據圖片調整)
    draw.text((d_width, d_height), text, font=myfont, fill=fillcolor) # (-1200, -320)

    new_filename= get_new_filename(filename)
    image.save(outdir + new_filename)
完整程式碼
以下是完整程式碼,並附上github的連結(連結中有原始的範例圖片)。
'''
批次給圖片增加時間水印的Python指令碼程式【目前測試為Mac OS X下的jpeg檔案】。
遍歷指定目錄(含子目錄)的照片檔案,根據拍照時間給照片在右下角新增時間和地點的水印。


!該程式需要安裝exifread,PIL,requests等模組,否則無法使用。
例如,Linux/Mac OS X下命令列安裝該模組:sudo pip install exifread

!該程式需要加baidu api的secret_key(在getLocationBy_lat_lng函數中);
!該程式可以手動調整字型大小(size),字型位置(d_width,d_height)和字型填充顏色(fillcolor)(在add_watermark函數中)。

獲取拍照時間 From 'https://www.racksam.com/2014/05/14/python-script-to-change-pictures-filenames/'
拍照地點 參考 http://lbsyun.baidu.com/index.php?title=webapi/guide/webservice-geocoding-abroad
watermark 參考 https://blog.csdn.net/weixin_30561177/article/details/97609897
orientation 參考 https://blog.csdn.net/mizhenpeng/article/details/82794112
'''
#!/usr/bin/env python
# -*- coding: utf-8 -*-
import os
import stat
import time
import math
import exifread
from PIL import Image, ImageDraw, ImageFont, ExifTags
import requests
import json

'=================分割線==================='
# 建立資料夾
def mymkdir(path):
    if not os.path.exists(path):
        os.mkdir(path)

# 判斷是否是支援的檔案型別
SUFFIX_FILTER = ['.jpg','.png','.mpg','.mp4','.thm','.bmp','.jpeg','.avi','.mov'] # 僅測試了jpeg,jpg
def isTargetedFileType(filename):
    '根據副檔名,判斷是否是需要處理的檔案型別;僅支援x.x格式'
    filename_nopath = os.path.basename(filename)
    f,e = os.path.splitext(filename_nopath)
    if e.lower() in SUFFIX_FILTER:
        return True
    else:
        return False

# 新檔案的名字
def get_new_filename(filename):
    f, e= filename.split('.')
    return "%s_watermark.%s" % (f, e)

'=================分割線==================='

'=================begin{得到照片的拍攝時間}==================='
def getPhotoTime(filename):
    '''得到照片的拍照時間(如果獲取不到拍照時間,則使用檔案的建立時間)
    '''
    try:
        if os.path.isfile(filename):
            fd = open(filename, 'rb')
        else:
            raise "[%s] is not a file!\n" % filename
    except:
        raise "unopen file[%s]\n" % filename

    #預設用影象檔案的建立日期作為拍攝日期(如果有照片的拍攝日期,則修改為拍攝日期
    state = os.stat(filename)
    dateStr = time.strftime("%Y-%m-%d %H:%M:%S", time.localtime(state[-2]))

    data = exifread.process_file( fd )
    if data: #取得照片的拍攝日期,改為拍攝日期
        try:
            t = data['EXIF DateTimeOriginal'] #轉換成 yyyy-mm-dd_hh:mm:ss的格式
            dateStr = str(t).replace(":","-")[:10] + str(t)[10:]
        except:
            pass

    return dateStr
'=================end{得到照片的拍攝時間}==================='


'=================begin{得到照片的拍攝地點}==================='
def format_lat_lng(data):
    '將exif得到的經緯度轉化成數值, 這個有點笨重'
    list_tmp=str(data).replace('[', '').replace(']', '').split(',')
    l= [ele.strip() for ele in list_tmp]
    data_sec = int(l[-1].split('/')[0]) /(int(l[-1].split('/')[1])*3600)# 秒的值
    data_minute = int(l[1])/60
    data_degree = int(l[0])
    result=data_degree + data_minute + data_sec
    return result

def getLocationBy_lat_lng(lat, lng):
    """
    使用Geocoding API把經緯度座標轉換為結構化地址。需要註冊baidu map api的key
    """
    secret_key = 'XXXXX你得ak金鑰'  # 請修改這裡

    # 使用說明http://lbsyun.baidu.com/index.php?title=webapi/guide/webservice-geocoding-abroad
    baidu_map_api = 'http://api.map.baidu.com/reverse_geocoding/v3/?ak={0}&output=json&coordtype=wgs84ll&location={1},{2}'.format(
        secret_key, lat, lng)
    response = requests.get(baidu_map_api)
    content = response.text
    baidu_map_address = json.loads(content)
    formatted_address = baidu_map_address["result"]["formatted_address"]
    return formatted_address

def getLocation(filename):
    '得到照片的拍照位置(如果獲取不到,則為空字串)'
    try:
        if os.path.isfile(filename):
            fd = open(filename, 'rb')
        else:
            raise "[%s] is not a file!\n" % filename
    except:
        raise "unopen file[%s]\n" % filename

    # 影象檔案的拍攝地址預設為空
    locationStr= ''

    data = exifread.process_file( fd )
    if data: #取得照片的拍攝位置
        try:
            lat= format_lat_lng(data['GPS GPSLatitude'])  # [34, 12, 9286743/200000] -> xx.xxxxx
            lng= format_lat_lng(data['GPS GPSLongitude']) # [108, 57, 56019287/1000000] -> xx.xxxx
            locationStr= getLocationBy_lat_lng(lat, lng)
        except:
            pass

    return locationStr

'=================end{得到照片的拍攝地點}==================='

def orientate(img):
    '''對於手機、相機等裝置拍攝的照片,由於手持方向的不同,拍出來的照片可能是旋轉0°、90°、180°和270°。即使在電腦上利用軟體將其轉正,他們的exif資訊中還是會保留方位資訊。
        在用PIL讀取這些影象時,讀取的是原始資料,也就是說,即使電腦螢幕上顯示是正常的照片,用PIL讀進來後,也可能是旋轉的影象,並且圖片的size也可能與螢幕上的不一樣。
        對於這種情況,可以利用PIL讀取exif中的orientation資訊,然後根據這個資訊將圖片轉正後,再進行後續操作,具體如下。
    '''
    try:
        orientation= None
        for i in ExifTags.TAGS.keys() :
            if ExifTags.TAGS[i]=='Orientation' : # 肯定會找到orientation,所以不需要對None做處理
                orientation= i
                break
        exif=dict(img._getexif().items())
        if   exif[orientation] == 3 :
            img=img.rotate(180, expand = True)
        elif exif[orientation] == 6 :
            img=img.rotate(270, expand = True)
        elif exif[orientation] == 8 :
            img=img.rotate(90, expand = True)
    except:
        pass
    return img


def add_watermark(filename, text):
    '為照片檔案新增水印,filename是照片檔名,text是水印時間和位置'
    # 建立輸出資料夾
    outdir= 'watermark/'
    mymkdir(outdir)

    # 建立繪畫物件
    image= Image.open(filename)
    image= orientate(image) # 將圖片轉正
    draw= ImageDraw.Draw(image)
    width, height= image.size # 寬度,高度
    size= int(0.04*width)  # 字型大小(可以調整0.04)
    myfont= ImageFont.truetype('/Library/Fonts/Arial Unicode.ttf', size=size) # 80, 4032*3024
    #fillcolor= '#000000' # RGB黑色
    fillcolor= '#fbfafe'

    # 引數一:位置(x軸,y軸);引數二:填寫內容;引數三:字型;引數四:顏色
    d_width, d_height=0.5*width, 0.92*height # 字型的相對位置(0.5, 0.92可以根據圖片調整)
    draw.text((d_width, d_height), text, font=myfont, fill=fillcolor) # (-1200, -320)

    new_filename= get_new_filename(filename)
    image.save(outdir + new_filename)


def scandir(startdir):
    '遍歷指定目錄,對滿足條件的檔案進行改名或刪除處理'
    os.chdir(startdir) # 改變當前工作目錄
    for obj in os.listdir(os.curdir) :
        if os.path.isfile(obj):
            if isTargetedFileType(obj): # 對滿足過濾條件的檔案,加時間和地點水印
                photoTime = getPhotoTime(obj) # 獲得照片的拍攝時間,當作水印的內容
                location= getLocation(obj) # 獲得照片的拍攝位置,當作水印的內容

                print("%s    %s" % (obj, photoTime+' '+location))
                add_watermark(obj, location +'\n'+ photoTime) #加時間和地點水印


if __name__ == "__main__":
    path = "./fig" # 照片位置
    scandir(path)
https://www.racksam.com/2014/05/14/python-script-to-change-pictures-filenames/ ↩︎
http://lbsyun.baidu.com/index.php?title=webapi/guide/webservice-geocoding-abroad ↩︎
https://www.jianshu.com/p/6ad61317d988 ↩︎
https://blog.csdn.net/mizhenpeng/article/details/82794112 ↩︎
https://blog.csdn.net/weixin_30561177/article/details/97609897 ↩︎