JavaFX標籤
JavaFX API的javafx.scene.control包中的Label類可用於顯示一個文字元素。
我們可以包裝文字元素以適應特定空間,新增圖形影象或使用JavaFX Label控制元件應用視覺效果。
以下程式碼顯示如何使用Label顯示文字。
import javafx.application.Application;
import javafx.geometry.HPos;
import javafx.geometry.Insets;
import javafx.scene.Group;
import javafx.scene.Scene;
import javafx.scene.control.Label;
import javafx.scene.layout.GridPane;
import javafx.scene.paint.Color;
import javafx.stage.Stage;

public class Main extends Application {

  public static void main(String[] args) {
    Application.launch(args);
  }
// create w w W .Y i  ib A I. c  O M
  @Override
  public void start(Stage primaryStage) {
    Group root = new Group();
    Scene scene = new Scene(root, 300, 130, Color.WHITE);

    GridPane gridpane = new GridPane();
    gridpane.setPadding(new Insets(5));
    gridpane.setHgap(10);
    gridpane.setVgap(10);

    Label label = new Label("Label");
    GridPane.setHalignment(label, HPos.CENTER);
    gridpane.add(label, 0, 0);

    root.getChildren().add(gridpane);
    primaryStage.setScene(scene);
    primaryStage.show();
  }
}
建立標籤
JavaFX API提供了Label類的三個建構函式來建立標籤。
//An empty label
Label label1 = new Label();

//A label with the text element
Label label2 = new Label("Name");

//A label with the text element and graphical icon
Image image = new Image(getClass().getResourceAsStream("labels.jpg"));
Label label3 = new Label("Name", new ImageView(image));
標籤內容
建立標籤後,我們可以使用Label類中的以下方法新增文字和圖形內容。
setText(String text)- 設定標籤的文字標題setGraphic(Node graphic)- 設定圖形圖示
setGraphicTextGap()方法設定文字和圖示之間的間距。setTextFill()方法設定標籤文字的顏色。以下程式碼建立文字標籤,向其新增圖示,並為文字設定填充顏色。
Label label1 = new Label("Name");
Image image = new Image(getClass().getResourceAsStream("icon.jpg"));
label1.setGraphic(new ImageView(image));
label1.setTextFill(Color.web("#FF76a3"));
以下程式碼顯示如何設定Label Text顏色。
import javafx.application.Application;
import javafx.scene.Group;
import javafx.scene.Scene;
import javafx.scene.control.Label;
import javafx.scene.layout.HBox;
import javafx.scene.paint.Color;
import javafx.stage.Stage;

public class Main extends Application {
  public static void main(String[] args) {
    launch(args);
  }
// by W  w  W. y iIb a I. c O M
  @Override
  public void start(Stage stage) {
    Scene scene = new Scene(new Group());
    stage.setTitle("Label Sample");
    stage.setWidth(400);
    stage.setHeight(180);

    HBox hbox = new HBox();

    Label label1 = new Label("Search");
    label1.setTextFill(Color.web("#0076a3"));

     hbox.setSpacing(10);
    hbox.getChildren().add((label1));
    ((Group) scene.getRoot()).getChildren().add(hbox);

    stage.setScene(scene);
    stage.show();
  }
}
setTextAlignment()方法可以在其布局區域內設定標籤內容的對齊方式。setContentDisplay()方法設定圖形相對於文字的位置。該方法接受以下ContentDisplay常數中的一個:LFFT,RIGHT,CENTER,TOP,BOTTOM。
標籤字型
如果未設定Label控制元件的字型,則使用預設字型大小進行渲染。要設定字型文字大小,請使用Label類中的setFont方法。
以下程式碼將label1文字的大小設定為30點畫素,將字型名稱設定為Arial。
label.setFont(new Font("Arial", 30));
將文字大小設定為32點畫素,將字型名稱設定為Cambria。
label.setFont(Font.font("Cambria", 32));
以下程式碼顯示如何設定標籤的字型。
import javafx.application.Application;
import javafx.scene.Group;
import javafx.scene.Scene;
import javafx.scene.control.Label;
import javafx.scene.layout.HBox;
import javafx.scene.text.Font;
import javafx.stage.Stage;

public class Main extends Application {
  public static void main(String[] args) {
    launch(args);
  }

  @Override
  public void start(Stage stage) {
    Scene scene = new Scene(new Group());
    stage.setWidth(400);
    stage.setHeight(180);

    HBox hbox = new HBox();// create  w W w .y  I I  bA  i.c OM

    Label label1 = new Label("Search");
    label1.setFont(new Font("Arial", 30));

    hbox.setSpacing(10);
    hbox.getChildren().add((label1));
    ((Group) scene.getRoot()).getChildren().add(hbox);

    stage.setScene(scene);
    stage.show();
  }
}
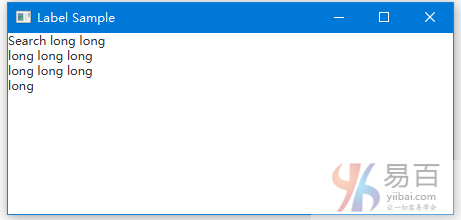
包裝文字
要包裝文字以將文字適合布局區域,請使用setWrapText方法並設定為true值。
Label label = new Label("A long long long long long text");
label.setWrapText(true);
以下程式碼顯示如何包裝Label。
import javafx.application.Application;
import javafx.scene.Group;
import javafx.scene.Scene;
import javafx.scene.control.Label;
import javafx.scene.layout.HBox;
import javafx.scene.text.TextAlignment;
import javafx.stage.Stage;

public class Main extends Application {
  public static void main(String[] args) {
    launch(args);
  }

  @Override
  public void start(Stage stage) {
    Scene scene = new Scene(new Group());
    stage.setTitle("Label Sample");
    stage.setWidth(400);
    stage.setHeight(180);

    HBox hbox = new HBox();

    Label label1 = new Label("Search long long long long long long long long long ");
    label1.setPrefWidth(100);
    label1.setWrapText(true);

    hbox.setSpacing(10);
    hbox.getChildren().add((label1));
    ((Group) scene.getRoot()).getChildren().add(hbox);

    stage.setScene(scene);
    stage.show();
  }
}
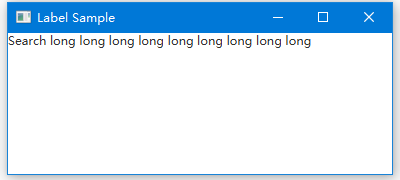
當不可能渲染文字字串時,我們可以使用setTextOverrun方法控制如何從標籤渲染文字。setTextOverrun方法接受一個OverrunStyle值。
上面的程式碼生成以下結果。
應用效果
我們可以對Label控制元件應用視覺效果或轉換。以下程式碼將標籤旋轉270度,並將其位置垂直平移。
Label label = new Label("Name");
label.setRotate(270);
label.setTranslateY(50);
以下程式碼顯示如何使用旋轉建立垂直標籤。
import javafx.application.Application;
import javafx.scene.Group;
import javafx.scene.Scene;
import javafx.scene.control.Label;
import javafx.scene.layout.HBox;
import javafx.scene.text.TextAlignment;
import javafx.stage.Stage;

public class Main extends Application {
  public static void main(String[] args) {
    launch(args);
  }

  @Override
  public void start(Stage stage) {
    Scene scene = new Scene(new Group());
    stage.setTitle("Label Sample");
    stage.setWidth(400);
    stage.setHeight(180);

    HBox hbox = new HBox();

    Label label1 = new Label("Search");
    label1.setRotate(270);

    hbox.setSpacing(10);
    hbox.getChildren().add((label1));
    ((Group) scene.getRoot()).getChildren().add(hbox);

    stage.setScene(scene);
    stage.show();
  }
}
以下程式碼顯示了如何使用setTranslateY來移動標籤。
import javafx.application.Application;
import javafx.scene.Group;
import javafx.scene.Scene;
import javafx.scene.control.Label;
import javafx.scene.layout.HBox;
import javafx.scene.text.TextAlignment;
import javafx.stage.Stage;

public class Main extends Application {
  public static void main(String[] args) {
    launch(args);
  }

  @Override
  public void start(Stage stage) {
    Scene scene = new Scene(new Group());
    stage.setTitle("Label Sample");
    stage.setWidth(400);
    stage.setHeight(180);

    HBox hbox = new HBox();

    Label label1 = new Label("Search");
    label1.setTranslateY(50);

    hbox.setSpacing(10);
    hbox.getChildren().add((label1));
    ((Group) scene.getRoot()).getChildren().add(hbox);

    stage.setScene(scene);
    stage.show();
  }
}
當使用者將滑鼠游標懸停在標籤上時,可以縮放標籤。當在標籤上觸發MOUSE_ENTERED事件時,以下程式碼將縮放效果應用於標籤。
以下程式碼顯示如何縮放標籤。
import javafx.application.Application;
import javafx.event.EventHandler;
import javafx.scene.Group;
import javafx.scene.Scene;
import javafx.scene.control.Label;
import javafx.scene.input.MouseEvent;
import javafx.scene.layout.HBox;
import javafx.stage.Stage;

public class Main extends Application {
  public static void main(String[] args) {
    launch(args);
  }

  @Override
  public void start(Stage stage) {
    Scene scene = new Scene(new Group());
    stage.setTitle("Label Sample");
    stage.setWidth(400);
    stage.setHeight(180);

    HBox hbox = new HBox();

    final Label label1 = new Label("Search long long long long long long long long long ");
    label1.setOnMouseEntered(new EventHandler<MouseEvent>() {
      @Override
      public void handle(MouseEvent e) {
        label1.setScaleX(1.5);
        label1.setScaleY(1.5);
      }
    });

    label1.setOnMouseExited(new EventHandler<MouseEvent>() {
      @Override
      public void handle(MouseEvent e) {
        label1.setScaleX(1);
        label1.setScaleY(1);
      }
    });

    hbox.setSpacing(10);
    hbox.getChildren().add((label1));
    ((Group) scene.getRoot()).getChildren().add(hbox);

    stage.setScene(scene);
    stage.show();
  }
}
上面的程式碼生成以下結果。

標籤滑鼠事件
以下程式碼顯示了如何為標籤新增滑鼠進出事件處理程式。
import javafx.application.Application;
import javafx.event.EventHandler;
import javafx.scene.Group;
import javafx.scene.Scene;
import javafx.scene.control.Label;
import javafx.scene.input.MouseEvent;
import javafx.scene.layout.HBox;
import javafx.stage.Stage;
// @  W w W . yI Ib  AI.C O m
public class Main extends Application {
  public static void main(String[] args) {
    launch(args);
  }

  @Override
  public void start(Stage stage) {
    Scene scene = new Scene(new Group());
    stage.setTitle("Label Sample");
    stage.setWidth(400);
    stage.setHeight(180);

    HBox hbox = new HBox();

    final Label label1 = new Label("Search long long long long long long long long long ");
    label1.setOnMouseEntered(new EventHandler<MouseEvent>() {
      @Override
      public void handle(MouseEvent e) {
        label1.setScaleX(1.5);
        label1.setScaleY(1.5);
      }
    });

    label1.setOnMouseExited(new EventHandler<MouseEvent>() {
      @Override
      public void handle(MouseEvent e) {
        label1.setScaleX(1);
        label1.setScaleY(1);
      }
    });

    hbox.setSpacing(10);
    hbox.getChildren().add((label1));
    ((Group) scene.getRoot()).getChildren().add(hbox);

    stage.setScene(scene);
    stage.show();
  }
}
上面的程式碼生成以下結果。
更新標籤
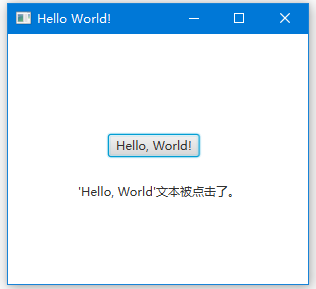
以下程式碼顯示了如何在Button單擊事件中更改Label文字。
import javafx.application.Application;
import javafx.event.ActionEvent;
import javafx.event.EventHandler;
import javafx.scene.Group;
import javafx.scene.Scene;
import javafx.scene.control.Button;
import javafx.scene.control.Label;
import javafx.stage.Stage;

public class Main extends Application {
    public static void main(String[] args) {
        Application.launch(args);
    }

    @Override
    public void start(Stage primaryStage) {

        Button btn = new Button();
        final Label lbl = new Label();

        primaryStage.setTitle("Hello World!");

        lbl.setLayoutX(70);
        lbl.setLayoutY(150);

        btn.setLayoutX(100);
        btn.setLayoutY(100);
        btn.setText("Hello, World!");

        btn.setOnAction(new EventHandler<ActionEvent>() {

            @Override
            public void handle(ActionEvent event) {
                lbl.setText("'Hello, World'文字被點選了。");
            }
        });

        Group root = new Group();

        root.getChildren().add(btn);
        root.getChildren().add(lbl);
        primaryStage.setScene(new Scene(root, 300, 250));
        primaryStage.show();
    }
}
上面的程式碼生成以下結果。